Windows环境下使用AppServ快速搭建网页服务器
版权申诉
32 浏览量
更新于2024-08-10
收藏 331KB DOCX 举报
"该文档详细介绍了在Windows环境下使用AppServ套件安装并配置网页服务器的过程,包括下载AppServ软件、执行安装、设置安装目录、选择安装组件、配置服务器信息、设置MySQL root用户密码以及修改php.ini配置文件。"
在Windows操作系统中搭建网页服务器通常需要集成环境,AppServ便是这样一款集成了Apache、PHP和MySQL的工具,使得在个人电脑上快速建立Web服务变得简单。以下是AppServ套件安装的具体步骤:
1. 首先,访问AppServ官方网站(http://www.appservnetwork.com/)下载最新版本的AppServ,例如2.5.x版本的安装程序appserv-win32-.exe。
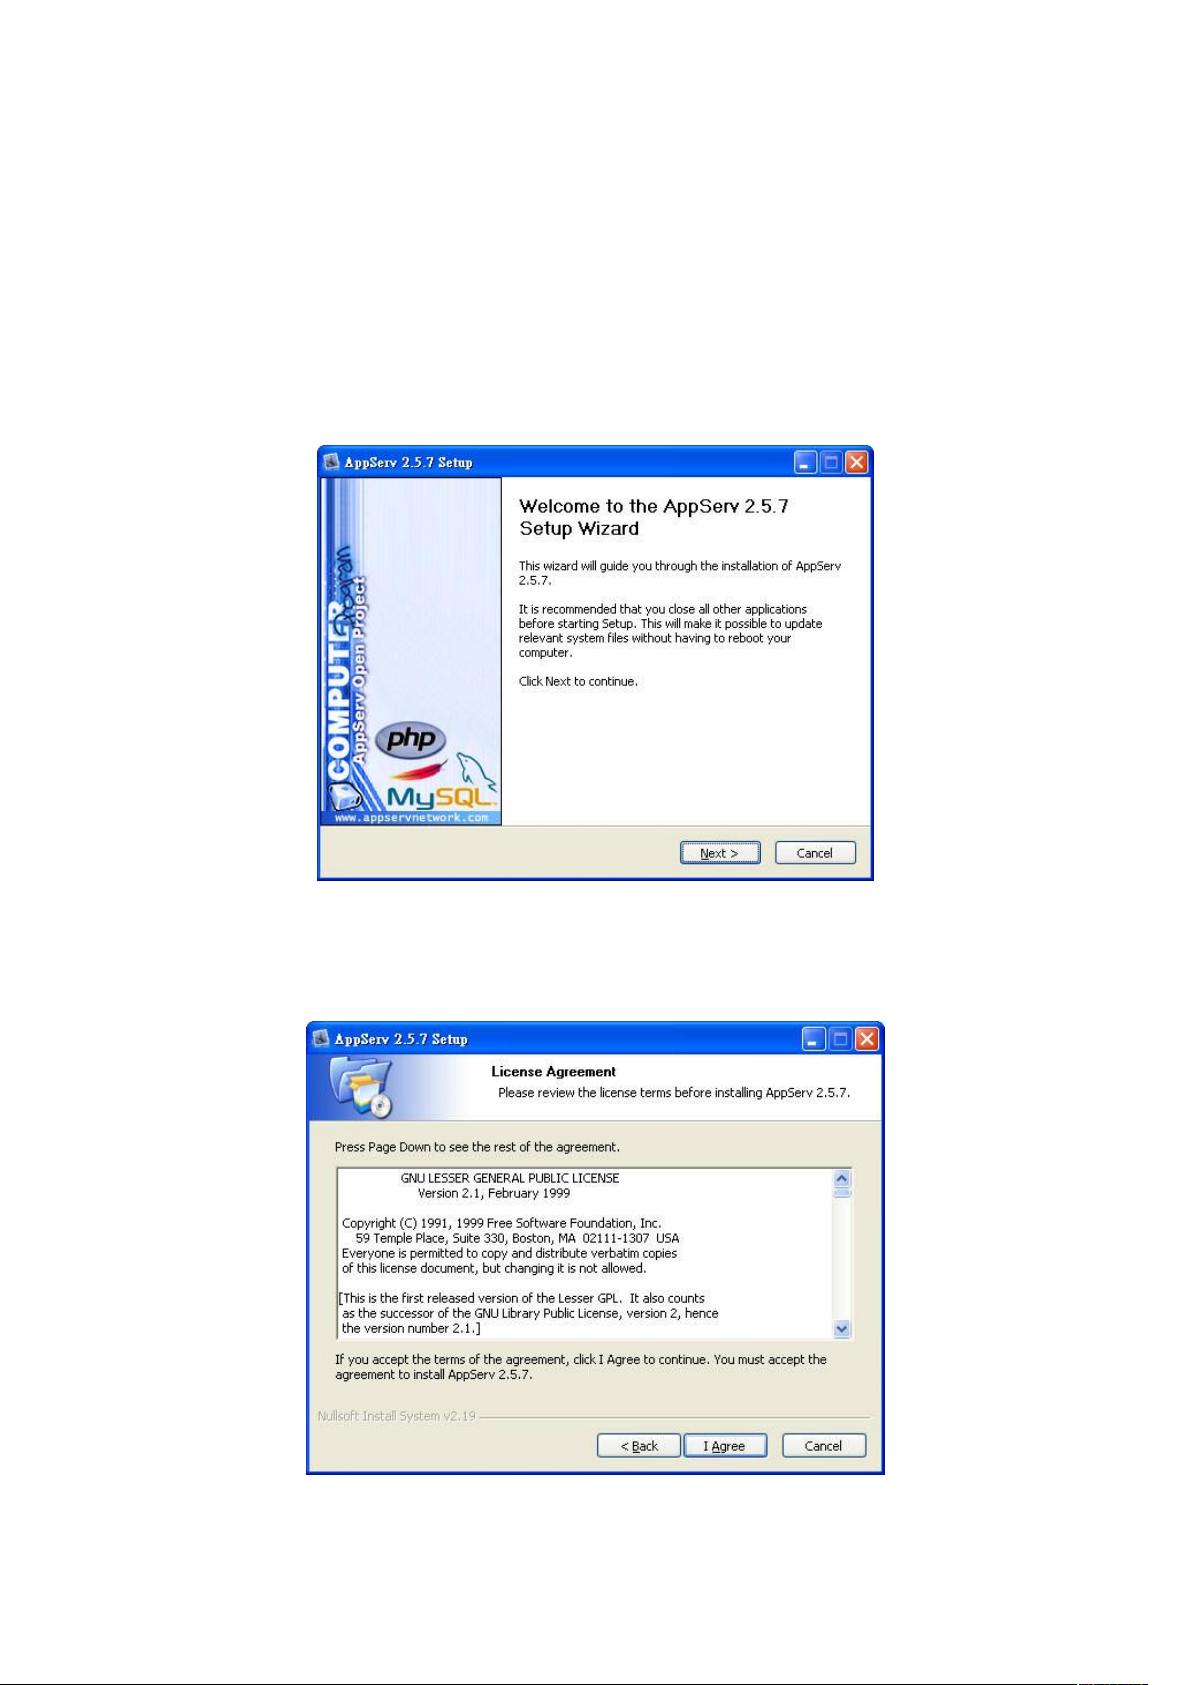
2. 下载完成后,双击运行安装文件,启动安装向导。在图1所示的界面中,点击“Next”继续。
3. 在图2中,阅读并接受安装协议,然后点击“I Agree”进行下一步。
4. 图3中,你可以选择安装路径,默认为"C:\AppServ",如需更改,可通过“Browse..”选择其他位置。确认后,点击“Next”。
5. 如图4所示,保持所有组件选中状态,包括Apache、PHP、MySQL等,然后点击“Next”。
6. 图5中,由于多数情况下个人电脑没有域名,因此在ServerName输入框中填写“localhost”或本机IP地址。Administrator’s Email Address填写可以接收邮件的邮箱地址。HTTPPort通常设置为80(标准端口),不建议随意更改。设置完毕后点击“Next”。
7. 图6为MySQL配置环节,你需要为root用户设置密码(例如:123456)。对于Character Sets and Collations,若需要支持繁体中文,选择“Big5 Traditional Chinese”,其余选项保持默认,然后点击“Install”开始安装。
8. 安装完成后,为了进一步配置服务器,你需要编辑php.ini文件。通过开始菜单 -> 所有程序 -> AppServ -> Configuration Server -> PHP Edit the "php.ini",打开php.ini进行必要的配置修改,例如开启某些扩展或调整内存限制。
完成以上步骤后,你的Windows环境下网页服务器就已经搭建完成。你可以通过在浏览器中输入“http://localhost”来验证服务器是否正常运行。同时,AppServ还提供了Web管理工具,方便你管理和配置MySQL数据库,以及对Apache和PHP的设置进行调整。
这个过程对于初学者或者需要在本地开发网站的开发者来说非常实用,因为它提供了一站式的解决方案,无需手动配置各个组件,大大简化了操作流程。不过,需要注意的是,出于安全考虑,实际生产环境中可能需要更复杂的配置和额外的安全措施。
在 windows 環境下架設網頁伺服器(AppServ 套件安裝)
由於 AppServ 已將 PHP、MySQL、Apache 整合成獨立的安裝檔,只需要進行一
次安裝,就可以把 3 個部份都安裝。安裝步驟如下:
1. 可於 AppServ 的官方網站(http://www.appservnetwork.com/)下載 AppServ2.5.x
版。
2. 當下載完成後,請按 appserv-win32-2.5.7.exe 檔案上連按兩下,執行該安裝檔
案。當出現圖 1 所示進入安裝程式。請點選「Next」繼續安裝步驟。
圖 1
3. 如圖 2 所示同意安裝的的說明規範,按下「I Agree」繼續安裝。
圖 2
下载后可阅读完整内容,剩余7页未读,立即下载
106 浏览量
2022-07-07 上传
2020-12-23 上传
143 浏览量
153 浏览量

cailibin
- 粉丝: 4
 我的内容管理
展开
我的内容管理
展开


最新资源
- 64位WIN10下通过文件操作驱动USB警示灯技术分享
- Java图片上传功能实现教程
- 安装gcc 4.4.7-4.el6.x86_64软件包的方法与步骤
- 基于ASP.Net MVC和Ajax技术的高校管理系统
- Zachery Zbinden的学术网站:探索JavaScript领域
- 深入分析GMT0104-2021云服务器密码机技术规范
- Android 2.1版摄像机功能使用指南
- 注入辅助工具内部版:深度应用与优化
- 探索AGV自动引导小车在Solidworks中的应用
- Android文件存储实现日程安排应用解析
- React开发入门与项目脚本使用指南
- ANN7.8稳定版发布:性能提升,安全优化
- mina框架源码深度解析及安卓交互应用
- MATLAB源码实现GMDH自组织网络模型预测时间序列
- Python101研讨会代码挑战解析
- CSS3动画实现3D骰子滚动效果教程
