Hudson持续集成服务器安装配置与使用指南
版权申诉
94 浏览量
更新于2024-08-03
收藏 1.67MB DOCX 举报
"这篇文档详细介绍了如何在 CentOS6.6 环境中安装和配置 Hudson 持续集成服务器,以及与之相关的 JDK、Maven 和 Tomcat 的设置。"
正文:
持续集成是软件开发过程中的一个重要环节,它允许团队频繁地合并代码并立即检查构建和测试的结果,从而尽早发现并修复问题。Hudson 是一个开源的持续集成服务器,它支持多种构建工具和插件,便于自动化构建、测试和部署。
在安装配置Hudson之前,首先需要安装JDK。文档中提到应使用JDK7,并配置相应的环境变量`JAVA_HOME`。配置完成后,可以确保Hudson能够运行在Java环境中。
接着,为了进行项目构建与管理,需要安装Maven。这里推荐使用Maven 3.0.5版本,因为高版本可能与Hudson存在兼容性问题。安装完成后,需要配置Maven的环境变量`MAVEN_HOME`,并将`settings.xml`文件进行相应配置,以指定本地仓库路径和其他个性化设置。
在安装Hudson之前,需要为其创建一个特定的Home目录,即`HUDSON_HOME`,这通常是在`/root`目录下创建一个名为`HudsonHome`的文件夹,并将该路径添加到系统环境变量中。这样,Hudson将在此目录中存储其配置文件和工作目录。
接下来,文档提到了使用Tomcat7作为Hudson的Web容器。下载最新版本的Tomcat后,解压缩并进行安装。Tomcat将承载Hudson的Web界面,使得用户可以通过浏览器访问和管理Hudson服务器。
在配置Tomcat时,需要将Hudson的war包放入Tomcat的webapps目录下,启动Tomcat服务后,Hudson应该可以通过浏览器访问。默认情况下,访问地址通常是`http://IP_ADDRESS:PORT/hudson`,其中IP_ADDRESS是服务器的IP,PORT是Tomcat的默认端口8080。
安装完成后,Hudson需要进行一些基本的设置,例如创建管理员账户,配置构建触发器(如源码管理工具如SVN的钩子),以及安装必要的插件以支持项目构建和测试。这些插件可能包括SCM集成(如Git或SVN)、构建触发器、报告生成器(如Junit测试报告)和质量分析工具(如SonarQube)等。
持续集成的关键在于自动化,因此,一旦配置完成,Hudson应定期检查源代码仓库的变更,自动触发构建和测试。如果构建失败,Hudson会立即通知团队,以便快速定位和解决问题。通过这种方式,持续集成有助于保持代码质量和项目的稳定性,提高开发效率。
Hudson作为一个强大的持续集成服务器,通过与JDK、Maven、Tomcat等工具的配合,为企业提供了一套完整的持续集成解决方案。正确安装和配置Hudson是实现这一目标的基础,而后续的优化和插件管理则是提升持续集成效能的关键。
设置 hudson-tomcat 的内存
# vi /root/hudson-tomcat/bin/catalina.sh
#!/bin/sh 下面增加:
JAVA_OPTS='-Xms512m -Xmx2048m'
6、 下载最新版的 Hudson(这里是 3.2.2 版)包:
# wget http://mirror.bit.edu.cn/eclipse/hudson/war/hudson-3.2.2.war
将 war 包拷贝到 hudson-tomcat/weapps 目录,并重命名为 hudson.war
# cp /root/hudson-3.2.2.war /root/hudson-tomcat/webapps/hudson.war
7、 防火墙开启 8080 端口,用 root 用户修改/etc/sysconfig/iptables,
# vi /etc/sysconfig/iptables
增加:
## hudson-tomcat port:8080
-A INPUT -m state --state NEW -m tcp -p tcp --dport 8080 -j ACCEPT
重启防火墙:
# service iptables restart
8、 设置 hudson-tomcat 开机启动:
在虚拟主机中编辑/etc/rc.local 文件,
# vi /etc/rc.local
加入:
/root/hudson-tomcat/bin/startup.sh
9、 启动 hudson-tomcat
# /root/hudson-tomcat/bin/startup.sh
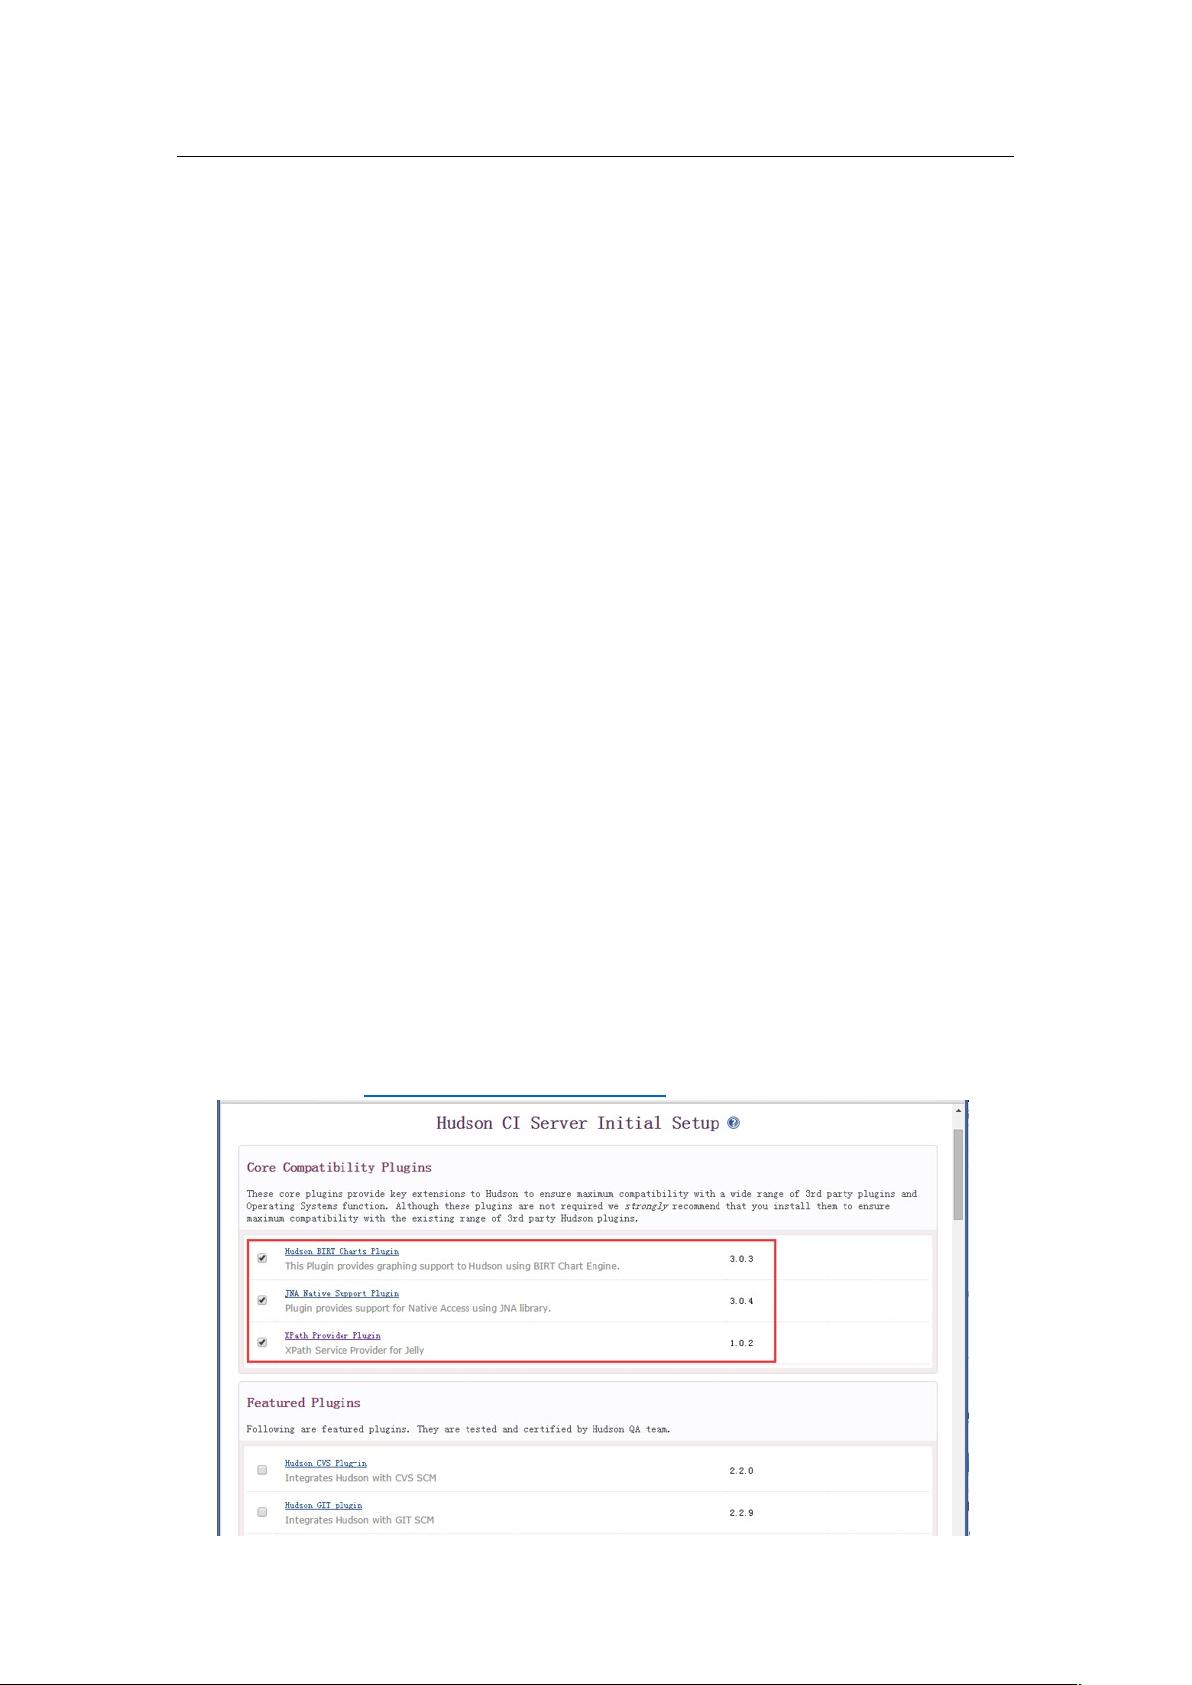
10、 配置 Hudson:
(1) 浏览器输入:http://192.168.4.221:8080/hudson/
剩余10页未读,继续阅读
2024-01-10 上传
2023-07-14 上传
2023-07-14 上传
2023-07-14 上传
2023-07-27 上传
2023-07-15 上传

小小哭包
- 粉丝: 1934
- 资源: 4081
 我的内容管理
展开
我的内容管理
展开


最新资源
- 开源通讯录备份系统项目,易于复刻与扩展
- 探索NX二次开发:UF_DRF_ask_id_symbol_geometry函数详解
- Vuex使用教程:详细资料包解析与实践
- 汉印A300蓝牙打印机安卓App开发教程与资源
- kkFileView 4.4.0-beta版:Windows下的解压缩文件预览器
- ChatGPT对战Bard:一场AI的深度测评与比较
- 稳定版MySQL连接Java的驱动包MySQL Connector/J 5.1.38发布
- Zabbix监控系统离线安装包下载指南
- JavaScript Promise代码解析与应用
- 基于JAVA和SQL的离散数学题库管理系统开发与应用
- 竞赛项目申报系统:SpringBoot与Vue.js结合毕业设计
- JAVA+SQL打造离散数学题库管理系统:源代码与文档全览
- C#代码实现装箱与转换的详细解析
- 利用ChatGPT深入了解行业的快速方法论
- C语言链表操作实战解析与代码示例
- 大学生选修选课系统设计与实现:源码及数据库架构
