iOS开发进阶:探索iOS 6 SDK实战
需积分: 9 8 浏览量
更新于2024-07-23
收藏 17.2MB PDF 举报
"Beginning iOS 6 Development Exploring the iOS SDK进阶篇" 是一本针对iOS开发者的中高级教程,旨在帮助读者深入理解并熟练运用iOS 6 SDK进行应用开发。这本书是《Beginning iOS 6 Development Exploring the iOS SDK》的后续,提供了更多实用的例子和进阶内容。
本书涵盖了一系列关键的iOS开发主题,包括:
1. Core Data: 介绍了Core Data框架,用于应用程序的数据管理,讲解了它的作用、为什么使用以及如何使用。Core Data不仅是一个数据库系统,还提供了一整套数据管理工具,包括模型、持久化和对象关系映射。
2. 数据操作: 如何添加、显示和删除数据,这是任何应用程序的基本功能。在第三章中,读者将学习如何高效地处理这些操作。
3. 详情视图: 第四章深入探讨了详情视图的开发,这是展示单一数据项的关键界面,通常与列表视图配合使用。
4. 数据迁移和版本控制: 当应用更新或数据结构发生变化时,第五章详细阐述了如何管理和迁移数据,以及如何实现版本控制,确保数据的一致性和兼容性。
5. 自定义Managed Objects: 第六章讲解如何根据应用需求定制Core Data的实体对象,增强其功能。
6. 关系、检索属性和表达式: 在第七章中,读者将学习如何处理对象之间的关系,利用检索属性提高查询效率,以及使用表达式来动态计算数据。
7. iCloud集成: 第八章涉及与iCloud的集成,使应用能够跨设备同步数据。
8. 蓝牙GameKit的对等连接: 第九章介绍了通过GameKit框架实现在设备之间使用蓝牙进行对等通信的方法。
9. MapKit: 第十章讲解如何利用MapKit框架创建地图相关功能,如定位、标记和路线规划。
10. 消息传递:第十一章涵盖了邮件、短信和社交媒体的集成,让应用能够发送和接收信息。
11. 媒体库访问和播放:第十二章介绍了如何访问用户的媒体库(如音乐和视频),并实现媒体内容的播放。
12. iOS安全:第十三章深入讨论了iOS平台的安全特性,包括如何保护用户数据和防止恶意攻击。
13. 保持界面响应性:第十四章探讨了如何优化代码,确保应用程序的用户界面在处理复杂任务时仍能保持流畅和快速响应。
14. 其他章节:书中的其他章节可能还包括更多主题,如动画、网络编程、性能优化等,帮助开发者提升应用的整体质量和用户体验。
通过这本书的学习,读者可以掌握iOS应用开发的高级技巧,提高自己的专业技能,为构建更复杂、功能更全面的应用奠定坚实基础。
12 CHAPTER 2: Core Data: What, Why, and How
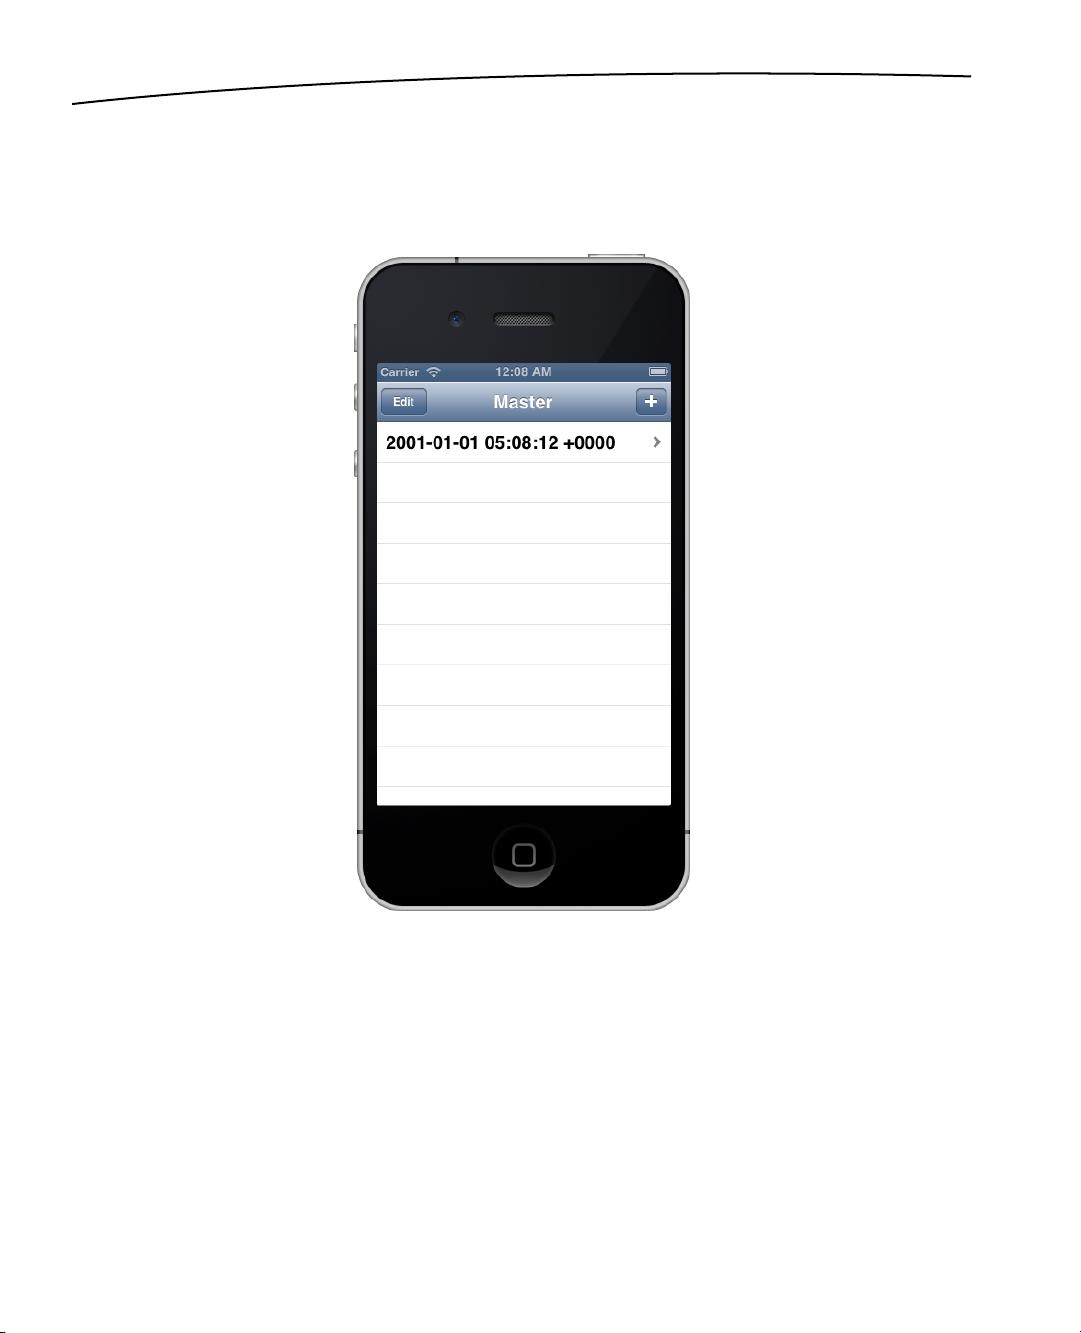
Build and run the application. Either press the Run button on the Toolbar, or Product ➤ Run. The
simulator should appear. Press the Add (+) button in the upper right. A new row will insert into the
table that shows the exact date and time the Add button was pressed (Figure 2-6). You can also use
the Edit button to delete rows. Exciting, huh?
Figure 2-6. CoreDataApp in action
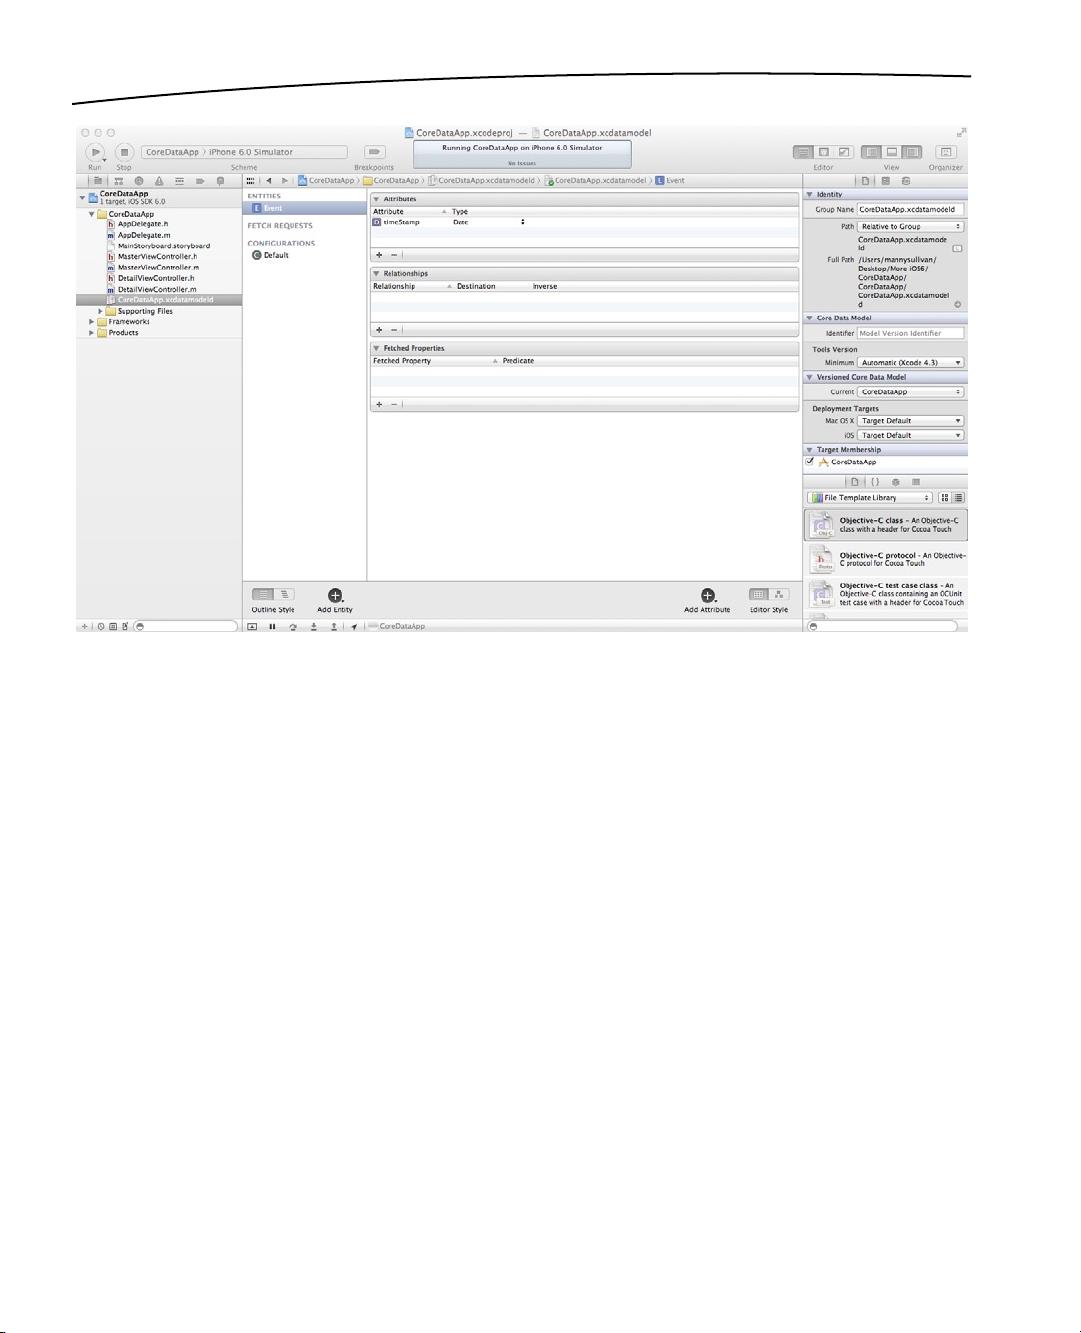
Under the hood of this simple application, a lot is happening. Think about it: without adding a
single class, or any code to persist data to a file or interact with a database, pressing the Add
button created an object, populated it with data, and saved it to a SQLite database created for you
automatically. There’s plenty of free functionality here.
Now that you’ve seen an application in action, let’s take a look at what’s going on behind the scenes.
Core Data Concepts and Terminology
Like most complex technologies, Core Data has its own terminology that can be a bit confusing to
newcomers. Let’s break down the mystery and get your arms around Core Data’s nomenclature.
www.it-ebooks.info


剩余541页未读,继续阅读
2013-07-15 上传
147 浏览量
111 浏览量
118 浏览量
110 浏览量
120 浏览量
105 浏览量
2012-04-19 上传
102 浏览量

joosonmao
- 粉丝: 46
 我的内容管理
展开
我的内容管理
展开


最新资源
- Oracle9i RMAN备份与恢复技术详解
- STATSPACK深度解析:Oracle函数关键指标与应用
- Oracle SQL语法详解与应用
- Richard Hightower的《Jakarta Struts Live》深度解析指南
- WAVECOM AT指令集详解
- JSTL in Action:探索强大的功能与全面介绍
- Eclipse集成 Axis 开发Web服务教程
- MATLAB常用函数详解及应用
- Spring框架开发者指南:V0.6预览版
- HTML速查手册:关键标签与文件结构解析
- HTML语法速成:关键元素与属性解析
- C++编程规范与最佳实践
- C++实现的图书管理系统源码解析
- C#与XQuery中文资源指南
- Linux内核0.11完全注释解析
- 爱鸥电子标签拣货系统L-PICK:创新物流解决方案
