没有合适的资源?快使用搜索试试~ 我知道了~
首页mule esb 3 tutorial.pdf
This book provides a tutorial on how to develop Mule ESB 3 applications. It covers the essentials, such as using the Mule IDE, writing a configuration file, routing messages, and testing your application. It also covers advanced topics such as developing Mule applications using Maven and using advanced message routing.
资源详情
资源评论
资源推荐
Mule ESB 3 Tutorial
1. Home . . . . . . . . . . . . . . . . . . . . . . . . . . . . . . . . . . . . . . . . . . . . . . . . . . . . . . . . . . . . . . . . . . . . . . . . . . . . . . . . . . . . . . . . . . . . . . . . . . . . . 2
1.1 Creating an Application Using the Mule IDE . . . . . . . . . . . . . . . . . . . . . . . . . . . . . . . . . . . . . . . . . . . . . . . . . . . . . . . . . . . . . . . . . . . 2
1.2 Creating an Application Using Maven . . . . . . . . . . . . . . . . . . . . . . . . . . . . . . . . . . . . . . . . . . . . . . . . . . . . . . . . . . . . . . . . . . . . . . . . 5
1.3 Creating a Configuration File . . . . . . . . . . . . . . . . . . . . . . . . . . . . . . . . . . . . . . . . . . . . . . . . . . . . . . . . . . . . . . . . . . . . . . . . . . . . . . 6
1.4 Testing Your Mule Application . . . . . . . . . . . . . . . . . . . . . . . . . . . . . . . . . . . . . . . . . . . . . . . . . . . . . . . . . . . . . . . . . . . . . . . . . . . . . 11
1.5 Introducing Message Routing . . . . . . . . . . . . . . . . . . . . . . . . . . . . . . . . . . . . . . . . . . . . . . . . . . . . . . . . . . . . . . . . . . . . . . . . . . . . . . 13
1.6 Understanding Advanced Message Routing . . . . . . . . . . . . . . . . . . . . . . . . . . . . . . . . . . . . . . . . . . . . . . . . . . . . . . . . . . . . . . . . . . . 16
1.
Home
Mule ESB 3 Tutorial
This book provides a tutorial on how to develop Mule ESB 3 applications. It covers the essentials, such as using the Mule IDE, writing a
configuration file, routing messages, and testing your application. It also covers advanced topics such as developing Mule applications using
Maven and using advanced message routing.
Using the Mule IDE
If you're curious about how to use the Mule IDE, this topic will help you get started with this tool.
Working with Maven
Maven can help you develop Mule applications, so if you are ready to plunge into this new world, this topic is a must-read.
Creating Configuration Files
Creating configuration files is at the heart of Mule development. Read this topic to learn the basics of how to do this.
How to Test Your Application
Testing is part and parcel of application development. Learn the Mule approach to testing here.
Message Routing
If you are ready to start moving data around your Mule application, this topic will help you understand the basics.
Advanced Message Routing
Routing messages can get complicated. Read this topic to learn some of the deeper, lesser-known methods of message routing with Mule.
Creating an Application Using the Mule IDE
[ ] [ ] [ ] [ ] [ Create the Application Run the Application Create a Configuration File for the New Application Use Eclipse Tools for Adding Elements
]Package and Deploy the JAR and Configuration File
The simplest way to create an application in Mule ESB is to use the with . The Mule IDE allows you to quickly start a new project,Mule IDE Eclipse
which you can base on one of the existing examples, or just create a new configuration file by selecting the transports you want to use. This
lesson walks you through creating a new application called myHelloApp, which will be based on the , running the application,Hello World Example
and creating a new configuration file for the project.
Mule IDE 2.1 is required to support Mule 3 but Mule 3's new Application Model and Hot Deployment capabilities are not yet
natively supported by the Mule IDE. If you would like to use the Mule IDE with these features, please see the documentation on
.Hot Deployment using the Mule IDE
Create the Application
1.
2.
3.
4.
1.
2.
1.
2.
1.
2.
3.
4.
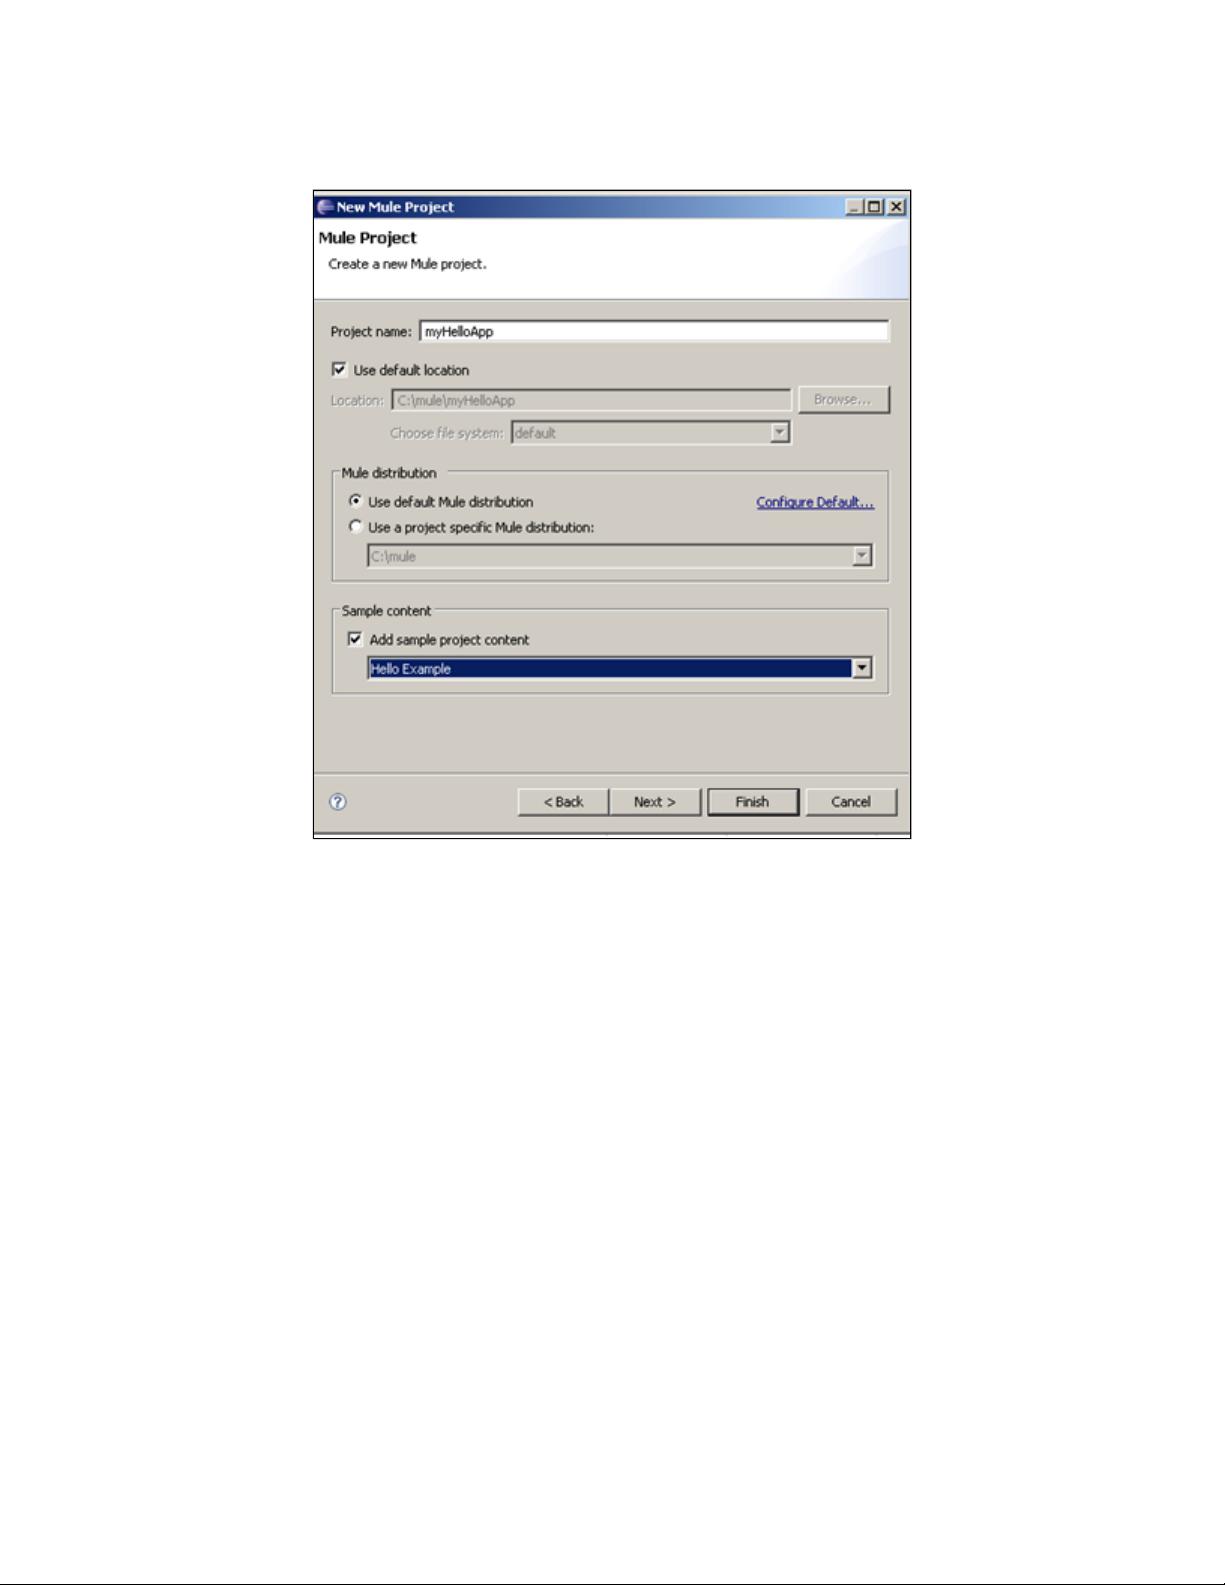
In Eclipse Workbench, choose , expand the Mule folder and select , and then click .File > New > Project Mule Project Next
Enter the name , ensuring that there is no space in the project name.myHelloApp
Ensure that Mule 3 is your default Mule distribution or selected as the project specific one.
Click and select the Hello example.Add sample project content
Click , and then click the Libraries tab and verify that the Java 5 or later library is installed and available on the build path.Next
Click to have the Mule IDE generate your project.Finish
You will now see the myHelloApp project in the navigation pane on the left. You can expand its folders to see the source code, configuration files,
and more. Let's run the application to see it in action.
Run the Application
In the Package Explorer, expand the directory, and right-click the configuration file.src/main/app mule-config.xml
Choose .Run As > Mule Server
A new run configuration is created automatically and the server is started. The application runs, initializing Mule. After the Mule splash screen
appears in the console window, open a web browser with this url:
http://localhost:8888?name=Ross
The server should respond with "Hello Ross, how are you?" If you get any other response, check the log in the console window for any errors.
Create a Configuration File for the New Application
Now let's create a new configuration file for the myHelloApp. Instead of using the HTTP and Servlet transports and a browser to interact with the
application, let's change the configuration to use the System I/O (also called ) and transports. For simplicity, we'll call the newSTDIO VM
configuration file .my-hello-config.xml
Choose , expand the Mule folder and select , and then click .File > New > Other Mule Configuration Next
Click , expand the myHelloApp project, select the directory, and then click .Browse... src/main/app OK
Change the default name from to . You can use any name you like, as long as it is uniquemule-config.xml my-hello-config.xml
within the project and has an extension. If you use the name of an existing file, it will overwrite that file..xml
Select the System I/O (also called STDIO) and VM transports, leave Spring Config selected, and then click .Finish
剩余19页未读,继续阅读
longdajiangjun
- 粉丝: 1
- 资源: 5
上传资源 快速赚钱
- 我的内容管理 收起
- 我的资源 快来上传第一个资源
- 我的收益 登录查看自己的收益
- 我的积分 登录查看自己的积分
- 我的C币 登录后查看C币余额
- 我的收藏
- 我的下载
- 下载帮助
会员权益专享
最新资源
- c++校园超市商品信息管理系统课程设计说明书(含源代码) (2).pdf
- 建筑供配电系统相关课件.pptx
- 企业管理规章制度及管理模式.doc
- vb打开摄像头.doc
- 云计算-可信计算中认证协议改进方案.pdf
- [详细完整版]单片机编程4.ppt
- c语言常用算法.pdf
- c++经典程序代码大全.pdf
- 单片机数字时钟资料.doc
- 11项目管理前沿1.0.pptx
- 基于ssm的“魅力”繁峙宣传网站的设计与实现论文.doc
- 智慧交通综合解决方案.pptx
- 建筑防潮设计-PowerPointPresentati.pptx
- SPC统计过程控制程序.pptx
- SPC统计方法基础知识.pptx
- MW全能培训汽轮机调节保安系统PPT教学课件.pptx
资源上传下载、课程学习等过程中有任何疑问或建议,欢迎提出宝贵意见哦~我们会及时处理!
点击此处反馈
安全验证
文档复制为VIP权益,开通VIP直接复制
信息提交成功
评论0