
Qt自定义控件实现简易仪表盘自定义控件实现简易仪表盘
本文实例为大家分享了Qt自定义控件实现简易仪表盘的具体代码,供大家参考,具体内容如下
Qt自定义控件12:简易仪表盘(根据liudianwu大神的界面自己写的代码,建议去学习刘大神,会受益良多的)
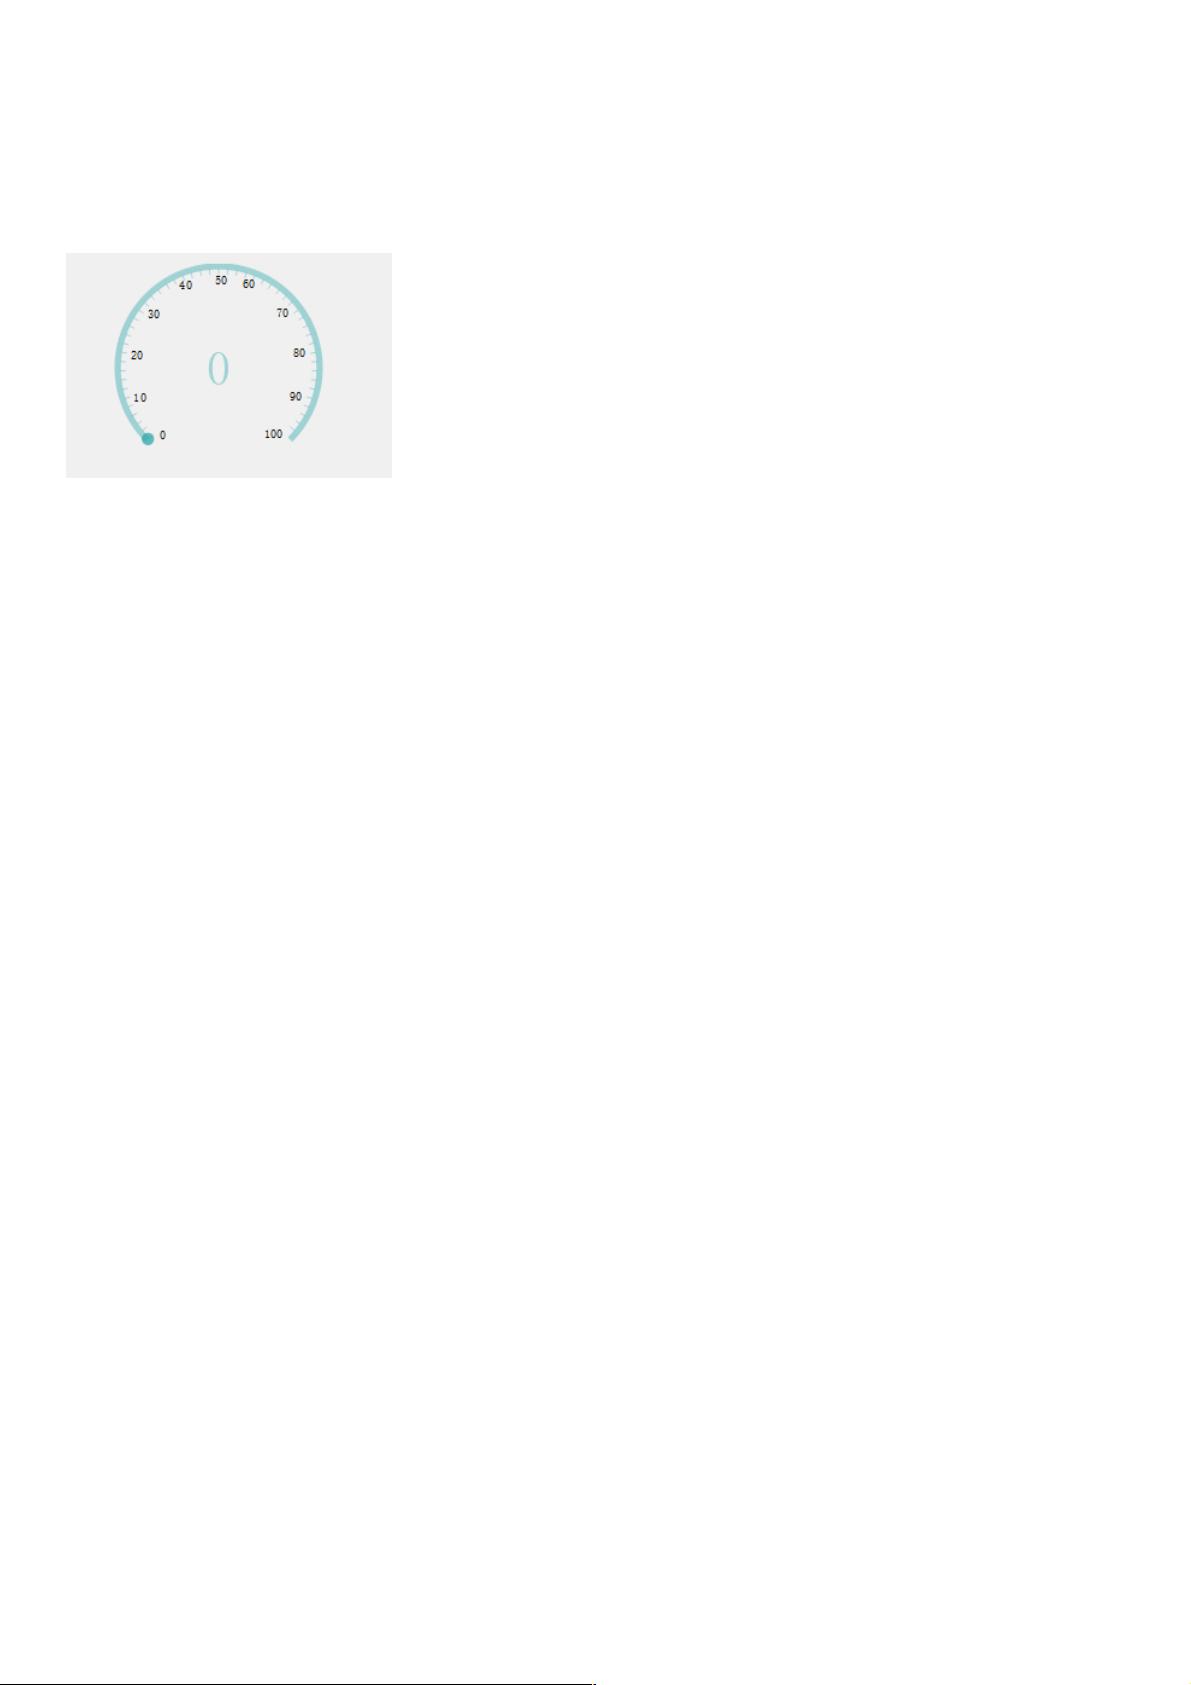
先看效果图:
思路:画270度的圆弧,圆弧根据占比分为两种颜色,根据占比在圆弧上画出一个圆球作为标志,然后就是刻度线和刻度值。
刻度线是根据坐标系旋转画出,刻度值是根据角度求出x,y坐标值构造出一个矩形画出刻度值(不要用坐标系旋转画刻度值,
那样刻度值的角度也会旋转,写出的字不是正的,效果不好)。最后就是在中心画value。
关键代码:
void CMPassrate5::paintEvent(QPaintEvent *event){
int width = this->width();
int height = this->height();
int side = qMin(width, height);
QPainter painter(this);
painter.setRenderHints(QPainter::Antialiasing | QPainter::TextAntialiasing);
painter.translate(width / 2, height / 2);
painter.scale(side / 200.0, side / 200.0);
drawE(&painter);
drawEPoint(&painter);
drawLine(&painter);
drawEText(&painter);
drawValue(&painter);
}
void CMPassrate5::drawE(QPainter* painter){
QRect rect(-radius,-radius,2*radius,2*radius);
painter->save();
painter->setPen(Qt::NoPen);
QPainterPath path;
QPainterPath subPath;
QPainterPath outPath;
QPainterPath outPubPath;
outPath.arcTo(rect,-45,outRange);
outPubPath.addEllipse(rect.adjusted(side,side,-side,-side));
outPath -= outPubPath;
color.setAlpha(100);
painter->setBrush(color);
painter->drawPath(outPath);
path.arcTo(rect,-45+outRange,range);
subPath.addEllipse(rect.adjusted(4,4,-4,-4));
path -= subPath;
color.setAlpha(180);
painter->setBrush(color);
painter->drawPath(path);
painter->restore();
}
void CMPassrate5::drawEPoint(QPainter* painter){

weixin_38590685
- 粉丝: 3
- 资源: 920
 我的内容管理
收起
我的内容管理
收起
- 我的资源
快来上传第一个资源
 我的收益 登录查看自己的收益
 我的积分
登录查看自己的积分
我的积分
登录查看自己的积分
 我的C币
登录后查看C币余额
我的C币
登录后查看C币余额
 我的收藏
我的收藏  我的下载
我的下载  下载帮助
下载帮助

会员权益专享


最新资源
- zigbee-cluster-library-specification
- JSBSim Reference Manual
- c++校园超市商品信息管理系统课程设计说明书(含源代码) (2).pdf
- 建筑供配电系统相关课件.pptx
- 企业管理规章制度及管理模式.doc
- vb打开摄像头.doc
- 云计算-可信计算中认证协议改进方案.pdf
- [详细完整版]单片机编程4.ppt
- c语言常用算法.pdf
- c++经典程序代码大全.pdf
- 单片机数字时钟资料.doc
- 11项目管理前沿1.0.pptx
- 基于ssm的“魅力”繁峙宣传网站的设计与实现论文.doc
- 智慧交通综合解决方案.pptx
- 建筑防潮设计-PowerPointPresentati.pptx
- SPC统计过程控制程序.pptx
资源上传下载、课程学习等过程中有任何疑问或建议,欢迎提出宝贵意见哦~我们会及时处理!
点击此处反馈


评论0