iOS游戏开发入门指南:用SpriteKit打造动画精灵
需积分: 15 151 浏览量
更新于2024-07-18
1
收藏 13.61MB PDF 举报
本资源是一份针对iOS游戏开发的全面指南,名为"IOS游戏开发工具箱",由Leland Long撰写。它旨在引导读者通过Apple的SpriteKit框架,从零开始创建一款简单的2D游戏。本书共分为十个章节,涵盖了游戏开发的基本要素,让初学者也能逐步掌握。
第1章"Hello World"将引导读者入门,熟悉环境并建立基本的编程结构,使新手对iOS游戏开发有一个初步认识。
第2章"SKActions和SKTextures:您的第一个动画精灵"会深入讲解如何使用SpriteKit的动作和纹理功能,创建动态的游戏元素,如动画角色。
第3章"Sprite Movement:响应用户输入"探讨如何使游戏对象根据用户的触控或手势进行移动,提升游戏交互性。
在第4章"Edges, Boundaries, and Ledges"中,读者会学习如何处理边界条件,确保游戏角色不会超出屏幕范围,以及利用“边缘”进行有趣的互动设计。
第5章和第6章进一步扩展,分别是"更多的动画精灵:‘敌人’和‘奖励’",以及"创造游戏角色集合",讲述如何设计复杂的角色行为和增加游戏多样性。
第7章"Points and Scoring"涉及积分系统和游戏成就管理,让玩家有目标去追求,提高游戏的吸引力。
第8章"Contacts and Collisions"深入解析碰撞检测技术,这对于游戏角色与其他物体的交互至关重要。
第9章"添加更多场景和级别",探讨如何构建多层次的游戏世界,提供丰富的游戏体验。
最后,第10章"Where to Go from Here"给出后续学习路径和建议,帮助读者在掌握了基础后继续深入探索iOS游戏开发的其他高级主题。
这本书为iOS游戏开发者提供了一个实用且循序渐进的学习平台,无论是初次接触游戏开发还是有一定经验的开发者,都能从中受益匪浅。通过阅读和实践,读者将能够掌握核心技能,制作出自己的iOS游戏作品。
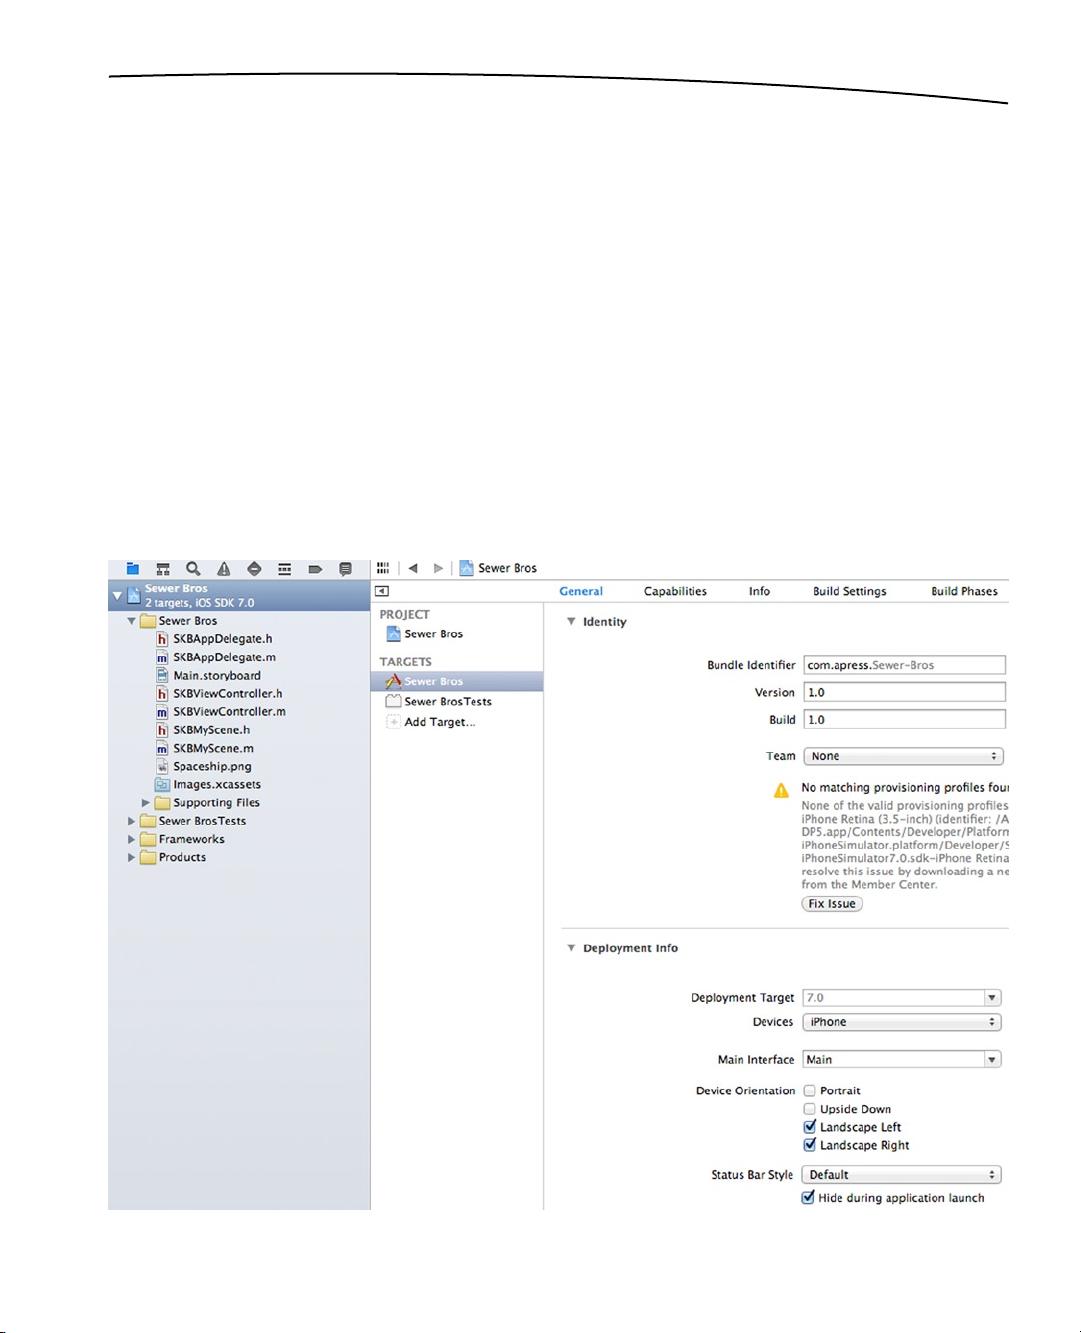
11CHAPTER 1: Hello World
Here is the bulk of the useful code. This is where everything that you saw happened when you ran
the game. The “Hello, World!” label, the debugging information, where the spaceships were spawned
from, and where the spinning actions were initiated—all of this happened when the user “touched”
the iPhone screen, and you clicked in the Simulator screen. That’s a lot going on for two short
methods, don’t you think?
Let’s examine it in more detail. First, take a look at the initWithSize method.
self.backgroundColor = [SKColor colorWithRed:0.15 green:0.15 blue:0.3 alpha:1.0];
Here, you set a background color using RGB (color) and alpha (transparency) values.
SKLabelNode *myLabel = [SKLabelNode labelNodeWithFontNamed:@"Chalkduster"];
myLabel.text = @"Hello, World!";
myLabel.fontSize = 30;
myLabel.position = CGPointMake(CGRectGetMidX(self.frame), CGRectGetMidY(self.frame));
Then you create an SKLabelNode object and set some important values such as its font, size,
and position, as well as the text itself. For the position calculation, you might notice that some
convenience methods (CGPointMake and GetMidX) are being used to determine the center of the
screen using the SKScene frame property.
[self addChild:myLabel];
Finally, you add the SKLabelNode that you created as a child of the SKScene. This is how sprites or
nodes are added to the screen: by using the addChild method of the SKScene object.
You may have noticed that all of this happened inside the scene initialization. In other words,
immediately after the app launch, since this scene will be instantiated when the storyboard is loaded.
This method then becomes the best place to add code to take care of whatever you want to have
happen when the user starts your game. You may want to go have some sort of splash screen, or
you may just get right to the point by presenting the user with several buttons from which to select:
a one- or two-player game perhaps.
Finally, you have the touchesBeganWithEvent method. As you will infer from its name, this method
will be called when the user places a finger on the screen. Not when they lift their finger off the
screen (that would be the touchesEndedWithEvent method), as is the common method employed
when using buttons, for instance. This allows the users to change their mind when making choices
between buttons. But that’s a different topic for a different book. When a user touches the screen in
this game, you don’t want to delay immediate action, so this is a better choice for method picking.
The for loop is used so that multiple simultaneous touches can be recognized and handled
accordingly. This is a bit tricky on the simulator. However, on an actual device, try pressing two
fingers down at the same time, and you’ll see what you would expect: two spaceships appear where
your fingers were placed.
CGPoint location = [touch locationInNode:self];
For each touch event, you first determine the position of the touch.
SKSpriteNode *sprite = [SKSpriteNode spriteNodeWithImageNamed:@"Spaceship"];
www.it-ebooks.info
多数
孵出
旋转
上开始
棘的
剩余242页未读,继续阅读
176 浏览量
764 浏览量
109 浏览量
133 浏览量
571 浏览量
122 浏览量
157 浏览量
113 浏览量

a704901117
- 粉丝: 2
 我的内容管理
展开
我的内容管理
展开


最新资源
- ASP.NET集成支付宝即时到账支付流程详解
- C++递推法在解决三道经典算法问题中的应用
- Qt_MARCHING_CUBES算法在面绘制中的应用
- 传感器原理与应用课程习题解答指南
- 乐高FLL2017-2018任务挑战解析:饮水思源
- Jquery Ui婚礼祝福特效:经典30款小型设计
- 紧急定位伴侣:蓝光文字的位置追踪功能
- MATLAB神经网络实用案例分析大全
- Masm611: 安全高效的汇编语言调试工具
- 3DCurator:彩色木雕CT数据的3D可视化解决方案
- 聊天留言网站开发项目全套资源下载
- 触摸屏适用的左右循环拖动展示技术
- 新型不连续导电模式V_2控制Buck变换器研究分析
- 用户自定义JavaScript脚本集合分享
- 易语言实现非主流方式获取网关IP源码教程
- 微信跳一跳小程序前端源码解析
