Selenium Grid搭建与分布式测试实例
发布时间: 2024-05-03 04:07:52 阅读量: 93 订阅数: 59 

python+selenium自动化测试环境搭建软件工具(整套)
1. Selenium Grid概述
Selenium Grid是一种分布式测试框架,它允许您在多个机器上并行运行Selenium测试。这可以显著减少测试执行时间,特别是在您有大量测试用例需要运行时。Selenium Grid由一个中心服务器(称为Grid Hub)和多个代理(称为Grid Node)组成。Grid Hub负责协调测试执行,而Grid Node负责实际执行测试。
2. Selenium Grid架构与组件
2.1 Grid Hub和Node的概念
Selenium Grid是一个分布式测试框架,它由两个主要组件组成:Grid Hub和Grid Node。
Grid Hub是Grid的中心组件,负责协调测试执行和管理Node。它接收测试请求,将它们分配给可用的Node,并收集测试结果。
Grid Node是运行实际测试的机器。它向Grid Hub注册,并接收来自Grid Hub分配的测试请求。Node执行测试并向Grid Hub报告结果。
2.2 Grid Hub与Node之间的通信机制
Grid Hub和Node之间的通信是通过HTTP协议进行的。Node向Grid Hub发送注册请求,提供其可用性信息和支持的测试环境。Grid Hub维护一个Node列表,并根据Node的可用性和测试要求将测试请求分配给它们。
Node注册过程
- import org.openqa.selenium.grid.node.Node;
- import org.openqa.selenium.grid.node.SessionFactory;
- import org.openqa.selenium.remote.DesiredCapabilities;
- // 创建一个Node会话工厂
- SessionFactory sessionFactory = ...;
- // 创建一个Node
- Node node = Node.builder()
- .sessionFactory(sessionFactory)
- .capabilities(DesiredCapabilities.chrome())
- .maximumSessions(5)
- .build();
- // 向Grid Hub注册Node
- node.start();
参数说明:
sessionFactory: 用于创建新测试会话的会话工厂。capabilities: Node支持的测试环境(例如,浏览器类型和版本)。maximumSessions: Node可以同时运行的最大会话数。
Grid Hub分配测试请求
- import org.openqa.selenium.grid.session.NewSessionRequest;
- import org.openqa.selenium.grid.session.NewSessionResponse;
- import org.openqa.selenium.grid.session.Session;
- import org.openqa.selenium.remote.DesiredCapabilities;
- // 创建一个新的会话请求
- NewSessionRequest request = NewSessionRequest.builder()
- .capabilities(DesiredCapabilities.chrome())
- .build();
- // 分配测试请求
- NewSessionResponse response = hub.allocateSession(request);
- // 创建一个会话
- Session session = response.getSession();
参数说明:
request: 包含测试环境要求的新会话请求。hub: Grid Hub实例。response: 包含分配的会话信息的新会话响应。session: 分配的会话。
3.1 Grid Hub的安装和配置
安装Grid Hub
- 下载Grid Hub安装包:从Selenium官网下载与操作系统匹配的Grid Hub安装包。
- 解压安装包:将下载的安装包解压到指定目录。
- 启动Grid Hub:在命令行中切换到解压后的目录,执行以下命令启动Grid Hub:
``

 百万级
高质量VIP文章无限畅学
百万级
高质量VIP文章无限畅学
 千万级
优质资源任意下载
千万级
优质资源任意下载
 C知道
免费提问 ( 生成式Al产品 )
C知道
免费提问 ( 生成式Al产品 )
0
0
相关推荐

专栏简介
**Selenium技术合集**
本专栏汇集了有关Selenium自动化测试框架的全面指南。从安装和配置Selenium环境到使用WebDriver控制浏览器、模拟鼠标键盘操作、处理多窗口和多标签页,以及实现断言方法。此外,还涵盖了Selenium + TestNG的报告生成、Selenium Grid的分布式测试、数据驱动测试设计、页面对象模式、CI/CD集成、数据库交互、REST API测试、移动端测试、跨浏览器测试、测试数据管理、监听器应用、Web性能和负载测试,以及Selenium与人工智能的结合。通过本专栏,开发者可以深入了解Selenium的强大功能,并将其应用于各种自动化测试场景中。
专栏目录
最低0.47元/天 解锁专栏
买1年送3月
百万级
高质量VIP文章无限畅学
千万级
优质资源任意下载
C知道
免费提问 ( 生成式Al产品 )
最新推荐
【Oracle RAC存储优化】:虚拟磁盘配置的最佳实践
# 摘要
Oracle RAC(Real Application Clusters)存储优化是确保数据库高性能和高可用性的关键。本文详细探讨了Oracle RAC存储架构的基础,包括集群文件系统、共享存储技术以及存储访问模式。重点分析了数据块读写过程、I/O堆栈和路径选择,并介绍了性能评估和优化前的准备,包括监控工具和基准测试。第三章深入虚拟磁盘配置的理论与实践,探讨
ACOM516高级功能挖掘:揭秘隐藏功能提升效率的私密方法

# 摘要
ACOM516是一款功能强大的软件工具,本文旨在全面介绍其功能并提供深入分析。从基础操作界面和核心功能的介绍开始,逐步深入到高级设置技巧、效率工具的集成使用,并通过实战演练展示数据分析、报告定制化与高级功能协同操作的强大能力。特别地,本文还揭示了ACOM516的隐藏功能,包括快捷键、高级数据处理技巧及效率优化方法,旨在帮助用户更全面地掌握并应用这款工具。最后,文章展望了ACOM516在跨学科应用、社区分享以及持续学习方面的未来
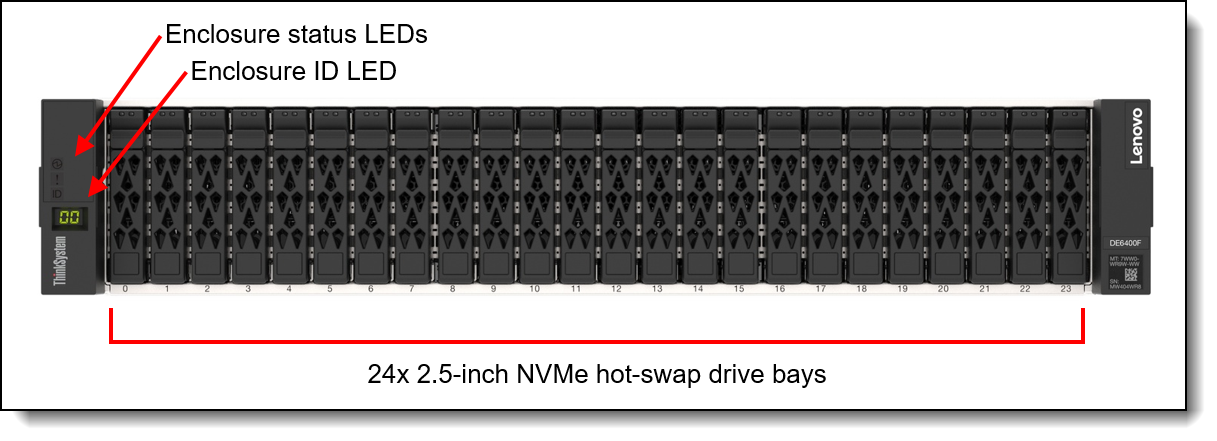
【联想SR650硬盘状态全面诊断】:硬件诊断工具的正确打开方式
# 摘要
本文详细探讨了联想SR650服务器硬盘的基础知识、状态监控、诊断、性能优化、数据备份策略以及预防性维护。首先,本文介绍了硬盘健康状态指标和SMART技术,分析了硬盘故障的前兆和监控工具的分类。接着,实操章节着重阐述了使用官方及第三方诊断工具的方法。深度分析章节深入讨论了性能瓶颈、数据恢复和硬盘升级的最佳实践。最后
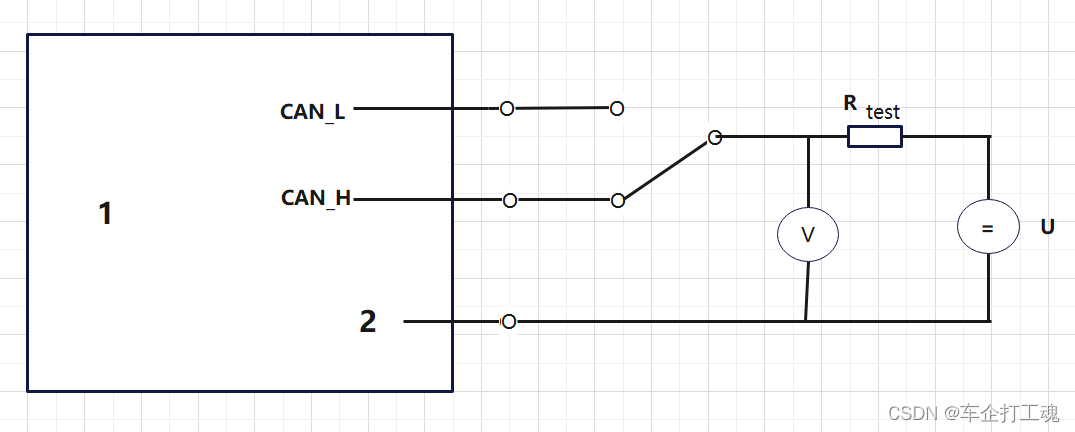
【终端电阻的理论与实践】:深入研究CAN总线中的电阻应用
# 摘要
终端电阻在保证CAN总线系统通信质量和稳定运行中扮演着关键角色。本文首先介绍了终端电阻的理论基础和CAN总线技术,重点阐述了终端电阻在CAN总线中的功能、计算方法及设计安装的要点。接着,本文详细探讨了终端电阻的故障诊断技术、维护管理策略,以及在工业自动化、车辆网络和智能家居等不同应用场景中的优化方案。最后,文章展望了终端电阻的新材料应用、技术创新方向以及未来标准化趋势,旨在为
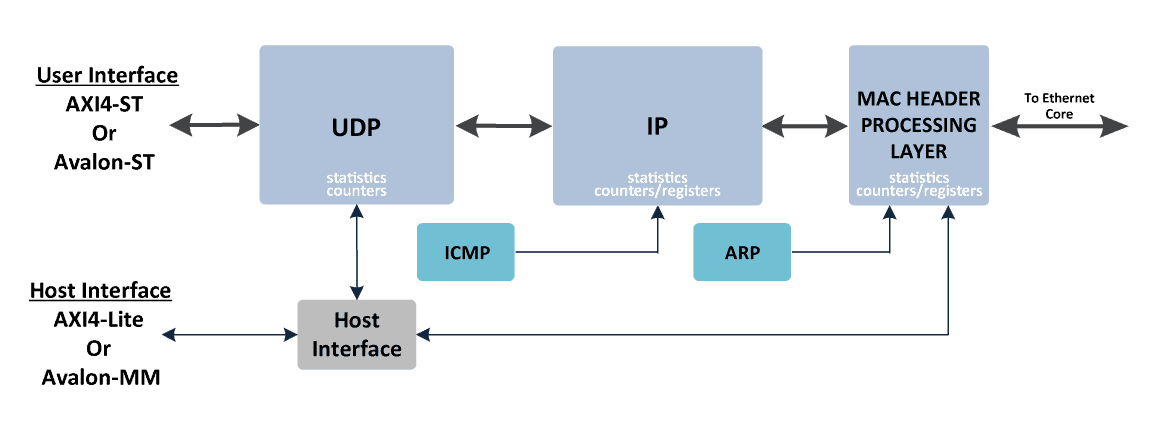
【高可靠CAN系统构建】:最佳设计与测试实践揭秘
# 摘要
随着自动化和网络化技术的快速发展,高可靠性的控制区域网络(CAN)系统变得至关重要。本文全面概述了高可靠CAN系统的设计与实现,详细分析了CAN协议的核心概念、网络拓扑结构的选择、错误检测与处理机制、时延优化及同步机制。同时,本文也探讨了在硬件与软件设计中需要考虑的关键要素,如控制器和收发器的选择、电气接口设计
【投篮机器人的视觉识别技术】:精准识别目标的幕后技术

# 摘要
本文系统地探讨了投篮机器人的视觉识别系统构建与优化。首先介绍了投篮机器人的基本概念及视觉识别需求,随后深入探讨了视觉识别技术的理论基础,包括摄像机成像原理、图像处理的数学模型和机器视觉中的模式识别。接着,文中重点介绍了视觉识别技术在实际应用中的实现方法,如实时目标跟踪技术、深度学习的应用以及机器人
故障诊断与修复指南:EQ2013异常处理的快速解决方案
# 摘要
EQ2013异常诊断是一套综合性的诊断系统,旨在通过深入理解系统架构、故障诊断理论和实践案例来提升故障识别、处理和预防的能力。本文概述了EQ2013系统架构,并详细分析了故障诊断的基本理论和实际操作步骤,包括日志分析、性能监控等。此外,通过对常见故障类型的案例分析和故障排除实践,本文提出了有效的解决策略和系统优化方法。文章还探讨了高级故障处理技巧,如内存泄漏和CPU使用异常的诊断技
【Tasker进阶秘技】:五步让你的Android体验独一无二
# 摘要
Tasker是一款强大的自动化应用程序,能够让用户通过创建自定义任务和场景来控制Android设备。本文首先介绍了Tasker的基础知识、安装流程和工作界面。接着,详细阐述了如何创建基本任务、场景触发器设置以及应用动作与插件的整合。深入研究了高级任务配置、系
Altium Designer CAMtastic实用技巧:PCB设计效率翻倍
# 摘要
Altium Designer CAMtastic是电子设计自动化(EDA)领域的重要软件工具,它提供了强大的PCB设计和制造文件生成功能。本文详细介绍了CAMtastic的基本操作、高级功能应用以及实践应用技巧,强调了CAMtastic在优化PCB布局、生成制造文件和执行自动化脚本中的核心作用。通过对
【Kingston SSS6690SK6211 U盘量产秘籍】:15个实用技巧,让量产出错成为过去
# 摘要
U盘量产是将普通U盘转化为特定用途存储设备的过程,涉及到硬件与软件的结合操作。本文从量产基础知识入手,逐步介绍了量产前的准备工作,包括选择合适的量产工具及其安装、U盘信息的检测、数据备份与格式化。文中详细讲解了量产过程中的参数设置和操作步骤,并对量产后的结果进行了验证。为了提升量产效率和解决常见问题,本文还提供了量产技巧与故障排除的方法,以及量产后的高级应用,
资源上传下载、课程学习等过程中有任何疑问或建议,欢迎提出宝贵意见哦~我们会及时处理!
点击此处反馈


专栏目录
最低0.47元/天 解锁专栏
买1年送3月
百万级
高质量VIP文章无限畅学
千万级
优质资源任意下载
C知道
免费提问 ( 生成式Al产品 )