使用Spring Cloud Gateway搭建API网关与单点登录集成
发布时间: 2024-02-22 12:48:47 阅读量: 26 订阅数: 16 
# 1. 简介
## 1.1 什么是API网关和单点登录
在微服务架构中,API网关扮演着一个重要的角色,它是系统的唯一入口,负责将所有请求导向适当的服务。API网关可以处理身份验证、授权、流量控制、日志记录、监控等功能,从而实现对微服务的统一管理和保护。
单点登录(SSO)是一种用户身份验证的方式,用户只需要一次登录,就能访问系统中的所有子应用,而无需重复登录。SSO可以提高用户体验,简化用户管理和减轻密码管理的负担。
## 1.2 Spring Cloud Gateway的介绍
Spring Cloud Gateway是Spring Cloud生态中的一个全新项目,它基于Spring Framework 5,Spring Boot 2和Project Reactor等技术,提供了一种非常强大的API网关解决方案。通过Spring Cloud Gateway,我们可以轻松地实现动态路由、安全性、监控/指标等功能。同时,Spring Cloud Gateway也天然集成了Spring Security,为我们提供了便利的单点登录集成能力。
接下来,我们将详细介绍如何使用Spring Cloud Gateway搭建API网关并集成单点登录,以实现统一的访问控制和安全认证。
# 2. 部署Spring Cloud Gateway
在本章中,我们将介绍如何部署Spring Cloud Gateway,并配置一个简单的API网关。
### 2.1 创建Spring Boot项目
首先,我们需要创建一个新的Spring Boot项目作为我们的API网关。可以使用Spring Initializr(https://start.spring.io/)来生成一个基本的Spring Boot项目,确保选择“Spring Cloud Gateway”作为需要添加的依赖。
### 2.2 配置Spring Cloud Gateway
接下来,我们需要在项目中配置Spring Cloud Gateway。创建一个名为`GatewayConfig`的配置类,并使用`@EnableGateway`注解来启用网关。
```java
@Configuration
@EnableGateway
public class GatewayConfig {
@Bean
public RouteLocator customRouteLocator(RouteLocatorBuilder builder) {
return builder.routes()
.route("api_route", r -> r.path("/api/**")
.uri("http://example.com"))
.build();
}
}
```
在上面的示例中,我们创建了一个`customRouteLocator` Bean,用于定义API的路由规则。这里我们将所有以`/api/`开头的请求转发到`http://example.com`。
### 2.3 启动和测试API网关
完成配置后,我们可以启动项目并测试API网关是否正常工作。可以使用Postman或浏览器发送请求来验证API网关是否正确转发请求。
这样,我们就成功地部署了一个简单的Spring Cloud Gateway,并配置了基本的路由转发规则。
在下一章节,我们将进一步探讨如何集成单点登录功能到我们的API网关中。
# 3. 集成单点登录
在这一章节中,我们将讨论如何集成单点登录(SSO)功能到我们的API网关中。单点登录是一种身份认证的方式,用户只需登录一次便可访问多个应用系统,提供了便利性和安全性。
#### 单点登录的优势与原理
单点登录的优势包括:
- 用户只需登录一次就可以访问多个系统,避免了重复登录的麻烦;
- 提高用户体验,简化了用户操作流程;
- 减少了密码管理的负担,提高了安全性。
单点登录的原理是当用户访问应用系统时,该系统会将用户重定向到认证服务器进行登录认证,认证成功后返回访问令牌(Access Token),应用系统可以使用该访问令牌来验证用户身份。
#### 集成Spring Security实现登录认证
我们可以使用Spring Security来实现登录认证的功能,Spring Security提供了一套完善的安全认证和权限管理机制。通过配置Spring Security,我们可以轻松实现对API网关的访问控制。
```java
// 示例代码:Spring Security配置类
@EnableWebSecurity
public class SecurityConfig extends WebSecurityConfigurerAdapter {
@Override
protected void configure(HttpSecurity http) throws Exception {
http.authorizeRequests()
.antMatchers("/login").permitAll()
.anyRequest().authenticated()
.and()
.formLogin();
}
@Override
protected void configure(AuthenticationManagerBuilder auth) throws Exception {
auth.inMemoryAuthentication()
.withUser("admin").password("{noop}password").roles("ADMIN");
}
}
```
在上面的示例中,我们配置了一个简单的Spring Security安全配置类,定义了对"/login"路径的匿名访问和一个管理员用户。
#### 配置OAuth2.0认证服务器
除了使用用户名密码进行登录认证外,我们还可以使用OAuth2.0协议进行认证授权。Spring Security提供了OAuth2.0的支持,我们可以轻松配置OAuth2.0认
 最低0.47元/天 解锁专栏
 送3个月
 百万级
高质量VIP文章无限畅学
百万级
高质量VIP文章无限畅学
 千万级
优质资源任意下载
千万级
优质资源任意下载
 C知道
免费提问 ( 生成式Al产品 )
C知道
免费提问 ( 生成式Al产品 )
0
0
相关推荐

专栏简介
《分布式应用实战之单点登录的实现》专栏深入剖析了单点登录在分布式系统中的关键作用和实际应用。首先从基础概念入手,系统解析了单点登录的基本原理及实现方式,探讨了基于JSON Web Token(JWT)和OAuth 2.0等现代认证协议在单点登录中的应用。同时,对经典的单点登录协议CAS进行了深入剖析。此外,专栏还对多种单点登录方案进行了对比,分析了它们的优缺点,并就单点登录系统中常见的漏洞与防范策略展开讨论。专栏还重点关注了分布式会话管理实践,并探讨了单点登录在微服务架构中的挑战与解决方案。除此之外,专栏还探讨了SAML 2.0和OAuth 2.0等企业级单点登录解决方案,并深入剖析了第三方应用授权管理。最后,专栏还关注了认证与授权在分布式系统中的实践,并探索了单点登录与数据隐私保护之间的平衡。通过本专栏,读者将深入了解如何使用Spring Cloud Gateway搭建API网关实现单点登录集成,为分布式系统的安全运行提供有力支持。
专栏目录

文章持续更新中,敬请期待~
最低0.47元/天 解锁专栏
送3个月
百万级
高质量VIP文章无限畅学
千万级
优质资源任意下载
C知道
免费提问 ( 生成式Al产品 )
最新推荐
【实战演练】前沿技术应用:AutoML实战与应用

# 1. AutoML概述与原理**
AutoML(Automated Machine Learning),即自动化机器学习,是一种通过自动化机器学习生命周期
【实战演练】构建简单的负载测试工具

# 1. 负载测试基础**
负载测试是一种性能测试,旨在模拟实际用户负载,评估系统在高并发下的表现。它通过向系统施加压力,识别瓶颈并验证系统是否能够满足预期性能需求。负载测试对于确保系统可靠性、可扩展性和用户满意度至关重要。
# 2. 构建负载测试工具
### 2.1 确定测试目标和指标
在构建负载测试工具之前,至关重要的是确定测试目标和指标。这将指导工具的设计和实现。以下是一些需要考虑的关键因素:
Python Excel数据分析:统计建模与预测,揭示数据的未来趋势
# 1. Python Excel数据分析概述**
**1.1 Python Excel数据分析的优势**
Python是一种强大的编程语言,具有丰富的库和工具,使其成为Excel数据分析的理想选择。通过使用Python,数据分析人员可以自动化任务、处理大量数据并创建交互式可视化。
**1.2 Python Excel数据分析库**
【实战演练】虚拟宠物:开发一个虚拟宠物游戏,重点在于状态管理和交互设计。
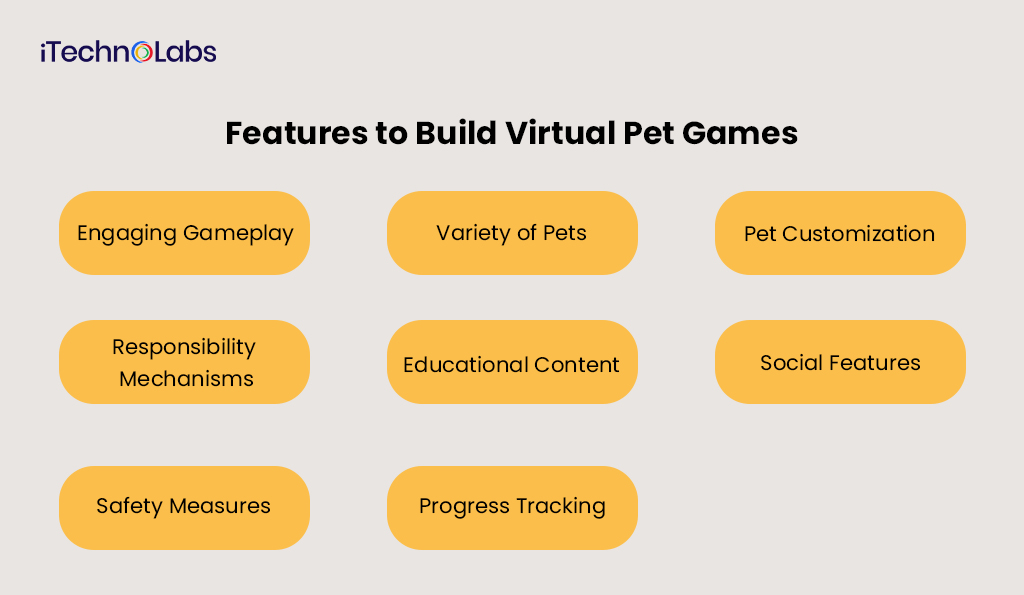
# 2.1 虚拟宠物的状态模型
### 2.1.1 宠物的基本属性
虚拟宠物的状态由一系列基本属性决定,这些属性描述了宠物的当前状态,包括:
- **生命值 (HP)**:宠物的健康状况,当 HP 为 0 时,宠物死亡。
- **饥饿值 (Hunger)**:宠物的饥饿程度,当 Hunger 为 0 时,宠物会饿死。
- **口渴
【实战演练】综合自动化测试项目:单元测试、功能测试、集成测试、性能测试的综合应用

# 2.1 单元测试框架的选择和使用
单元测试框架是用于编写、执行和报告单元测试的软件库。在选择单元测试框架时,需要考虑以下因素:
* **语言支持:**框架必须支持你正在使用的编程语言。
* **易用性:**框架应该易于学习和使用,以便团队成员可以轻松编写和维护测试用例。
* **功能性:**框架应该提供广泛的功能,包括断言、模拟和存根。
* **报告:**框架应该生成清
【实战演练】时间序列预测项目:天气预测-数据预处理、LSTM构建、模型训练与评估
# 1. 时间序列预测概述**
时间序列预测是指根据历史数据预测未来值。它广泛应用于金融、天气、交通等领域,具有重要的实际意义。时间序列数据通常具有时序性、趋势性和季节性等特点,对其进行预测需要考虑这些特性。
# 2. 数据预处理
### 2.1 数据收集和清洗
#### 2.1.1 数据源介绍
时间序列预测模型的构建需要可靠且高质量的数据作为基础。数据源的选择至关重要,它将影响模型的准确性和可靠性。常见的时序数据源包括:
【实战演练】使用Unity ML-Agents创建3D强化学习环境
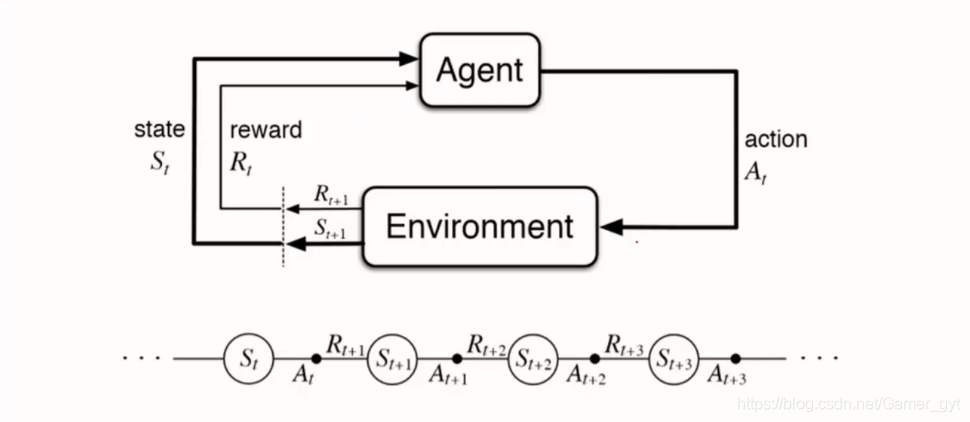
# 2.1 强化学习的原理和算法
### 2.1.1 马尔可夫决策过程
强化学习基于马尔可夫决策过程(MDP)建模,其定义如下:
- **状态(S):**环境的当前状态,它包含了有关环境所有相关
OODB数据建模:设计灵活且可扩展的数据库,应对数据变化,游刃有余

# 1. OODB数据建模概述
对象-面向数据库(OODB)数据建模是一种数据建模方法,它将现实世界的实体和关系映射到数据库中。与关系数据建模不同,OODB数据建模将数据表示为对象,这些对象具有属性、方法和引用。这种方法更接近现实世界的表示,从而简化了复杂数据结构的建模。
OODB数据建模提供了几个关键优势,包括:
* **对象标识和引用完整性
Python map函数在代码部署中的利器:自动化流程,提升运维效率

# 1. Python map 函数简介**
map 函数是一个内置的高阶函数,用于将一个函数应用于可迭代对象的每个元素,并返回一个包含转换后元素的新可迭代对象。其语法为:
```python
map(function, iterable)
```
其中,`function` 是要应用的函数,`iterable` 是要遍历的可迭代对象。map 函数通
Python脚本调用与区块链:探索脚本调用在区块链技术中的潜力,让区块链技术更强大

# 1. Python脚本与区块链简介**
**1.1 Python脚本简介**
Python是一种高级编程语言,以其简洁、易读和广泛的库而闻名。它广泛用于各种领域,包括数据科学、机器学习和Web开发。
**1.2 区块链简介**
区块链是一种分布式账本技术,用于记录交易并防止篡改。它由一系列称为区块的数据块组成,每个区块都包含一组交易和指向前一个区块的哈希值。区块链的去中心化和不可变性使其
资源上传下载、课程学习等过程中有任何疑问或建议,欢迎提出宝贵意见哦~我们会及时处理!
点击此处反馈


专栏目录
文章持续更新中,敬请期待~
最低0.47元/天 解锁专栏
送3个月
百万级
高质量VIP文章无限畅学
千万级
优质资源任意下载
C知道
免费提问 ( 生成式Al产品 )