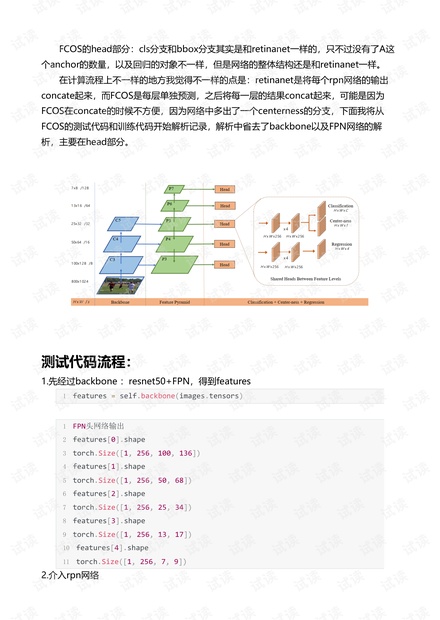

FCOS的head部分:cls分支和bbox分支其实是和retinanet一样的,只不过没有了A这
个anchor的数量,以及回归的对象不一样,但是网络的整体结构还是和retinanet一样。
在计算流程上不一样的地方我觉得不一样的点是:retinanet是将每个rpn网络的输出
concate起来,而FCOS是每层单独预测,之后将每一层的结果concat起来,可能是因为
FCOS在concate的时候不方便,因为网络中多出了一个centerness的分支,下面我将从
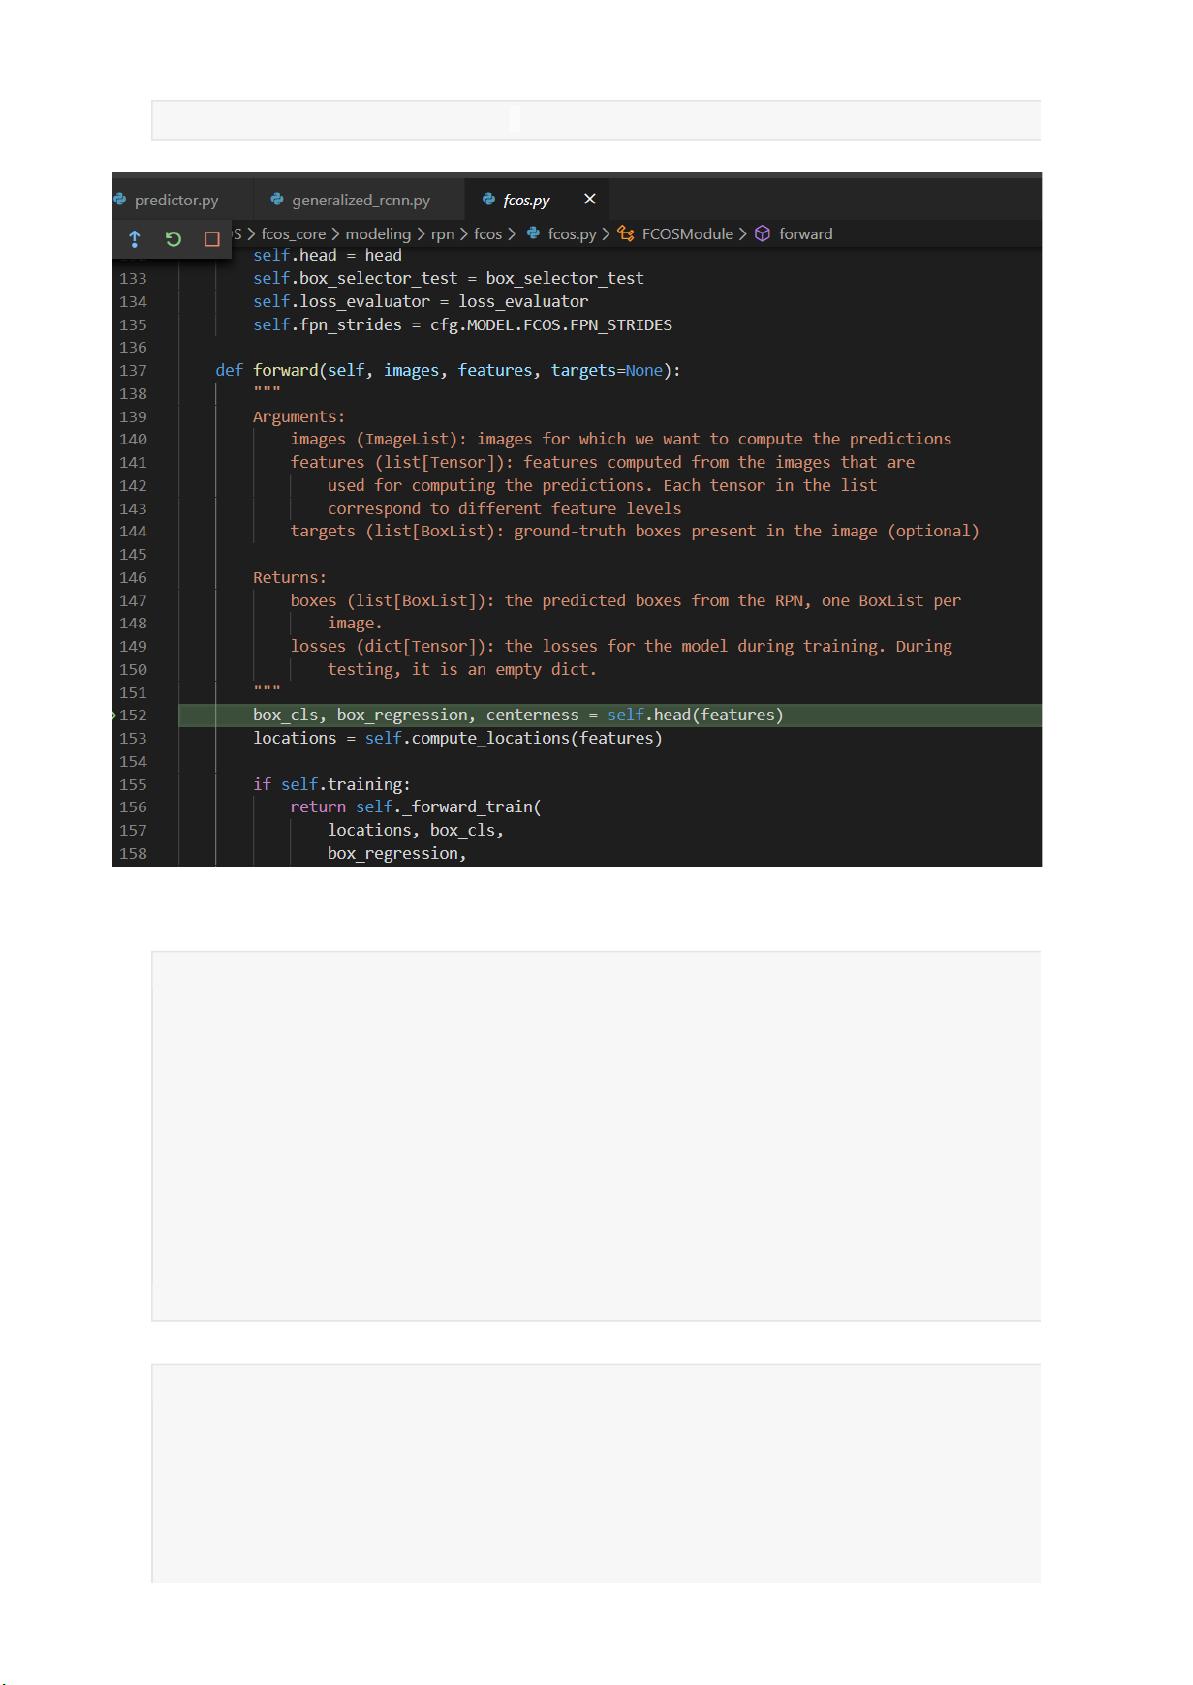
FCOS的测试代码和训练代码开始解析记录,解析中省去了backbone以及FPN网络的解
析,主要在head部分。
测试代码流程:
1.先经过backbone:resnet50+FPN,得到features
1 features=self.backbone(images.tensors)
1 FPN头网络输出
2 features[0].shape
3 torch.Size([1,256,100,136])
4 features[1].shape
5 torch.Size([1,256,50,68])
6 features[2].shape
7 torch.Size([1,256,25,34])
8 features[3].shape
9 torch.Size([1,256,13,17])
10 features[4].shape
11 torch.Size([1,256,7,9])
2.介入rpn网络


剩余15页未读,继续阅读

爱乐城的鸟儿
- 粉丝: 17
- 资源: 1
 我的内容管理
收起
我的内容管理
收起
- 我的资源
快来上传第一个资源
 我的收益 登录查看自己的收益
 我的积分
登录查看自己的积分
我的积分
登录查看自己的积分
 我的C币
登录后查看C币余额
我的C币
登录后查看C币余额
 我的收藏
我的收藏  我的下载
我的下载  下载帮助
下载帮助

会员权益专享


最新资源
- zigbee-cluster-library-specification
- JSBSim Reference Manual
- c++校园超市商品信息管理系统课程设计说明书(含源代码) (2).pdf
- 建筑供配电系统相关课件.pptx
- 企业管理规章制度及管理模式.doc
- vb打开摄像头.doc
- 云计算-可信计算中认证协议改进方案.pdf
- [详细完整版]单片机编程4.ppt
- c语言常用算法.pdf
- c++经典程序代码大全.pdf
- 单片机数字时钟资料.doc
- 11项目管理前沿1.0.pptx
- 基于ssm的“魅力”繁峙宣传网站的设计与实现论文.doc
- 智慧交通综合解决方案.pptx
- 建筑防潮设计-PowerPointPresentati.pptx
- SPC统计过程控制程序.pptx
资源上传下载、课程学习等过程中有任何疑问或建议,欢迎提出宝贵意见哦~我们会及时处理!
点击此处反馈


评论5