没有合适的资源?快使用搜索试试~ 我知道了~
首页理解胶囊网络 Understanding Capsule Networks
资源详情
资源评论
资源推荐

NickBourdakos
ComputervisionaddictatIBMWatson
Feb12 · 15minread
UnderstandingCapsuleNetworks—AI’s
AlluringNewArchitecture
Convolutional neural networks have done an amazing job, but are
rooted in problems. It’s time we started thinking about new solutions or
improvements — and now, enter capsules.
Previously, I briey discussed how capsule networks combat some of
these traditional problems. For the past for few months, I’ve been
submerging myself in all things capsules. I think it’s time we all try to
get a deeper understanding of how capsules actually work.
In order to make it easier to follow along, I have built a visualization
tool that allows you to see what is happening at each layer. This is
“Science”byAlexReynolds

paired with a simple implementation of the network. All of it can be
found on GitHub here.
This is the CapsNet architecture. Don’t worry if you don’t understand
what any of it means yet. I’ll be going through it layer by layer, with as
much detail as I can possibly conjure up.
Part0:TheInput
The input into CapsNet is the actual image supplied to the neural net.
In this example the input image is 28 pixels high and 28 pixels wide.
But images are actually 3 dimensions, and the 3rd dimension contains
the color channels.
The image in our example only has one color channel, because it’s black
and white. Most images you are familiar with have 3 or 4 channels, for
Red-Green-Blue and possibly an additional channel for Alpha, or
transparency.

Each one of these pixels is represented as a value from 0 to 255 and
stored in a 28x28x1 matrix [28, 28, 1]. The brighter the pixel, the
larger the value.
Part1a:Convolutions
The rst part of CapsNet is a traditional convolutional layer. What is a
convolutional layer, how does it work, and what is its purpose?
The goal is to extract some extremely basic features from the input
image, like edges or curves.
How can we do this?
Let’s think about an edge:
If we look at a few points on the image, we can start to pick up a
pattern. Focus on the colors to the left and right of the point we are
looking at:

You might notice that they have a larger dierence if the point is an
edge:
255 - 114 = 141
114 - 153 = -39
153 - 153 = 0
255 - 255 = 0
What if we went through each pixel in the image and replaced its value
with the value of the dierence of the pixels to the left and right of it?
In theory, the image should become all black except for the edges.
We could do this by looping through every pixel in the image:
for pixel in image {
result[pixel] = image[pixel - 1] - image[pixel + 1]
}
But this isn’t very ecient. We can instead use something called a
“convolution.” Technically speaking, it’s a “cross-correlation,” but
everyone likes to call them convolutions.
A convolution is essentially doing the same thing as our loop, but it
takes advantage of matrix math.

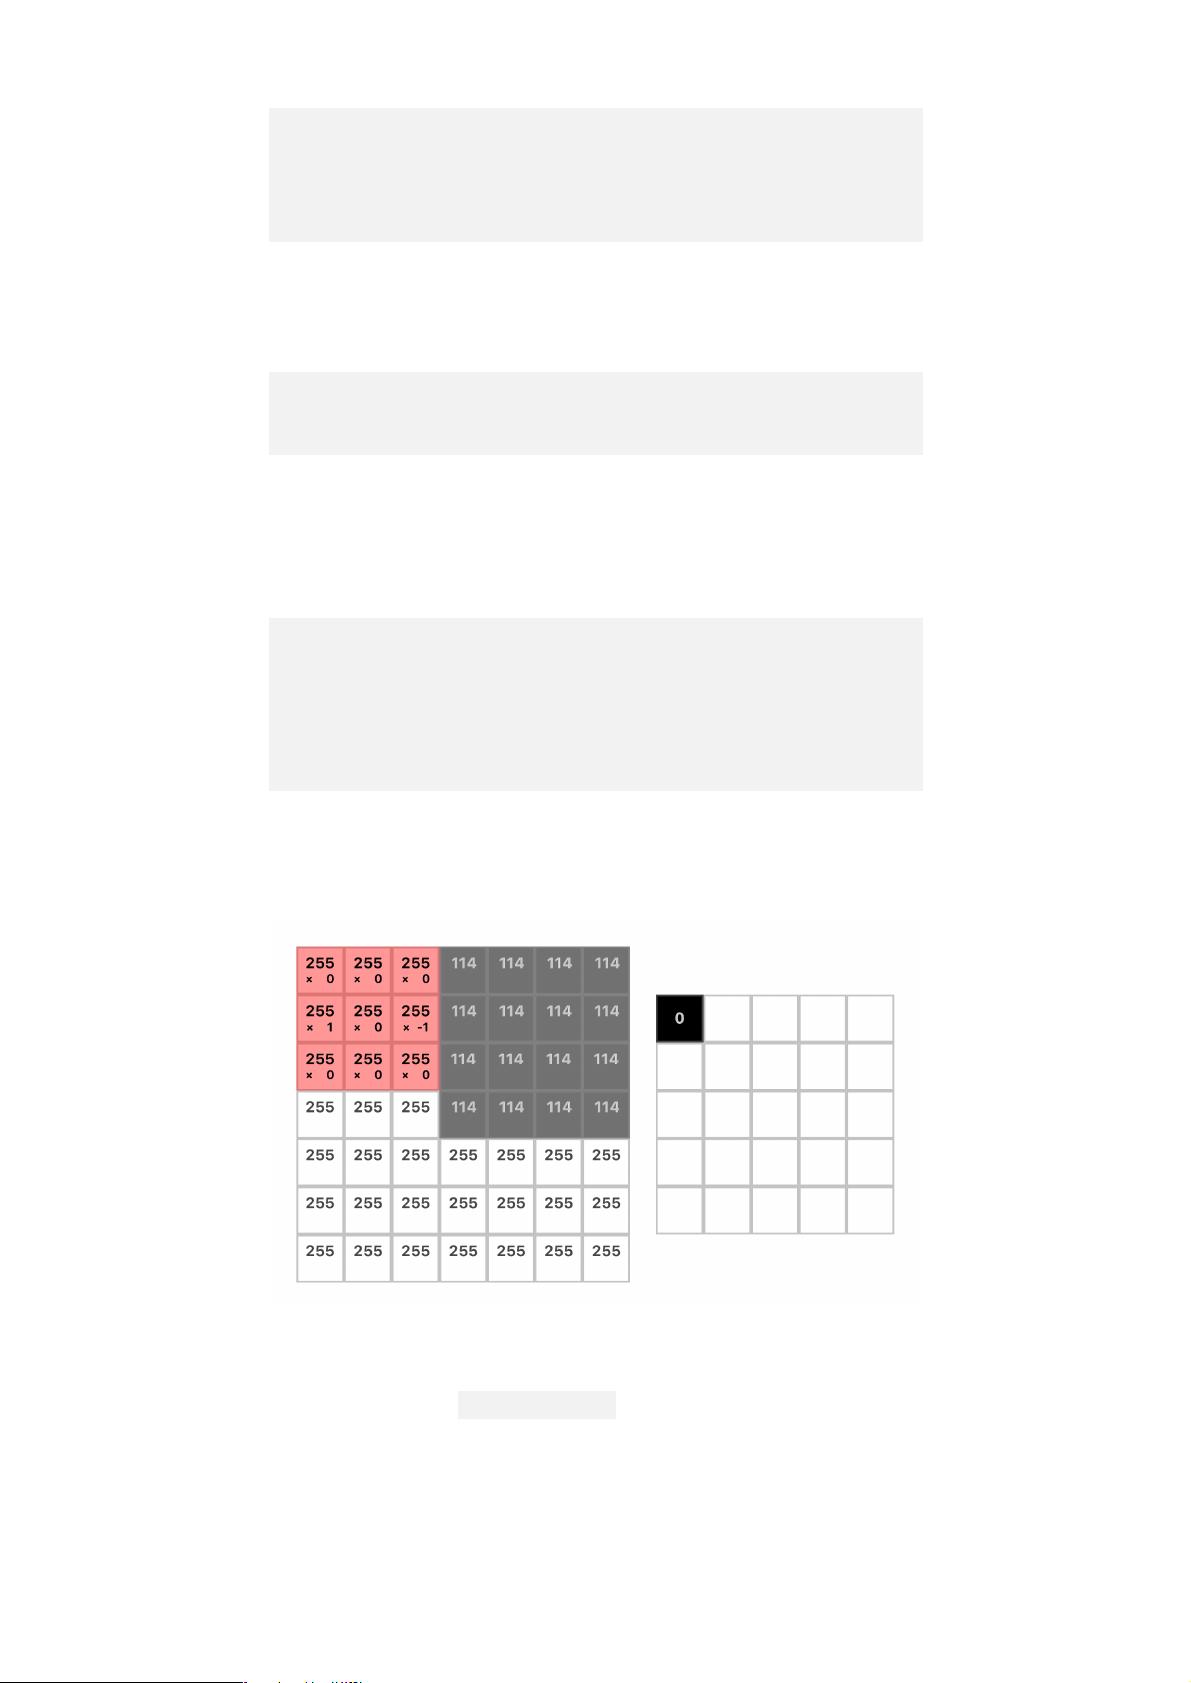
A convolution is done by lining up a small “window” in the corner of
the image that only lets us see the pixels in that area. We then slide the
window across all the pixels in the image, multiplying each pixel by a
set of weights and then adding up all the values that are in that
window.
This window is a matrix of weights, called a “kernel.”
We only care about 2 pixels, but when we wrap the window around
them it will encapsulate the pixel between them.
Window:
┌─────────────────────────────────────┐
│ left_pixel middle_pixel right_pixel │
└─────────────────────────────────────┘
Can you think of a set of weights that we can multiply these pixels by so
that their sum adds up to the value we are looking for?
Window:
┌─────────────────────────────────────┐
│ left_pixel middle_pixel right_pixel │
└─────────────────────────────────────┘
(w1 * 255) + (w2 * 255) + (w3 * 114) = 141
Spoilers below!
│ │ │
│ │ │
│ │ │
│ │ │
│ │ │
\│/ \│/ \│/
V V V
We can do something like this:
Window:
┌─────────────────────────────────────┐
剩余25页未读,继续阅读


安全验证
文档复制为VIP权益,开通VIP直接复制

评论0