Text Editing Tips in Notepad
发布时间: 2024-09-14 22:02:10 阅读量: 28 订阅数: 26 

写作助手软件 Text Editing Assistant v9.4
# 1. Keyboard Shortcut Tips
## 1.1 Common Keyboard Shortcuts
In Notepad, using keyboard shortcuts can greatly enhance editing efficiency. Here are some common shortcut tips:
| Shortcut | Function |
|----------------|----------------------------|
| Ctrl + S | Save current file |
| Ctrl + C | Copy selected text |
| Ctrl + X | Cut selected text |
| Ctrl + V | Paste text |
| Ctrl + Z | Undo last action |
| Ctrl + F | Find text |
| Ctrl + H | Replace text |
| Ctrl + A | Select all text |
These shortcuts can help you perform common operations more quickly, saving time and increasing efficiency.
## 1.2 Customizing Keyboard Shortcut Bindings
In addition to the system default shortcuts, Notepad also supports user-customized shortcut bindings. Here's how to achieve it:
1. Open Notepad, click on "Settings" or "Tools" in the menu bar.
2. Select "Keyboard Shortcut Settings" or a similar option.
3. In the shortcut settings interface, you can see the list of defined shortcuts.
4. Click on the "Add" or similar button, and enter the combination of shortcuts you want to bind.
5. Select the corresponding function or command, and save the settings.
By customizing your shortcut bindings, you can set shortcuts that better fit your personal habits or needs, making the editing process smoother and more convenient.
# 2. Find and Replace Functionality
The find and replace functionality is one of the common techniques used in text editing within Notepad. Here’s how you can enhance editing efficiency:
### 2.1 Text Finding Tips
In Notepad, we can use the following shortcuts to find text:
1. Press `Ctrl + F` to bring up the find dialog.
2. Enter the text you want to find, and click "Find Next" to locate each instance of the text.
3. If you want to replace the found text, click on the "Replace" tab, enter the replacement text, and click "Replace" or "Replace All."
Here's a Python example code that demonstrates how to search for specific content in a text file and output the line number:
```python
with open('example.txt', 'r') as ***
***
*** 'Hello'
for i, line in enumerate(lines):
if search_term in line:
print(f'Found at line {i+1}: {line}')
```
**Code Explanation:**
- Use the `open()` function to open the file and read the text line by line.
- The search term is `'Hello'`, which can be modified as needed.
- Use the `enumerate()` function to get the line number and output the line containing `'Hello'`.
### 2.2 Batch Text Replacement
Batch text replacement is also a very practical feature in Notepad. Here's an example that shows how to perform batch replacement:
| Original Text | Before Replacement | After Replacement |
|---------------|--------------------|-------------------|
| Apple | A | B |
| Banana | B | C |
| Orange | O | P |
By looking at the table above, you can clearly see the effect before and after the replacement. In Notepad, batch replacement can be done similarly.
Here's a flowchart using the mermaid format to demonstrate the process of text finding and replacement:
```mermaid
graph LR
A[Start] --> B(Enter text to find)
B --> C(Click "Find Next")
C --> D{Is there a match?}
D -- Yes --> E(Continue finding?)
D -- No --> B
E -- Yes --> C
E -- No --> F(Enter replacement text)
F --> G(Click "Replace")
G --> H{Continue replacing?}
H -- Yes --> G
H -- No --> I(Finish replacement)
I --> J[End]
```
The above is a detailed introduction to the find and replace functionality in Notepad. Mastering these tips can improve the efficiency and accuracy of text editing.
# 3. Text Formatting Settings
In Notepad, we can adjust the text format through some simple operations, including font, font size, color settings, as well as line spacing and text alignment functions.
### 3.1 Font, Font Size, Color Settings
In Notepad, we can set the font, font size, and color of the text through the following steps:
1. **Set Font**: In the menu bar, choose “Format”, then click “Font”. In the font dialog box that pops up, choose your favorite font, such as Microsoft YaHei, Songti, or SimHei.
2. **Set Font Size**: In the font dialog box, ***mon font sizes include 12 point, 14 point, etc.
3. **Set Color**: In the font dialog box, you can also set the text color through the "Color" option. You can choose from common colors or customize your own color.
Here's an example code that demonstrates how to set the font, font size, and color of the text in Notepad:
```python
# Set text font to Microsoft YaHei, font size to 14 points, color to red
text_font = "Microsoft YaHei"
text_size = 14
text_color = "red"
def set_text_format(font, size, color):
print(f"Setting text font to: {font}")
print(f"Setting text font size to: {size}")
print(f"Setting text color to: {color}")
# Call the function to set text format in Notepad
set_text_format(text_font, text_size, text_color)
```
With the above code, we can customize the font, font size, and color of the text, making it more personalized in Notepad.
### 3.2 Line Spacing and Text Alignment
In addition to font, font size, and color settings, we can also adjust the line spacing and text alignment of the text to improve readability.
In Notepad, you can set the line spacing and text alignment in the following ways:
1. **Adjust Line Spacing**: While editing text, you can change the line spacing by inserting blank lines between text lines or adjusting the paragraph format, making the text clearer and easier to read.
2. **Text Alignment**: In the menu bar, choose “Format”, then click “Paragraph”. In the paragraph dialog box, you can choose the text alignment method, including left alignment, right alignment, center alignment, etc.
Here's a flowchart showing how to adjust text line spacing and alignment in Notepad:
```mermaid
graph TD
A[Open text editor] --> B{Adjust line spacing}
B -->|Insert blank lines or adjust paragraph format| C[Set line spacing]
A --> D{Set text alignment}
D -->|Choose text alignment method| E[Left alignment]
D --> F[Right alignment]
D --> G[Center alignment]
```
With the above operations, we can adjust the line spacing and text alignment of the text according to our needs, making the text layout more aesthetic and tidy.
# 4. Folding and Expanding Text
In Notepad, folding and expanding text can help us better organize and manage large blocks of text content, improving editing efficiency. Here's how to use the folding function to fold and expand multiple lines of text.
### 4.1 Folding Multiple Lines of Text
The following steps can be used to fold multiple lines of text:
1. Select multiple lines of text in Notepad.
2. Click on the "Format" option in the menu bar.
3. In the dropdown menu, choose "Fold". This will fold the selected text, displaying only a summary line of content.
Here's an example code block that demonstrates how to fold multiple lines of text in Notepad:
```python
# Define a list
fruits = ['apple', 'orange', 'banana', 'grape', 'watermelon']
# Loop and print each fruit in the list
for fruit in fruits:
print(fruit)
```
### 4.2 Using the Folding Function to Improve Efficiency
The folding function can help us be more efficient when dealing with large blocks of text:
- Fold and hide parts that do not need to be edited directly, focusing on the current work content.
- Fold code blocks to improve the efficiency of reading code, reducing visual distractions.
In Notepad, skillfully using the folding function can make the editing process smoother, adapt to the switching of different editing needs, and improve work efficiency.
Next, we will demonstrate the process of folding text with a mermaid flowchart:
```mermaid
graph LR
A(Select multiple lines of text) -- Click format --> B(Choose fold function)
B -- Text folded --> C(Only display summary content)
```
# 5. Text Auto-Completion Function
The text auto-completion function in Notepad is a very practical feature that can help improve the efficiency of writing text. Here's how to enable and use text auto-completion.
### 5.1 Enabling and Using Auto-Completion
Enabling text auto-completion in Notepad is very simple:
1. Open the Notepad software.
2. Click on "Settings" -> "Preferences" in the menu bar.
3. In the preferences window that pops up, find the "Auto-completion" option and check the box to enable the auto-completion feature.
4. Once confirmed, you can start using the text auto-completion feature.
The specific steps for using text auto-completion are as follows:
- While editing text, type part of a word or the first few letters of a word.
- Press "Tab" or "Enter" keys, and Notepad will automatically match possible suggestions for you to choose from or continue typing.
### 5.2 Customizing the Auto-Completion List
Notepad also supports customizing the auto-completion list, allowing you to add or modify auto-completion content based on your needs. Here's an example code for customizing the auto-completion list:
```xml
<autoComplete>
<item>HTML</item>
<item>CSS</item>
<item>JavaScript</item>
<item>Python</item>
</autoComplete>
```
The above code defines a custom auto-completion list that includes HTML, CSS, JavaScript, and Python. You can modify or expand the list content as needed.
With the above introduction, you can easily enable and customize the text auto-completion feature in Notepad, improving the efficiency of writing text and making the editing work more convenient!
Next, let's look at an example scenario flowchart using the text auto-completion feature:
```mermaid
graph LR
A(Start typing) --> B(Partial word or first few letters of a word)
B --> C{Trigger}
C -->|Yes| D(Automatically match suggestions)
C -->|No| E(Continue typing)
D --> F(Choose or continue typing)
F --> C
E --> C
```
Through this flowchart, you can clearly understand the interaction process of using text auto-completion, helping you better master the operation method of this feature.
# 6. Plugins and Extension Features
In Notepad, plugins and extension features can provide users with more choices and personalized configurations. Here's how to install and manage plugins, as well as some recommended plugin categories.
### 6.1 Installing and Managing Plugins
To use plugins in Notepad, you first need to enter the plugin management interface, which is usually available in the menu bar under "Plugins" or "Extensions." Then follow these steps:
1. In the plugin management interface, you can use buttons like "Install Plugin" or "Browse Plugins" to find and install the desired plugin.
2. Make sure the selected plugin is compatible with the current version of Notepad to avoid unnecessary problems.
3. Once installed, you can view the list of installed plugins in the plugin management interface and enable or disable them as needed.
### Recommended Common Plugin Categories
Here are some common plugin categories and recommended plugins:
| Plugin Category | Recommended Plugins |
|--------------------|----------------------------|
| Text Processing | TextFX |
| Code Completion | IntelliSense |
| Themes and Skins | Theme Manager |
| File Management | Explorer |
| Version Control | Git Plugin |
These plugins can be selected and installed based on the user's needs and usage habits to enhance Notepad's functionality and user experience.
### 6.2 Plugin Example Code
Here, we demonstrate a simple plugin example code for implementing a specific function in Notepad:
```python
def count_words(text):
words = text.split()
return len(words)
# Test example
sample_text = "This is a sample text for word count."
word_count = count_words(sample_text)
print(f"The word count is: {word_count}")
```
With the above code example, you can see how to write a plugin function to count the number of words in a text, offering more possibilities for text processing.
### Plugin Operation Flowchart
```mermaid
graph LR
A(Select plugin feature) --> B{Search for required plugin}
B -- Found plugin --> C[Install plugin]
C -- Installation successful --> D[Enable plugin]
D -- Plugin feature is complete --> E[Use plugin feature]
E -- Operation completed --> F(Complete operation)
B -- Plugin not found --> G[Manually install plugin]
G -- Manual installation completed --> D
```
The above is the content of the plugins and extension features section in Notepad, hoping it will be helpful to you.
# 7. Code Highlighting and Coloring
In Notepad, by configuring syntax highlighting for different programming languages, different types of code can be made easier to recognize and read. Here are the detailed steps for configuration:
### 7.1 Configure Syntax Highlighting for Different Programming Languages
1. Open Notepad, click on the "Format" option in the menu.
2. In the dropdown menu, select "Language", then choose "Define Custom Language" option.
3. In the window that pops up, click the "New" button, enter the corresponding language name, such as Python or Java.
4. In the "Keywords" tab, enter the keywords of the programming language, such as if, else, for, etc., and set different colors for emphasis.
Example code:
```python
if a == 1:
print("Hello, World!")
else:
print("Goodbye, World!")
```
5. Click on the "Define Styles" tab to set the text color, font, etc., for the best reading experience.
### 7.2 Optimize Code Reading Experience
To optimize the code reading experience, you can use the following features in Notepad:
- **Fold Code Blocks**: Use the folding feature to hide unnecessary code, making reading more concise.
- **Smart Completion**: Some plugins can provide smart completion, helping you write code faster.
Here is a flowchart showing the steps for code highlighting and coloring:
```mermaid
graph LR
A[Open Notepad] --> B{Click "Format"}
B -->|Choose "Language"| C[Choose "Define Custom Language"]
C --> D{New}
D -->|Enter Language Name| E[Enter Keywords]
E --> F[Set Keyword Colors]
F --> G[Click "Define Styles"]
G --> H[Set Text Styles]
```
With the above steps, you can easily configure code highlighting and coloring for different programming languages, enhancing the experience of writing and reading code.

 百万级
高质量VIP文章无限畅学
百万级
高质量VIP文章无限畅学
 千万级
优质资源任意下载
千万级
优质资源任意下载
 C知道
免费提问 ( 生成式Al产品 )
C知道
免费提问 ( 生成式Al产品 )
0
0
相关推荐

专栏目录
最低0.47元/天 解锁专栏
买1年送3月
百万级
高质量VIP文章无限畅学
千万级
优质资源任意下载
C知道
免费提问 ( 生成式Al产品 )
最新推荐
【EDEM仿真非球形粒子专家】:揭秘提升仿真准确性的核心技术

# 1. EDEM仿真软件概述与非球形粒子的重要性
## 1.1 EDEM仿真软件简介
EDEM是一种用于粒子模拟的仿真工具,能够准确地模拟和分析各种离散元方法(Discrete Element Method, DEM)问题。该软件广泛应用于采矿
雷达数据压缩技术突破:提升效率与存储优化新策略

# 1. 雷达数据压缩技术概述
在现代军事和民用领域,雷达系统产生了大量的数据,这些数据的处理和存储是技术进步的关键。本章旨在对雷达数据压缩技术进行简要
SaTScan软件的扩展应用:与其他统计软件的协同工作揭秘

# 1. SaTScan软件概述
SaTScan是一种用于空间、时间和空间时间数据分析的免费软件,它通过可变动的圆形窗口统计分析方法来识别数据中的异常聚集。本章将简要介绍SaTScan的起源、功能及如何在不同领域中得到应用。SaTScan软件特别适合公共卫生研究、环境监测和流行病学调查等领域,能够帮助研究人员和决策者发现数据中的模式和异常,进行预防和控制策略的制定。
在
SGMII传输层优化:延迟与吞吐量的双重提升技术

# 1. SGMII传输层优化概述
在信息技术不断发展的今天,网络传输的效率直接影响着整个系统的性能。作为以太网物理层的标准之一,SGMII(Serial Gigabit Media Independent Interface)在高性能网络设计中起着至关重要的作用。SGMII传输层优化,就是通过一系列手段来提高数据传输效率,减少延迟,提升吞吐量,从而达到优化整个网络性能的目
Java SPI与依赖注入(DI)整合:技术策略与实践案例
# 1. Java SPI机制概述
## 1.1 SPI的概念与作用
Service Provider Interface(SPI)是Java提供的一套服务发现机制,允许我们在运行时动态地提供和替换服务实现。它主要被用来实现模块之间的解耦,使得系统更加灵活,易于扩展。通过定义一个接口以及一个用于存放具体服务实现类的配置文件,我们可以轻松地在不修改现有代码的情况下,增加或替换底
【矩阵求逆的历史演变】:从高斯到现代算法的发展之旅

# 1. 矩阵求逆概念的起源与基础
## 1.1 起源背景
矩阵求逆是线性代数中的一个重要概念,其起源可以追溯到19世纪初,当时科学家们开始探索线性方程组的解法。早期的数学家如高斯(Carl Friedrich Gauss)通过消元法解决了线性方程组问题,为矩阵求逆奠定了基础。
社交网络分析工具大比拼:Gephi, NodeXL, UCINET优劣全面对比
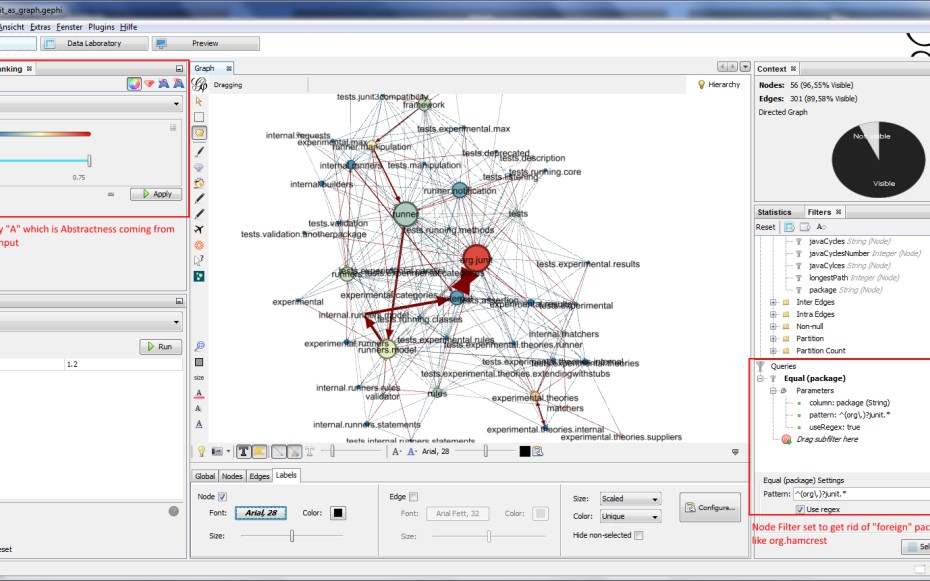
# 1. 社交网络分析概述
社交网络分析是理解和揭示社会结构和信息流的一种强有力的工具,它跨越了人文和社会科学的边界,找到了在计算机科学中的一个牢固立足点。这一分析不仅限于对人际关系的研究,更扩展到信息传播、影响力扩散、群体行为等多个层面。
## 1.1 社交网络分析的定义
社交网络分析(Social Network Analysis,简称SNA)是一种研究社会结构的方法论
原型设计:提升需求沟通效率的有效途径

# 1. 原型设计概述
在现代产品设计领域,原型设计扮演着至关重要的角色。它不仅是连接设计与开发的桥梁,更是一种沟通与验证设计思维的有效工具。随着技术的发展和市场对产品快速迭代的要求不断提高,原型设计已经成为产品生命周期中不可或缺的一环。通过创建原型,设计师能够快速理解用户需求,验证产品概念,及早发现潜在问题,并有效地与项目相关方沟通想法,从而推动产品向前发展。本章将对原型设计的必要性、演变以及其在产品开发过程中的作
Python环境监控高可用构建:可靠性增强的策略

# 1. Python环境监控高可用构建概述
在构建Python环境监控系统时,确保系统的高可用性是至关重要的。监控系统不仅要在系统正常运行时提供实时的性能指标,而且在出现故障或性能瓶颈时,能够迅速响应并采取措施,避免业务中断。高可用监控系统的设计需要综合考虑监控范围、系统架构、工具选型等多个方面,以达到对资源消耗最小化、数据准确性和响应速度最优化的目
【信号异常检测法】:FFT在信号突变识别中的关键作用
# 1. 信号异常检测法基础
## 1.1 信号异常检测的重要性
在众多的IT和相关领域中,从工业监控到医疗设备,信号异常检测是确保系统安全和可靠运行的关键技术。信号异常检测的目的是及时发现数据中的不规则模式,这些模式可能表明了设备故障、网络攻击或其他需要立即关注的问题。
## 1.2 信号异常检测方法概述
信号异常检测的方法多种多样,包括统计学方法、机器学习方法、以及基于特定信号
资源上传下载、课程学习等过程中有任何疑问或建议,欢迎提出宝贵意见哦~我们会及时处理!
点击此处反馈


专栏目录
最低0.47元/天 解锁专栏
买1年送3月
百万级
高质量VIP文章无限畅学
千万级
优质资源任意下载
C知道
免费提问 ( 生成式Al产品 )