【Connecting to MySQL Database with Navicat】: 10 Steps to Quickly Get Started, from Beginner to Expert
发布时间: 2024-09-14 18:14:37 阅读量: 41 订阅数: 45 

ERROR 2002 (HY000): Can't connect to local MySQL server through socket '/tmp/mysql.sock'
# Navicat Connection to MySQL Database: 10 Steps to Get Started, from Beginner to Expert
## 1. Introduction to Navicat and Installation
Navicat is a powerful database management tool that supports connecting to and managing various database systems, including MySQL, MariaDB, Oracle, PostgreSQL, and more. It offers an intuitive user interface, streamlining database management tasks and enhancing the productivity of developers and database administrators.
### Installing Navicat
1. Visit the official Navicat website to download the installer.
2. Double-click the installer and follow the prompts to install.
3. After installation, launch Navicat and input the license key (if applicable).
## 2. Connecting to a MySQL Database
### 2.1 Configuring Connection Parameters
When connecting to a MySQL database, the following parameters need to be configured:
- **Host Address:** The IP address or domain name of the MySQL server.
- **Port:** The listening port of the MySQL server, with a default value of 3306.
- **Username:** The username for connecting to the MySQL server.
- **Password:** The password for connecting to the MySQL server.
- **Database:** The name of the database to connect to.
### 2.2 Choosing a Connection Method
Navicat supports various connection methods:
- **Standard TCP/IP Connection:** Connect directly to the MySQL server using the TCP/IP protocol.
- **SSH Tunnel Connection:** Connect securely via an SSH tunnel, requiring the specification of the SSH server address, port, username, and password.
- **Local Socket Connection:** Connect to the MySQL server using a local socket file, suitable for situations where Navicat and the MySQL server are running on the same computer.
### 2.3 Connection Verification and Troubleshooting
After configuring the connection parameters, connection verification is necessary. If the connection fails, check the following potential issues:
- **Incorrect Parameters:** Ensure the connection parameters are correct.
- **Firewall Restrictions:** Check if the firewall is blocking Navicat's connection to the MySQL server.
- **Server Status:** Make sure the MySQL server is running and accepting connections.
- **Network Issues:** Verify that the network connection is functioning properly.
**Code Block:**
```python
import mysql.connector
# Connection Parameter Configuration
host = "***.*.*.*"
port = 3306
user = "root"
password = "password"
database = "my_database"
# Connection Verification
try:
connection = mysql.connector.connect(
host=host,
port=port,
user=user,
password=password,
database=database
)
print("Connection successful")
except mysql.connector.Error as e:
print("Connection failed:", e)
```
**Logical Analysis:**
This code uses the mysql.connector module in Python to connect to a MySQL database. It first configures the connection parameters, including the host address, port, username, password, and database name. Then it attempts to connect to the database, printing "Connection successful" upon success, or the reason for failure upon failure.
**Parameter Description:**
- `host`: The IP address or domain name of the MySQL server.
- `port`: The listening port of the MySQL server, with a default value of 3306.
- `user`: The username for connecting to the MySQL server.
- `password`: The password for connecting to the MySQL server.
- `database`: The name of the database to connect to.
## 3. Database Management
### 3.1 Creating and Managing Databases
**Creating a Database**
1. Right-click on the connected server node in Navicat, then select "New Database."
2. In the "New Database" dialog box, enter the database name and select the character set and collation rules.
3. Click "OK" to create the database.
**Modifying a Database**
1. Right-click on the database to modify, then select "Properties."
2. In the "Properties" dialog box, modify the database's character set, collation rules, and other attributes.
3. Click "OK" to save changes.
**Deleting a Database**
1. Right-click on the database to delete, then select "Delete."
2. In the "Delete Database" dialog box, confirm the deletion operation.
3. Click "OK" to delete the database.
### 3.2 Creating and Managing Tables
**Creating a Table**
1. Right-click on the database, then select "New Table."
2. In the "New Table" dialog box, enter the table name and define the columns.
3. Click "OK" to create the table.
**Modifying a Table**
1. Right-click on the table to modify, then select "Design."
2. In the "Design" view, add, delete, or modify columns as needed.
3. Click "Save" to save changes.
**Deleting a Table**
1. Right-click on the table to delete, then select "Delete."
2. In the "Delete Table" dialog box, confirm the deletion operation.
3. Click "OK" to delete the table.
### 3.3 Importing and Exporting Data
**Importing Data**
1. Right-click on the table where data will be imported, then select "Import Data."
2. In the "Import Data" dialog box, choose the data source and configure import options.
3. Click "OK" to import the data.
**Exporting Data**
1. Right-click on the table where data will be exported, then select "Export Data."
2. In the "Export Data" dialog box, choose the export format and configure export options.
3. Click "OK" to export the data.
**Code Example:**
```sql
-- Creating a database
CREATE DATABASE my_database CHARACTER SET utf8 COLLATE utf8_general_ci;
-- Modifying database character set
ALTER DATABASE my_database CHARACTER SET latin1;
-- Deleting a database
DROP DATABASE my_database;
-- Creating a table
CREATE TABLE my_table (
id INT NOT NULL AUTO_INCREMENT,
name VARCHAR(255) NOT NULL,
age INT NOT NULL,
PRIMARY KEY (id)
);
-- Modifying a table
ALTER TABLE my_table ADD COLUMN email VARCHAR(255);
-- Deleting a table
DROP TABLE my_table;
-- Importing data
LOAD DATA INFILE 'data.csv' INTO TABLE my_table FIELDS TERMINATED BY ',' LINES TERMINATED BY '\n';
-- Exporting data
SELECT * FROM my_table INTO OUTFILE 'data.csv' FIELDS TERMINATED BY ',' LINES TERMINATED BY '\n';
```
**Parameter Explanation:**
* `CREATE DATABASE`: Creates a database named `my_database`, with a character set of `utf8` and a collation rule of `utf8_general_ci`.
* `ALTER DATABASE`: Changes the character set of database `my_database` to `latin1`.
* `DROP DATABASE`: Deletes the database `my_database`.
* `CREATE TABLE`: Creates a table named `my_table`, with three columns: `id` (auto-incrementing primary key), `name` (non-nullable string), and `age` (non-nullable integer).
* `ALTER TABLE`: Adds a column named `email` to table `my_table`, with a data type of non-nullable string.
* `DROP TABLE`: Deletes table `my_table`.
* `LOAD DATA INFILE`: Imports data from file `data.csv` into table `my_table`, with fields separated by commas and lines terminated by newline characters.
* `SELECT ... INTO OUTFILE`: Exports data from table `my_table` to file `data.csv`, with fields separated by commas and lines terminated by newline characters.
**Logical Analysis:**
These code examples demonstrate how to perform various database management tasks using SQL statements, including creating and modifying databases, creating and modifying tables, and importing and exporting data. These operations are essential for managing and maintaining databases.
## 4.1 Using the Query Editor
Navicat provides a powerful query editor for writing and executing SQL queries. The query editor supports code completion, syntax highlighting, and error checking to streamline the query writing process.
### Query Editor Interface
The query editor interface includes the following main areas:
- **Query Area:** Used for writing SQL queries.
- **Result Area:** Displays the results of the query.
- **Toolbar:** Provides common query operation buttons, such as Run, Save, and Format.
- **Status Bar:** Shows query execution time, number of result rows, and other information.
### Writing SQL Queries
To write SQL queries, enter the query statement in the query area. Navicat offers code completion functionality, automatically suggesting available options as you type part of the query statement. Additionally, the query editor supports syntax highlighting to help identify syntax errors in the query statement.
### Executing Queries
To execute a query, click the "Run" button on the toolbar. The results will be displayed in the result area. The result area supports various viewing modes, such as table view, tree view, and text view.
### Advanced Features of the Query Editor
The query editor also offers some advanced features, such as:
- **Parameterized Queries:** Allows the use of parameters in queries, enhancing query reusability.
- **Query History:** Records recently executed queries for easy reuse.
- **Query Plans:** Shows the execution plan for a query, helping to optimize query performance.
## 4.2 Data Querying and Filtering
Navicat offers various data querying and filtering options to help users quickly find the data they need.
### Querying Data
To query data, enter a SELECT statement in the query editor. The SELECT statement is used to retrieve data from a table. For example, the following query statement retrieves all customer information from the `customers` table:
```sql
SELECT * FROM customers;
```
### Filtering Data
To filter data, use the WHERE clause in your query statement. The WHERE clause is used to筛选 data based on specified conditions. For example, the following query statement retrieves all customer information from the `customers` table for those from "China":
```sql
SELECT * FROM customers WHERE country = 'China';
```
### Sorting Data
To sort data, use the ORDER BY clause in your query statement. The ORDER BY clause is used to sort data by a specified column. For example, the following query statement retrieves all customer information from the `customers` table and sorts the data by name in ascending order:
```sql
SELECT * FROM customers ORDER BY name ASC;
```
## 4.3 Data Editing and Updating
Navicat allows users to edit and update data directly from the query results.
### Editing Data
To edit data, double-click a cell in the query results. The cell will enter edit mode, allowing you to modify the data directly. After making changes, click the "Save" button to save the modifications.
### Adding Data
To add data, click the "Add" button on the query results toolbar. A new row will be created, where you can input new data. After entering the data, click the "Save" button to add the data.
### Deleting Data
To delete data, select the row to be deleted and then click the "Delete" button on the query results toolbar. The selected row will be deleted.
## 5.1 Managing Stored Procedures and Functions
### 5.1.1 Stored Procedure Management
**Definition:**
Stored procedures are a set of pre-compiled SQL statements stored in the database that can be executed as a single unit. They can accept parameters and return result sets or update data.
**Creating a Stored Procedure:**
```sql
CREATE PROCEDURE [Stored Procedure Name]
AS
BEGIN
-- Stored procedure code
END
```
**Parameter Explanation:**
* `[Stored Procedure Name]`: The name of the stored procedure.
* `BEGIN`: The starting identifier for the stored procedure.
* `END`: The ending identifier for the stored procedure.
**Executing a Stored Procedure:**
```sql
CALL [Stored Procedure Name]([Parameter List])
```
**Logical Analysis:**
1. The `CREATE PROCEDURE` statement creates a stored procedure.
2. `BEGIN` and `END` delimit the code block of the stored procedure.
3. The `CALL` statement executes the stored procedure, passing parameters if necessary.
### 5.1.2 Function Management
**Definition:**
Functions are pre-compiled SQL statements that return a single value. They can accept parameters and are useful for calculations, string operations, or date manipulations.
**Creating a Function:**
```sql
CREATE FUNCTION [Function Name]
(
[Parameter List]
)
RETURNS [Data Type]
AS
BEGIN
-- Function code
END
```
**Parameter Explanation:**
* `[Function Name]`: The name of the function.
* `[Parameter List]`: The list of parameters for the function.
* `RETURNS [Data Type]`: The data type that the function returns.
* `BEGIN`: The starting identifier for the function.
* `END`: The ending identifier for the function.
**Executing a Function:**
```sql
SELECT [Function Name]([Parameter List])
```
**Logical Analysis:**
1. The `CREATE FUNCTION` statement creates a function.
2. `BEGIN` and `END` delimit the code block of the function.
3. The `SELECT` statement executes the function, passing parameters if necessary.
### 5.1.3 Stored Procedure and Function Management in Navicat
Navicat provides a user-friendly interface for managing stored procedures and functions.
**Creating a Stored Procedure/Function:**
1. Right-click on the database node, then select "New" > "Stored Procedure/Function."
2. In the "Create Stored Procedure/Function" dialog box, enter the name, parameters, and code for the stored procedure/function.
**Editing a Stored Procedure/Function:**
1. Right-click on the stored procedure/function, then select "Edit."
2. In the "Edit Stored Procedure/Function" dialog box, modify the code for the stored procedure/function.
**Executing a Stored Procedure/Function:**
1. Right-click on the stored procedure/function, then select "Execute."
2. In the "Execute Stored Procedure/Function" dialog box, enter parameters if necessary.
## 6. Navicat Tips and Best Practices
**6.1 Tips to Improve Connection Efficiency**
***Use Persistent Connections:** Enabling persistent connections can prevent establishing a new connection with each query, thus improving connection efficiency. In Navicat, this option can be checked in the connection properties.
***Optimize Network Settings:** Ensure network connectivity is stable and adjust network settings to optimize data transfer speed. For example, adjust the MTU size or enable TCP window scaling.
***Use SSH Tunnels:** If the database server is located remotely or behind a firewall, SSH tunnels can be used to establish secure connections. In Navicat, SSH tunnel parameters can be set in the connection properties.
**6.2 Methods to Optimize Query Performance**
***Use Indexes:** Creating indexes on frequently queried columns can significantly improve query performance. Navicat provides an "Index Manager" for easily creating and managing indexes.
***Optimize Query Statements:** Using appropriate join operators (AND/OR), avoiding unnecessary subqueries, and using efficient aggregate functions (such as SUM(), COUNT()) can optimize query statements.
***Use Query Plans:** Navicat provides a "Query Plan" feature that shows the steps and time taken for query execution. Analyzing query plans can help identify performance bottlenecks and optimizations.
**6.3 Suggestions to Ensure Database Security**
***Use Strong Passwords:** Set strong passwords for database users and change them regularly.
***Enable SSL Encryption:** Enabling SSL encryption can protect database connections from eavesdropping and tampering. In Navicat, the SSL option can be enabled in the connection properties.
***Limit User Permissions:** Grant the minimum permissions according to the user's responsibilities and needs. Navicat provides a "User Manager" for conveniently managing user permissions.
***Regularly Backup the Database:** Regular backups can prevent data loss. Navicat provides a "Backup Manager" for easily creating and managing backups.

 百万级
高质量VIP文章无限畅学
百万级
高质量VIP文章无限畅学
 千万级
优质资源任意下载
千万级
优质资源任意下载
 C知道
免费提问 ( 生成式Al产品 )
C知道
免费提问 ( 生成式Al产品 )
0
0
相关推荐

专栏目录
最低0.47元/天 解锁专栏
买1年送3月
百万级
高质量VIP文章无限畅学
千万级
优质资源任意下载
C知道
免费提问 ( 生成式Al产品 )
最新推荐
【EDEM仿真非球形粒子专家】:揭秘提升仿真准确性的核心技术

# 1. EDEM仿真软件概述与非球形粒子的重要性
## 1.1 EDEM仿真软件简介
EDEM是一种用于粒子模拟的仿真工具,能够准确地模拟和分析各种离散元方法(Discrete Element Method, DEM)问题。该软件广泛应用于采矿
雷达数据压缩技术突破:提升效率与存储优化新策略

# 1. 雷达数据压缩技术概述
在现代军事和民用领域,雷达系统产生了大量的数据,这些数据的处理和存储是技术进步的关键。本章旨在对雷达数据压缩技术进行简要
SaTScan软件的扩展应用:与其他统计软件的协同工作揭秘

# 1. SaTScan软件概述
SaTScan是一种用于空间、时间和空间时间数据分析的免费软件,它通过可变动的圆形窗口统计分析方法来识别数据中的异常聚集。本章将简要介绍SaTScan的起源、功能及如何在不同领域中得到应用。SaTScan软件特别适合公共卫生研究、环境监测和流行病学调查等领域,能够帮助研究人员和决策者发现数据中的模式和异常,进行预防和控制策略的制定。
在
SGMII传输层优化:延迟与吞吐量的双重提升技术

# 1. SGMII传输层优化概述
在信息技术不断发展的今天,网络传输的效率直接影响着整个系统的性能。作为以太网物理层的标准之一,SGMII(Serial Gigabit Media Independent Interface)在高性能网络设计中起着至关重要的作用。SGMII传输层优化,就是通过一系列手段来提高数据传输效率,减少延迟,提升吞吐量,从而达到优化整个网络性能的目
Java SPI与依赖注入(DI)整合:技术策略与实践案例
# 1. Java SPI机制概述
## 1.1 SPI的概念与作用
Service Provider Interface(SPI)是Java提供的一套服务发现机制,允许我们在运行时动态地提供和替换服务实现。它主要被用来实现模块之间的解耦,使得系统更加灵活,易于扩展。通过定义一个接口以及一个用于存放具体服务实现类的配置文件,我们可以轻松地在不修改现有代码的情况下,增加或替换底
【矩阵求逆的历史演变】:从高斯到现代算法的发展之旅

# 1. 矩阵求逆概念的起源与基础
## 1.1 起源背景
矩阵求逆是线性代数中的一个重要概念,其起源可以追溯到19世纪初,当时科学家们开始探索线性方程组的解法。早期的数学家如高斯(Carl Friedrich Gauss)通过消元法解决了线性方程组问题,为矩阵求逆奠定了基础。
社交网络分析工具大比拼:Gephi, NodeXL, UCINET优劣全面对比
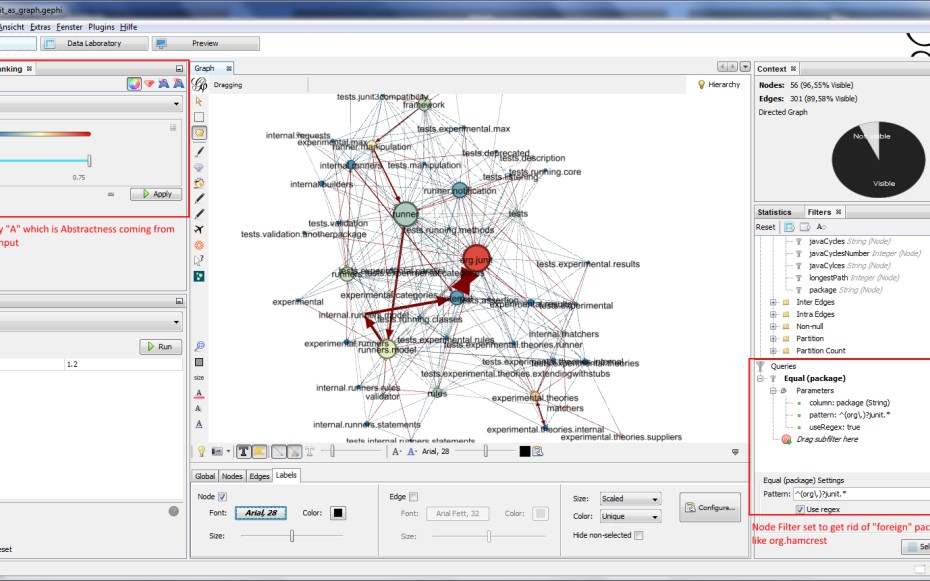
# 1. 社交网络分析概述
社交网络分析是理解和揭示社会结构和信息流的一种强有力的工具,它跨越了人文和社会科学的边界,找到了在计算机科学中的一个牢固立足点。这一分析不仅限于对人际关系的研究,更扩展到信息传播、影响力扩散、群体行为等多个层面。
## 1.1 社交网络分析的定义
社交网络分析(Social Network Analysis,简称SNA)是一种研究社会结构的方法论
原型设计:提升需求沟通效率的有效途径

# 1. 原型设计概述
在现代产品设计领域,原型设计扮演着至关重要的角色。它不仅是连接设计与开发的桥梁,更是一种沟通与验证设计思维的有效工具。随着技术的发展和市场对产品快速迭代的要求不断提高,原型设计已经成为产品生命周期中不可或缺的一环。通过创建原型,设计师能够快速理解用户需求,验证产品概念,及早发现潜在问题,并有效地与项目相关方沟通想法,从而推动产品向前发展。本章将对原型设计的必要性、演变以及其在产品开发过程中的作
Python环境监控高可用构建:可靠性增强的策略

# 1. Python环境监控高可用构建概述
在构建Python环境监控系统时,确保系统的高可用性是至关重要的。监控系统不仅要在系统正常运行时提供实时的性能指标,而且在出现故障或性能瓶颈时,能够迅速响应并采取措施,避免业务中断。高可用监控系统的设计需要综合考虑监控范围、系统架构、工具选型等多个方面,以达到对资源消耗最小化、数据准确性和响应速度最优化的目
【信号异常检测法】:FFT在信号突变识别中的关键作用
# 1. 信号异常检测法基础
## 1.1 信号异常检测的重要性
在众多的IT和相关领域中,从工业监控到医疗设备,信号异常检测是确保系统安全和可靠运行的关键技术。信号异常检测的目的是及时发现数据中的不规则模式,这些模式可能表明了设备故障、网络攻击或其他需要立即关注的问题。
## 1.2 信号异常检测方法概述
信号异常检测的方法多种多样,包括统计学方法、机器学习方法、以及基于特定信号
资源上传下载、课程学习等过程中有任何疑问或建议,欢迎提出宝贵意见哦~我们会及时处理!
点击此处反馈


专栏目录
最低0.47元/天 解锁专栏
买1年送3月
百万级
高质量VIP文章无限畅学
千万级
优质资源任意下载
C知道
免费提问 ( 生成式Al产品 )