
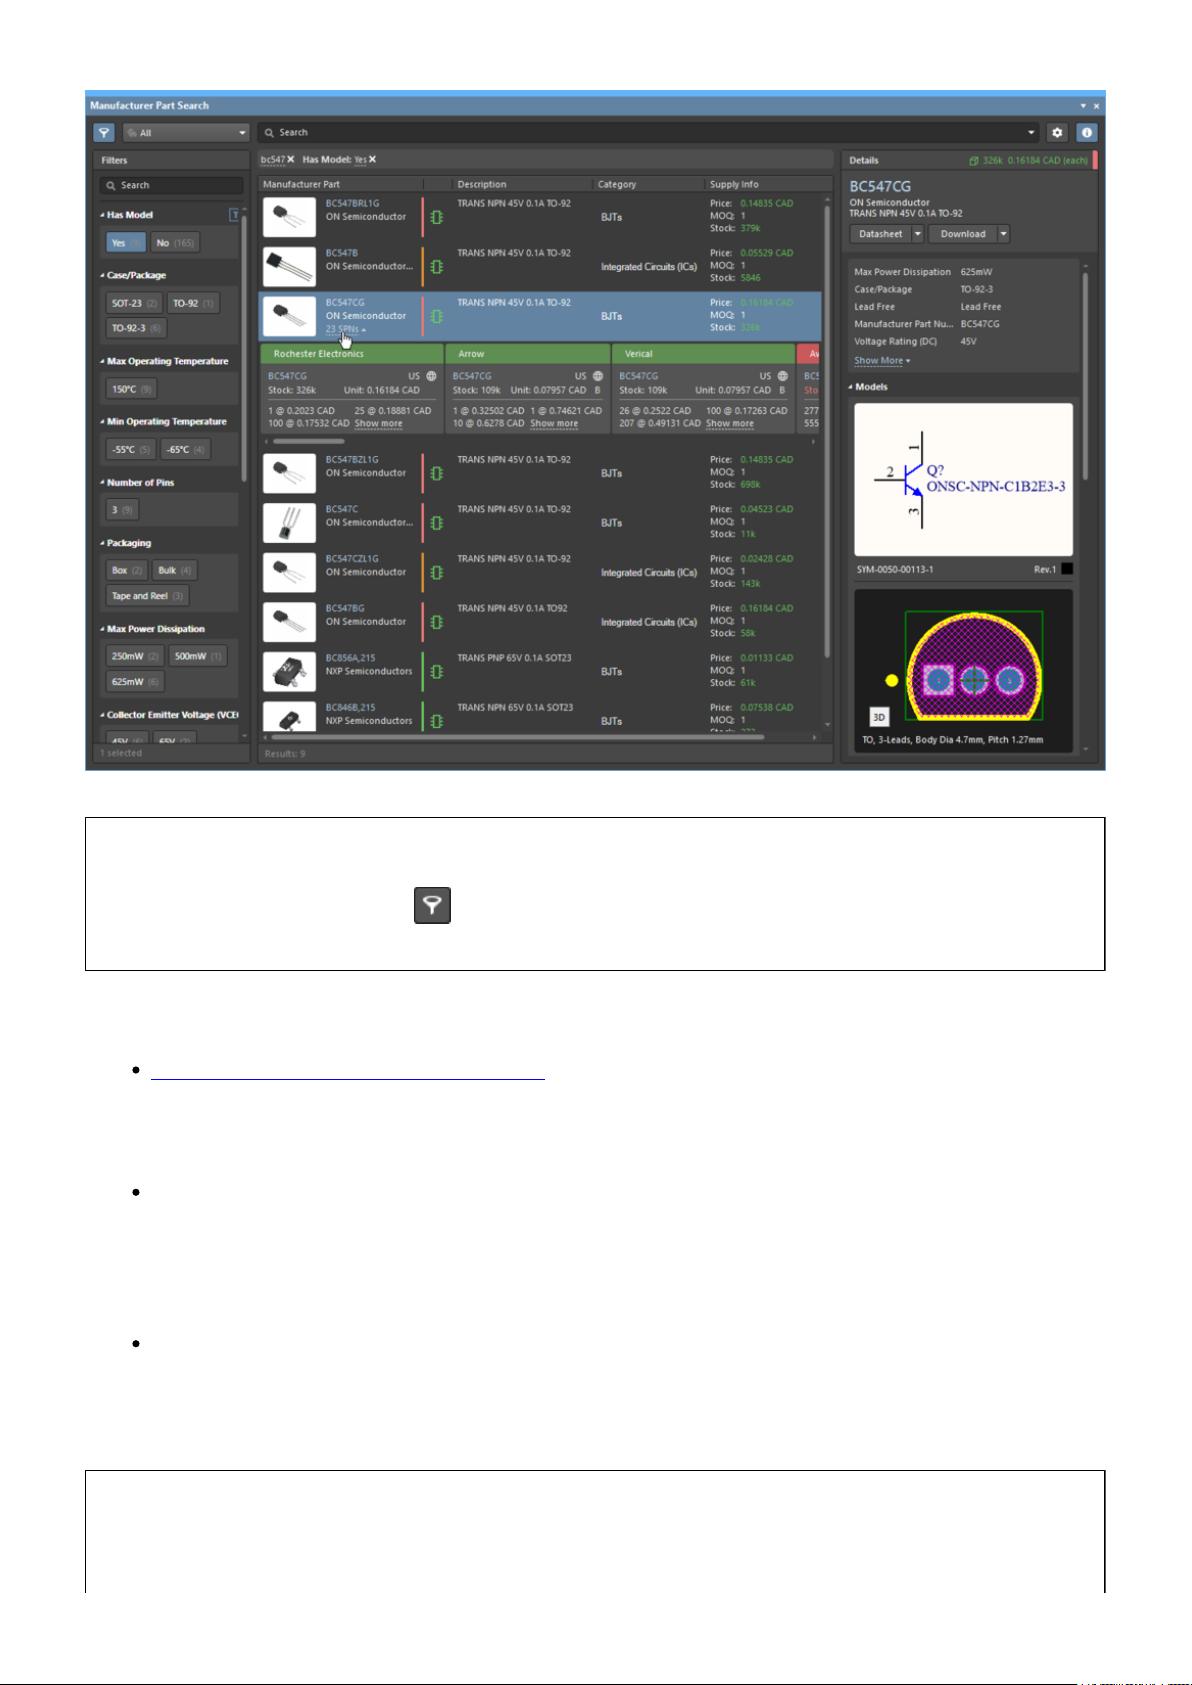
Use the faceted search features in the Manufacturer Part Search panel to only display components with models.
The Filters region of the panel includes a Has Model filter. Enable this to only display
design-ready parts. Click to display the available filters.
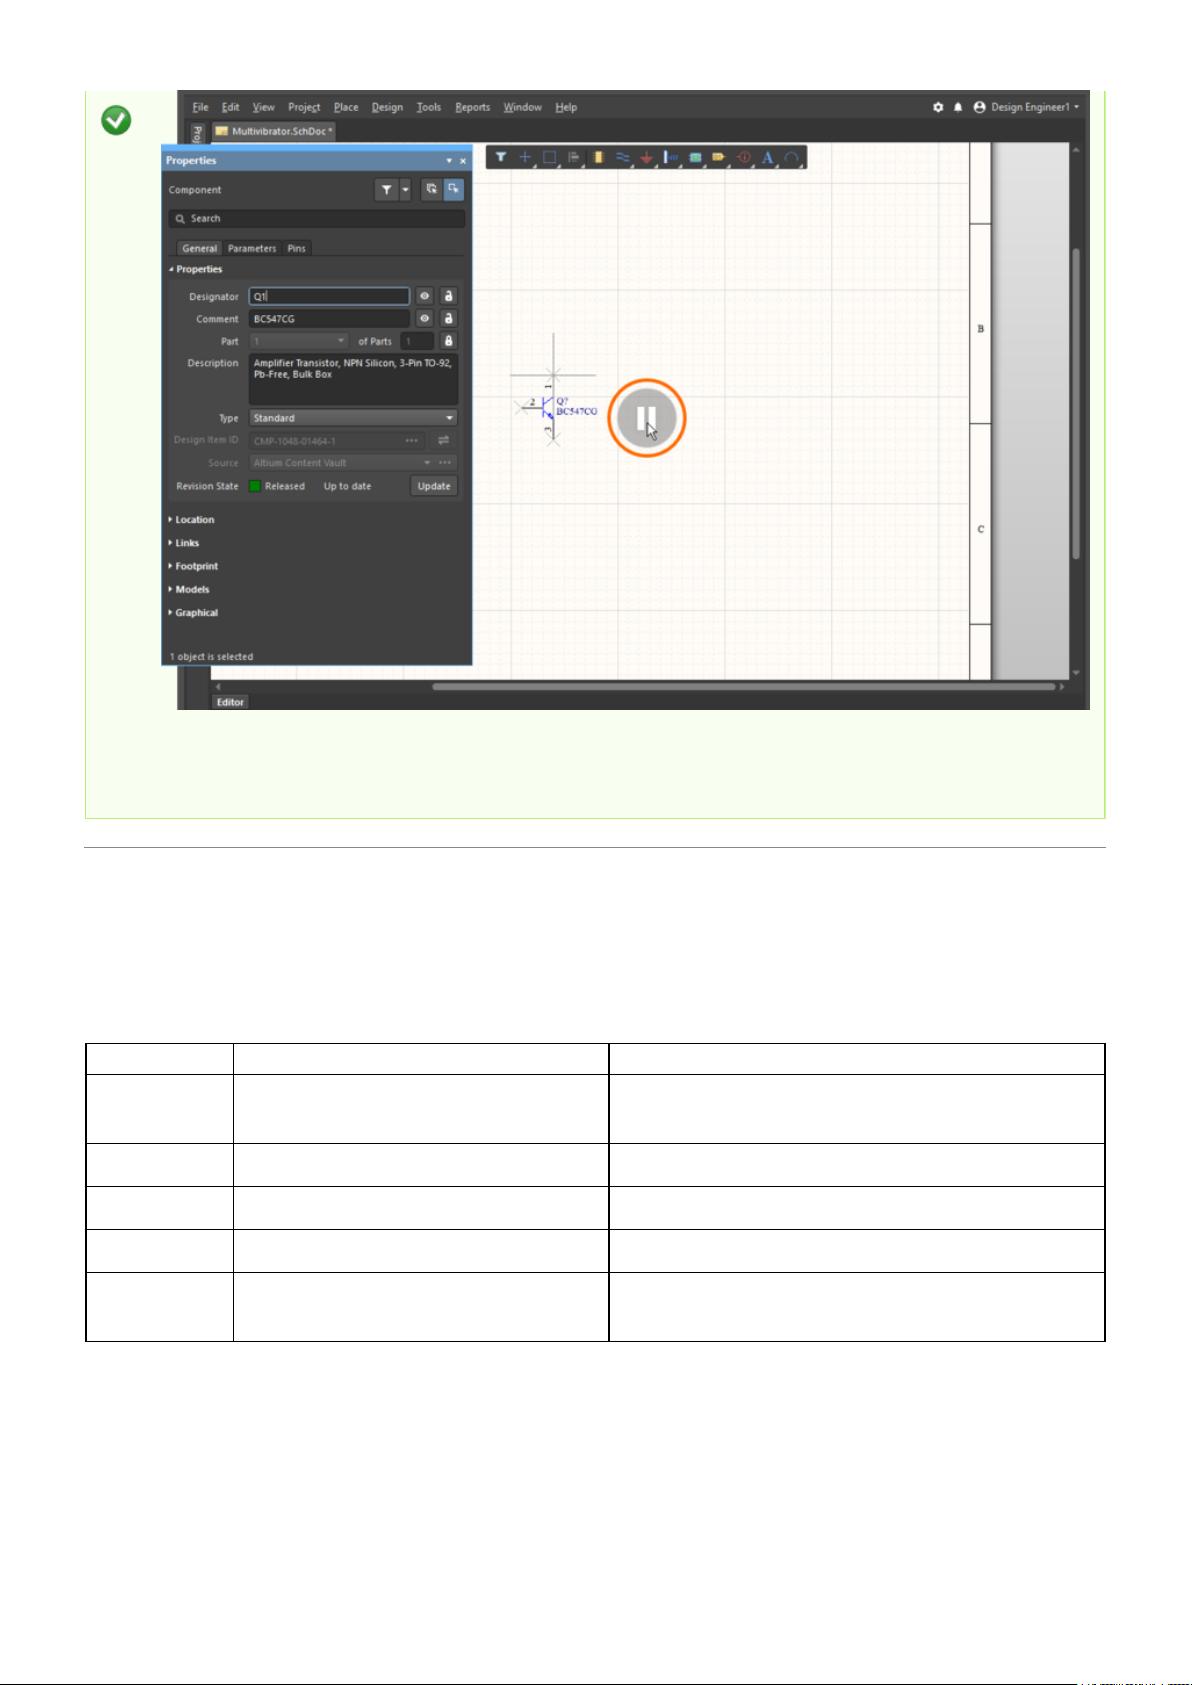
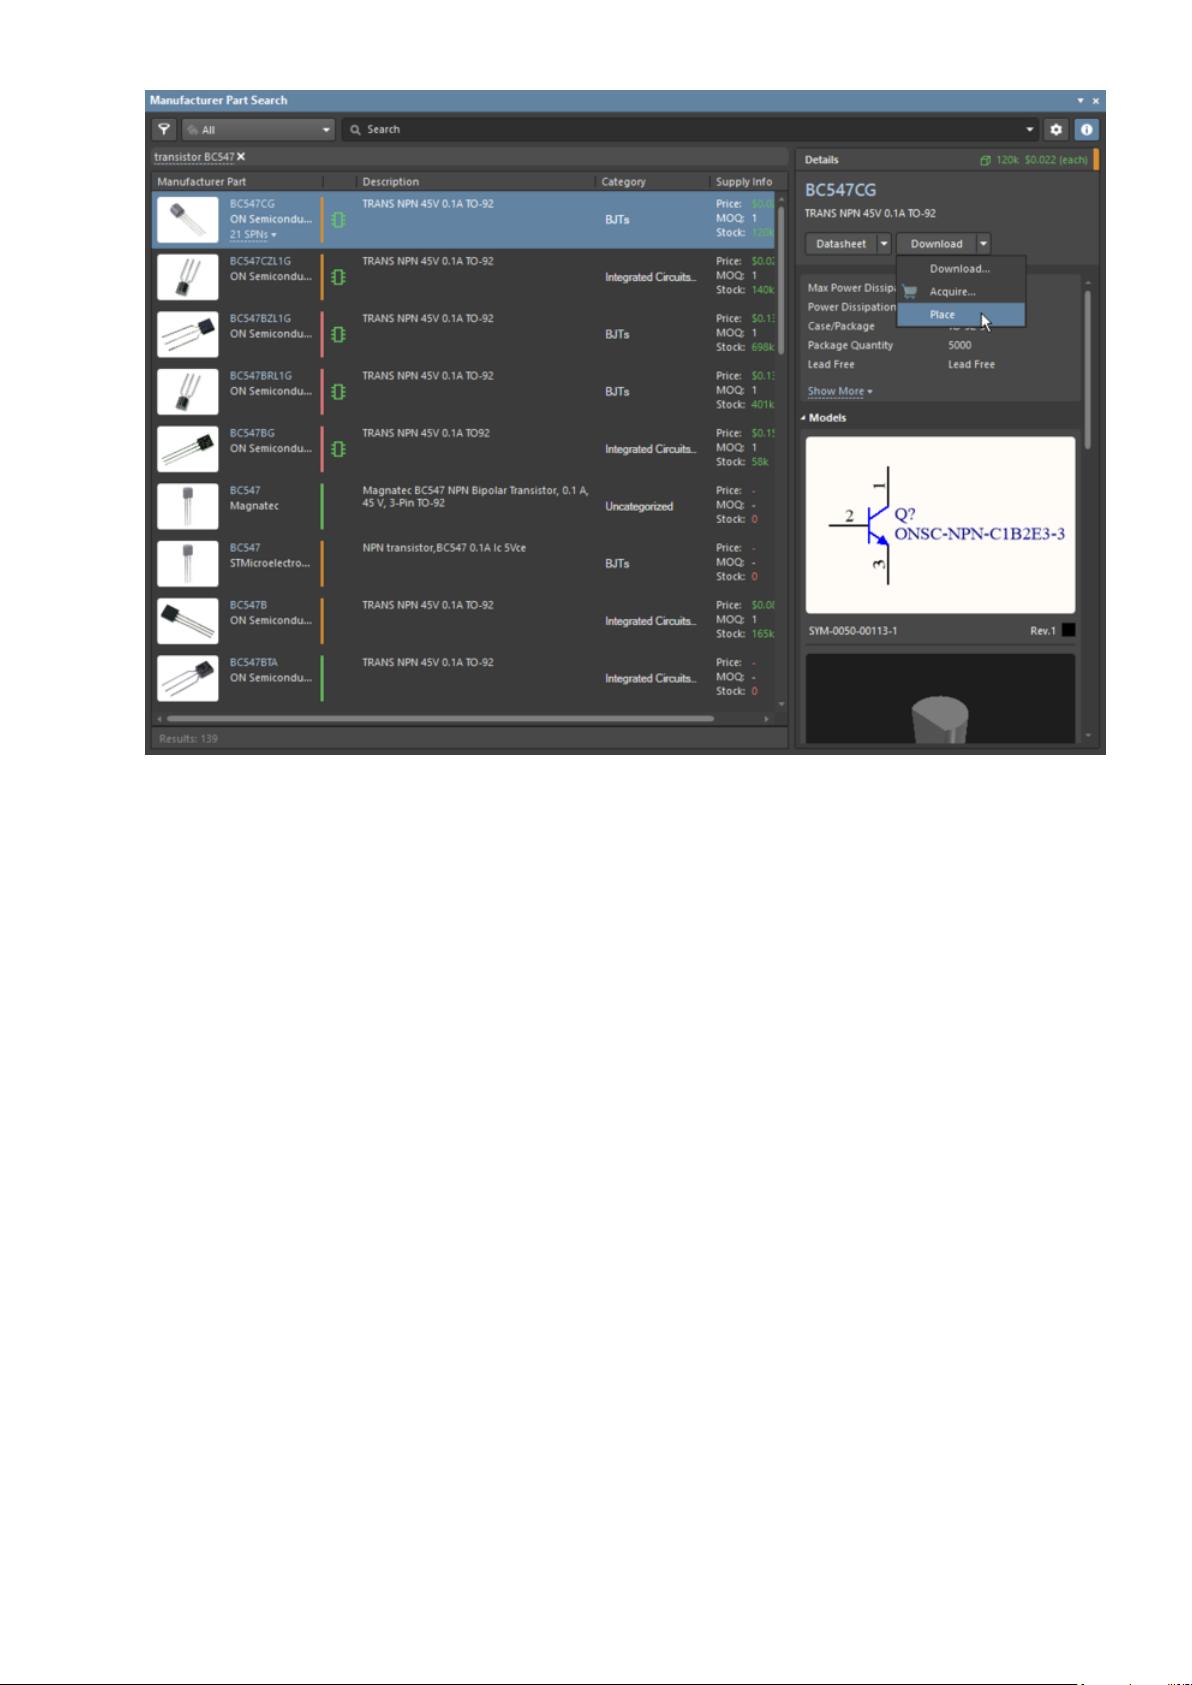
To place a component from the panel, you can:
Select Place from the Download button - the cursor automatically moves to be within the
bounds of the schematic sheet and the component appears floating on the cursor; position it
and click to place. After placing a component, another instance of the same component will
appear on the cursor; right-click to drop out of placement mode.
Right-click on the component and select Place from the context menu. The component
appears floating on the cursor; position it and click to place. Note that if the panel is floating
over the workspace, it will fade to allow you to see the schematic and place the component.
After placing a component, another instance of the same component will appear on the
cursor; right-click to drop out of placement mode.
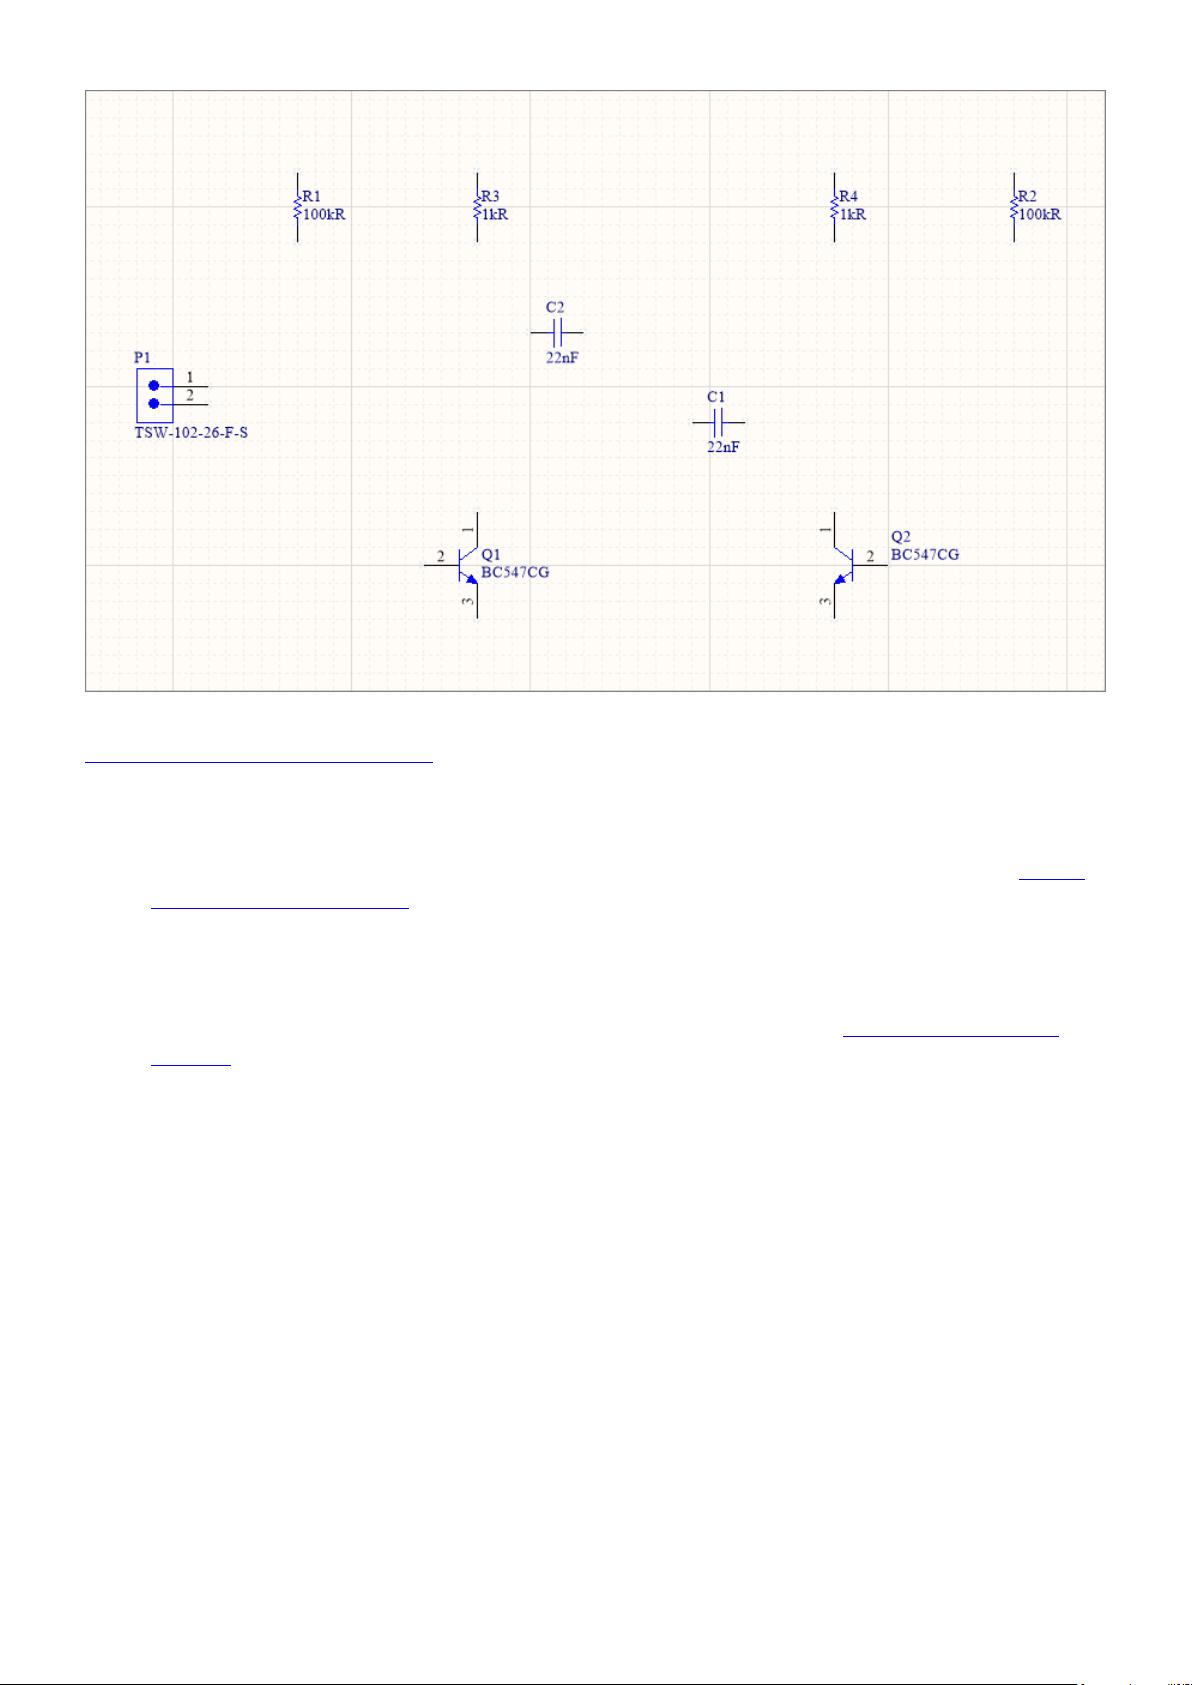
Click and drag - click and drag the component from the grid region of the panel onto this
sheet. This mode requires that the cursor is held down; the component is placed when the
cursor is released. Using this technique only one component is placed. After placing the
component, you are free to select another component or another command.
剩余119页未读,继续阅读

lanzehua
- 粉丝: 7
- 资源: 3
 我的内容管理
收起
我的内容管理
收起
- 我的资源
快来上传第一个资源
 我的收益 登录查看自己的收益
 我的积分
登录查看自己的积分
我的积分
登录查看自己的积分
 我的C币
登录后查看C币余额
我的C币
登录后查看C币余额
 我的收藏
我的收藏  我的下载
我的下载  下载帮助
下载帮助

会员权益专享


最新资源
- 计算机系统基石:深度解析与优化秘籍
- 《ThinkingInJava》中文版:经典Java学习宝典
- 《世界是平的》新版:全球化进程加速与教育挑战
- 编程珠玑:程序员的基础与深度探索
- C# 语言规范4.0详解
- Java编程:兔子繁殖与素数、水仙花数问题探索
- Oracle内存结构详解:SGA与PGA
- Java编程中的经典算法解析
- Logback日志管理系统:从入门到精通
- Maven一站式构建与配置教程:从入门到私服搭建
- Linux TCP/IP网络编程基础与实践
- 《CLR via C# 第3版》- 中文译稿,深度探索.NET框架
- Oracle10gR2 RAC在RedHat上的安装指南
- 微信技术总监解密:从架构设计到敏捷开发
- 民用航空专业英汉对照词典:全面指导航空教学与工作
- Rexroth HVE & HVR 2nd Gen. Power Supply Units应用手册:DIAX04选择与安装指南
资源上传下载、课程学习等过程中有任何疑问或建议,欢迎提出宝贵意见哦~我们会及时处理!
点击此处反馈


