【Matlab Axis Masterclass】: 15 Tips to Master Axes Control with Ease
发布时间: 2024-09-13 22:15:20 阅读量: 38 订阅数: 30 
# **Matlab Coordinate Axes: 15 Tips for Mastering Axes**
## **1. Overview of Matlab Coordinate Axes**
Coordinate axes are one of the fundamental elements for plotting graphs in Matlab. They define the spatial positions of data points and provide a visual reference for the graphics. Matlab offers a wide range of options to customize the appearance and behavior of coordinate axes to meet various plotting requirements.
Coordinate axes consist of a horizontal x-axis and a vertical y-axis that intersect at the origin. The range of the axes defines the area where data points can be plotted, while the tick marks provide intervals to help interpret the data. Axes may also include labels and titles to provide additional information about the graph.
## **2. Setting Coordinate Axes Attributes**
Setting coordinate axes attributes is a key part of customizing the appearance and behavior of axes. Matlab provides various properties that allow you to control the range, ticks, labels, title, grid, and background of the axes.
### **2.1 Coordinate Axes Range and Ticks**
#### **2.1.1 Setting the Coordinate Axes Range**
The coordinate axes range defines the minimum and maximum values for data points on the axes. You can use the `axis` function to set the coordinate axes range. The syntax is as follows:
```matlab
axis([xmin xmax ymin ymax])
```
Where `xmin` and `xmax` specify the minimum and maximum values for the x-axis, and `ymin` and `ymax` specify the minimum and maximum values for the y-axis.
**Code Block:**
```matlab
% Set the x-axis range to [0, 10]
axis([0 10 0 10])
% Set the y-axis range to [-5, 5]
axis([0 10 -5 5])
```
**Logical Analysis:**
* The first code block sets the x-axis range to [0, 10] and the y-axis range to [0, 10].
* The second code block maintains the x-axis range and sets the y-axis range to [-5, 5].
#### **2.1.2 Setting the Coordinate Axes Ticks**
Coordinate axes ticks define the tick marks and tick labels displayed on the axes. You can use the `set` function to set the coordinate axes ticks. The syntax is as follows:
```matlab
set(gca, 'XTick', [x1 x2 ...])
set(gca, 'YTick', [y1 y2 ...])
```
Where `gca` gets the current axis handle, and `XTick` and `YTick` specify the tick values for the x-axis and y-axis, respectively.
**Code Block:**
```matlab
% Set the x-axis ticks to [0, 2, 4, 6, 8, 10]
set(gca, 'XTick', [0 2 4 6 8 10])
% Set the y-axis ticks to [-5, -2, 0, 2, 5]
set(gca, 'YTick', [-5 -2 0 2 5])
```
**Logical Analysis:**
* The first code block sets the x-axis ticks to [0, 2, 4, 6, 8, 10].
* The second code block sets the y-axis ticks to [-5, -2, 0, 2, 5].
### **2.2 Coordinate Axes Labels and Titles**
#### **2.2.1 Setting Coordinate Axes Labels**
Coordinate axes labels are the text displayed next to the tick marks on the axes. You can use the `xlabel` and `ylabel` functions to set coordinate axes labels. The syntax is as follows:
```matlab
xlabel('X-Axis Label')
ylabel('Y-Axis Label')
```
Where `xlabel` and `ylabel` specify the label text for the x-axis and y-axis, respectively.
**Code Block:**
```matlab
% Set the x-axis label to "Time (s)"
xlabel('Time (s)')
% Set the y-axis label to "Amplitude (V)"
ylabel('Amplitude (V)')
```
**Logical Analysis:**
* The first code block sets the x-axis label to "Time (s)".
* The second code block sets the y-axis label to "Amplitude (V)".
#### **2.2.2 Setting Coordinate Axes Titles**
Coordinate axes titles are the text displayed on the axes to describe their content. You can use the `title` function to set coordinate axes titles. The syntax is as follows:
```matlab
title('Plot Title')
```
Where the string 'Plot Title' is replaced with the title you want to set for the graph.
---
# **3. Axis Transformations**
## **3.1 Linear Transformations**
Linear transformations are among the most basic types of coordinate axes transformations. They can translate or scale the axes along the x-axis or y-axis.
### **3.1.1 Translating Axes**
Translating axes involves moving the axes along the x-axis or y-axis by a certain distance. You can use the `xlim` and `ylim` functions to set the range of the axes, thus achieving translation.
```matlab
% Create an axes
figure;
plot(1:10, rand(1, 10));
% Translate the axes
xlim([0, 12]);
ylim([0, 1.5]);
```
**Logical Analysis of the Code:**
* `plot(1:10, rand(1, 10))`: Draws a line graph containing 10 random numbers.
* `xlim([0, 12])`: Sets the x-axis range to [0, 12], translating the axes 2 units to the right along the x-axis.
* `ylim([0, 1.5])`: Sets the y-axis range to [0, 1.5], translating the axes 0.5 units up along the y-axis.
### **3.1.2 Scaling Axes**
Scaling axes involves enlarging or reducing the axes by a certain multiple along the x-axis or y-axis. You can use the `daspect` function to set the aspect ratio of the axes, thus achieving scaling.
```matlab
% Create an axes
figure;
plot(1:10, rand(1, 10));
% Scale the axes
daspect([2 1 1]);
```
**Logical Analysis of the Code:**
* `plot(1:10, rand(1, 10))`: Draws a line graph containing 10 random numbers.
* `daspect([2 1 1])`: Sets the aspect ratio of the axes to [2 1 1], enlarging the x-axis by 2 times while keeping the y-axis unchanged.
## **3.2 Logarithmic Transformations**
Logarithmic transformations are nonlinear transformations that can distribute the data on different scales, making the relationship between data points clearer.
### **3.2.1 Creating Logarithmic Axes**
You can use the `loglog` function to create logarithmic axes.
```matlab
% Create a logarithmic axes
figure;
loglog(1:10, rand(1, 10));
```
**Logical Analysis of the Code:**
* `loglog(1:10, rand(1, 10))`: Draws a logarithmic axis line graph containing 10 random numbers.
### **3.2.2 Setting Logarithmic Axes Properties**
The properties of logarithmic axes can be set using the `set` function.
```matlab
% Create a logarithmic axes
figure;
loglog(1:10, rand(1, 10));
% Set logarithmic axes properties
set(gca, 'XScale', 'log', 'YScale', 'log');
```
**Logical Analysis of the Code:**
* `loglog(1:10, rand(1, 10))`: Draws a logarithmic axis line graph containing 10 random numbers.
* `set(gca, 'XScale', 'log', 'YScale', 'log')`: Sets both the x-axis and y-axis scales to logarithmic scales.
# **4. Axis Annotations**
Axis annotations are elements used to add additional information to axes. These annotations can be text, graphics, or a combination of both.
### **4.1 Text Annotations**
#### **4.1.1 Adding Text Annotations**
To add text annotations, you can use the `text` function. The syntax for this function is as follows:
```
text(x, y, str, 'PropertyName', PropertyValue, ...)
```
Where:
* `x` and `y` specify the location of the annotation.
* `str` is the text to be displayed.
* `'PropertyName'` and `PropertyValue` are optional pairs of property names and values used to set the annotation's properties.
For example, the following code adds a text annotation to the axes:
```
text(10, 20, 'Text Annotation', 'Color', 'red', 'FontSize', 14);
```
This creates a red text annotation with a font size of 14 located at `x = 10` and `y = 20`.
#### **4.1.2 Setting Text Annotation Properties**
Text annotation properties can be set using the `'PropertyName'` and `PropertyValue` parameters. Some commonly used properties include:
* `'Color'`: Sets the text color.
* `'FontSize'`: Sets the text font size.
* `'FontName'`: Sets the text font.
* `'HorizontalAlignment'`: Sets the horizontal alignment of the text.
* `'VerticalAlignment'`: Sets the vertical alignment of the text.
### **4.2 Graphic Annotations**
#### **4.2.1 Adding Graphic Annotations**
To add graphic annotations, you can use functions like `line`, `rectangle`, or `circle`. The syntax for these functions is as follows:
```
line(x, y, 'PropertyName', PropertyValue, ...)
rectangle('Position', [x, y, width, height], 'PropertyName', PropertyValue, ...)
circle('Center', [x, y], 'Radius', radius, 'PropertyName', PropertyValue, ...)
```
Where:
* `x` and `y` specify the location of the graphic.
* `'PropertyName'` and `PropertyValue` are optional pairs of property names and values used to set the graphic's properties.
For example, the following code adds a rectangle annotation to the axes:
```
rectangle('Position', [10, 20, 50, 30], 'FaceColor', 'blue', 'EdgeColor', 'red');
```
This creates a rectangle annotation with a blue fill and red border located at `x = 10`, `y = 20`, with a width of 50 and a height of 30.
#### **4.2.2 Setting Graphic Annotation Properties**
Graphic annotation properties can be set using the `'PropertyName'` and `PropertyValue` parameters. Some commonly used properties include:
* `'FaceColor'`: Sets the fill color.
* `'EdgeColor'`: Sets the border color.
* `'LineWidth'`: Sets the border width.
* `'LineStyle'`: Sets the border style.
* `'Marker'`: Sets the marker type.
* `'MarkerSize'`: Sets the marker size.
# **5. Axis Layout**
### **5.1 Multiple Axes**
#### **5.1.1 Creating Multiple Axes**
Creating multiple axes in the same graphic can realize visualizing different datasets or information in different coordinate systems. Matlab provides the `subplot` function to create multiple axes. The syntax for the `subplot` function is as follows:
```
subplot(m, n, p)
```
Where:
* `m`: Specifies the number of rows of subplots in the figure.
* `n`: Specifies the number of columns of subplots in the figure.
* `p`: Specifies the position of the current subplot in the figure.
For example, to create a figure with two subplots, where the first subplot is in the first row and first column, and the second subplot is in the first row and second column, you can use the following code:
```
subplot(1, 2, 1);
subplot(1, 2, 2);
```
#### **5.1.2 Coordinating Multiple Axes**
When creating multiple axes, it may be necessary to coordinate them to ensure they have the same scale or range. Matlab provides the `linkaxes` function to coordinate axes. The syntax for the `linkaxes` function is as follows:
```
linkaxes(axes_array, 'property')
```
Where:
* `axes_array`: An array of axes to be coordinated.
* `property`: The property to be coordinated, such as `'xlims'`, `'ylims'`, or `'view'`.
For example, to link the x-axis range of two axes together, you can use the following code:
```
linkaxes([ax1, ax2], 'xlims');
```
### **5.2 Sub-Axes**
#### **5.2.1 Creating Sub-Axes**
Sub-axes are smaller axes nested within the main axes. They are often used to display information related to the main axes but with a different range or scale. Matlab provides the `axes` function to create sub-axes. The syntax for the `axes` function is as follows:
```
axes('Position', [left, bottom, width, height])
```
Where:
* `Position`: The position and size of the sub-axes, specified as `[left, bottom, width, height]`, where `left` and `bottom` are the relative positions of the lower-left corner of the sub-axes, and `width` and `height` are the width and height of the sub-axes.
For example, to create a sub-axes in the top right corner of the main axes, you can use the following code:
```
axes('Position', [0.6, 0.6, 0.3, 0.3]);
```
#### **5.2.2 Setting Sub-Axes Properties**
Sub-axes have the same properties as the main axes and can be set to customize their appearance and behavior. You can use the same functions and methods for the main axes to set the properties of sub-axes.
For example, to set the title of the sub-axes, you can use the following code:
```
title('Sub-Axes Title');
```
# **6.1 Axis Event Handling**
### **6.1.1 Responding to Axis Events**
Matlab provides various events that can be used to respond to user interactions on the axes. These events include:
- `ButtonDownFcn`: Triggered when the mouse is pressed on the axes.
- `ButtonUpFcn`: Triggered when the mouse is released on the axes.
- `WindowButtonDownFcn`: Triggered when the mouse is pressed within the axes window.
- `WindowButtonUpFcn`: Triggered when the mouse is released within the axes window.
- `WindowButtonMotionFcn`: Triggered when the mouse is moved within the axes window.
To respond to these events, you can use the `set` function to assign an event handling function to the corresponding event properties. For example, to respond to the event of the mouse being pressed on the axes, you can use the following code:
```
set(gca, 'ButtonDownFcn', @myButtonDownFcn);
```
Where `myButtonDownFcn` is a custom event handling function.
### **6.1.2 Customizing Axis Event Handling Functions**
Custom axis event handling functions must be functions that accept an event object as the input parameter. The event object contains information about the triggering event, such as mouse position and button status.
Below is an example of a custom axis event handling function that prints the mouse position when the mouse is pressed on the axes:
```matlab
function myButtonDownFcn(hObject, eventdata)
% Get the mouse position
mousePosition = get(gca, 'CurrentPoint');
% Print the mouse position
disp(['Mouse position: ', num2str(mousePosition(1)), ', ', num2str(mousePosition(2))]);
end
```
To use a custom event handling function, assign it to the corresponding event property as shown above.

 百万级
高质量VIP文章无限畅学
百万级
高质量VIP文章无限畅学
 千万级
优质资源任意下载
千万级
优质资源任意下载
 C知道
免费提问 ( 生成式Al产品 )
C知道
免费提问 ( 生成式Al产品 )
0
0
专栏目录
最低0.47元/天 解锁专栏
买1年送3月
百万级
高质量VIP文章无限畅学
千万级
优质资源任意下载
C知道
免费提问 ( 生成式Al产品 )
最新推荐
揭秘Web性能的秘密:静态与动态请求处理的终极指南
# 摘要
随着互联网技术的快速发展,Web性能优化成为提升用户体验的关键因素。本文首先介绍了Web性能与请求处理的基础知识,随后分别探讨了静态内容与动态请求处理的优化策略,包括静态资源的快速响应、缓存机制、负载均衡以及动态内容生成的流程优化。文章深入分析了Web性能监控工具与指标,以及如何诊断和定位性能瓶颈,并实施有效的优化措施。通过对高流量网站的案例研究,本文展
【打造高效JK触发器移位寄存器】:数字电路设计实践指南

# 摘要
本文系统地探讨了JK触发器及其在移位寄存器中的应用。第一章介绍了JK触发器的基础知识和特性,第二章详细分析了移位寄存器的设计原理,包括工作模式、关键参数以及实用设计技巧。第三章专注于JK触发器与移位寄存器的结合机制和电路实现,以及提升性能的方法。第四章讨论了JK触发器移位寄存器的高级应用,如可编程移位寄存器的实现和在数字信号处理中的角色。第
C# POST请求优化:表单提交、文件上传与异步编程的高效结合
# 摘要
本文全面探讨了C#中POST请求的实现与优化,从表单提交的基础机制、性能优化、验证与安全措施,到文件上传的协议要求、性能提升、安全防护和代码实现。文章进一步深入异步编程在POST请求中的应用,分析其在C#中的实现原理和实践案例,并提出优化策略和最佳实践。最后,通过对高效表单与文件提交系统的综合案例分析,展现了系统需求、关键技术的实现以及性能评估。本文不仅关注当前技术实践,还展望了网络技术发展、异步编程演进以及C#在Web开发中新的应用趋势。
# 关键字
C# POST请求;表单提交;性能优化;文件上传;异步编程;安全性;云计算;单页应用(SPA)
参考资源链接:[C#实现POST
Chroma 8000制造业应用案例分享
# 摘要
本文介绍了Chroma 8000在制造业中的应用,从基础安装、功能验证、系统集成到高级应用,如智能化生产流程控制、质量控制与优化以及设备远程监控与管理。详细分析了Chroma 8000在不同制造业场景中的实际应用案例,包括半导体制造、汽车零部件质量检测以及电子消费品生产线改进。文章还探讨了
J语言函数入门:官方教程第一章实践指南

# 摘要
J语言作为一种函数式编程语言,其函数的应用和管理是构建高效、可维护代码的基础。本文从函数的基础概念出发,深入探讨了函数定义、语法、操作、调用、作用域和生命周期等关键要素。接着,文章进入函数编程实战,涵盖了如何构建实用函数库、高级函数应用以及性能优化与内存管理策略。最后,进阶主题部分探讨了函数式编程的高级概念、并发编程中函数的应用以及结合J语言特性的函数编程模式。本文旨
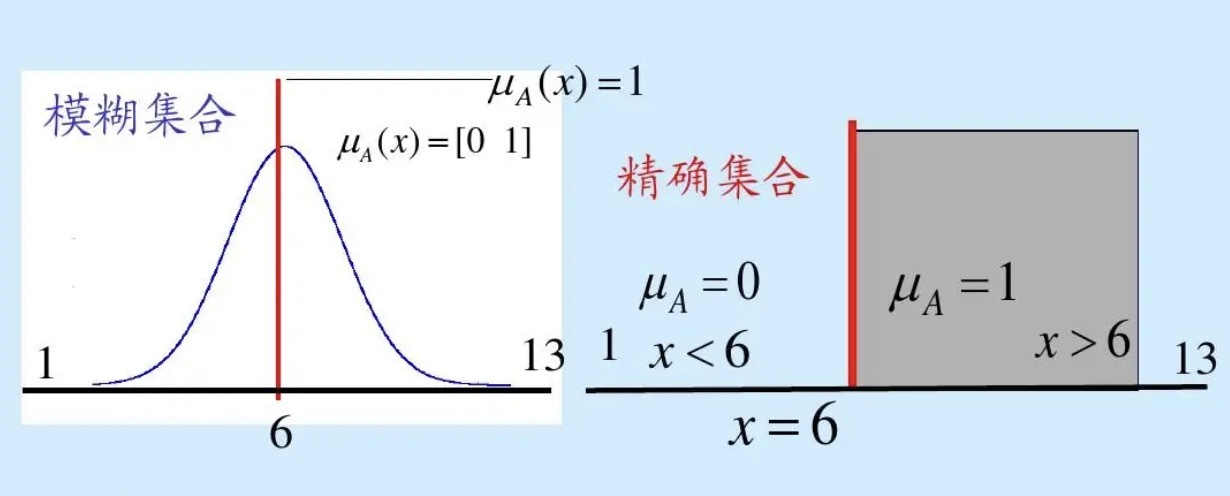
【模糊控制算法突破】:超越传统方法,提升系统智能化与效率
# 摘要
模糊控制算法是一种处理不确定性问题的有效方法,它利用模糊集合理论、模糊逻辑和推理机制来设计模糊控制器。本文首先概述了模糊控制算法的基本原理,随后深入探讨了模糊控制理论基础,包括模糊集合的定义、表示、基本运算、模糊逻辑概念以及推理的类型和方法。此外,文章介绍了模糊控制算法的实现方法,包括编程基础、调试与测试以及性能评估。在应用案例部分,本文分析了模糊控制在工业自动化、智能交通系统和消费电子中的具体应用,并探讨了模糊控制算法优化与面对大数据环境下的挑战
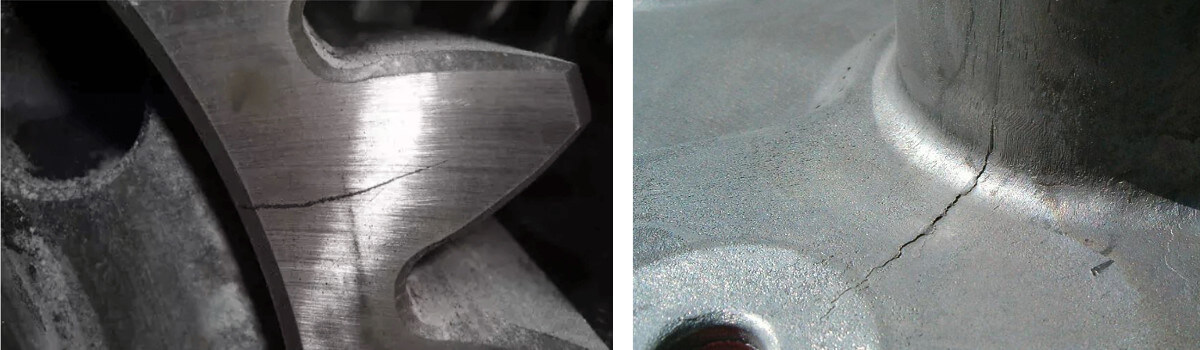
【MATLAB图像处理秘籍】:工件缺陷检测技术从入门到精通
# 摘要
本文系统地探讨了使用MATLAB进行工件缺陷检测的理论和实践应用。首先介绍了MATLAB在图像处理中的基础知识,然后深入分析了缺陷检测的理论基础,包括图像预处理技术和分割技术。随后,文章详细讨论了MATLAB工具箱在实际缺陷检测中的应用,包括图像处理函数的使用和具体案例分析。进阶技术部分着重介绍了高级图像处理算法和深度学习工具箱在MATLAB中的应用。最后,文章探讨了缺
【Sew Movifit FC变频器终极指南】:深入挖掘性能潜力与应用技巧
# 摘要
本文对Sew Movifit FC变频器进行了全面介绍和深入分析,从核心组件解析到性能挖掘,再到应用技巧与案例分享,最后探讨了其未来发展趋势及维护与升级指南。通过详细解析变频器的电力电子组件、控制系统架构、通讯与网络功能,本文揭示了如何挖掘和优化Sew Movifit FC的性能。故障诊断、预防性维护及性能测试方法也在文中得到了充分讨论。此外,针对不同行业的应用调整、案例分析以及智能制造和可持续发展的融合,展示了该变频器在实际应用中的广泛适用性和先进性。本文最后提供了维护与升级的实用指南,确保用户可以最大限度地利用Sew Movifit FC变频器的潜力。
# 关键字
变频器;电力
【C++课程管理系统文档编写】:记录每个细节,提升开发效率
# 摘要
本文旨在构建一个全面的C++课程管理系统,涵盖了从需求分析到系统设计、核心功能实现,再到测试、性能优化和部署维护的全过程。通过收集和分析系统的功能性与非功能性需求,本文确定了合适的系统架构模式和模块划分,并进行了详细的数据库设计。在核心功能的C++实现部分,重点介绍了用户界面设计、课程信息管理以及学生和教师信息的管理方法。测试与性能优化章节详细阐述了单元测
【网络性能优化秘策】:谢希仁《计算机网络(第六版)》课后习题精准分析

# 摘要
网络性能优化是提升数据传输效率和用户满意度的重要途径。本文对网络性能优化的多个方面进行了全面概述,包括对网络协议在传输层、网络层和应用层的分析与优化策略;网络设备配置,如交换机、路由器以及网络安全设备的优化;以及QoS优化的基本原理和实施监控。特别关注了网络流量分析工具的使用和流量优化的实践案例。最后,文章探讨了SDN和网络虚拟化技术以及新兴
资源上传下载、课程学习等过程中有任何疑问或建议,欢迎提出宝贵意见哦~我们会及时处理!
点击此处反馈


专栏目录
最低0.47元/天 解锁专栏
买1年送3月
百万级
高质量VIP文章无限畅学
千万级
优质资源任意下载
C知道
免费提问 ( 生成式Al产品 )