OpenCV仿射变换图像校正秘籍:图像畸变纠正的终极指南
发布时间: 2024-08-11 17:55:10 阅读量: 126 订阅数: 43 

基于Opencv实现的图像纠偏
# 1. OpenCV图像仿射变换概述
图像仿射变换是一种几何变换,它可以将图像中的像素从一个位置映射到另一个位置。它广泛应用于图像处理、计算机视觉和计算机图形学中,例如图像配准、透视校正和图像变形。
OpenCV(开放计算机视觉库)提供了一组强大的函数来执行图像仿射变换。这些函数允许用户轻松地平移、旋转、缩放、剪切和透视变换图像。通过使用这些函数,开发者可以轻松地实现各种图像处理任务。
# 2. 图像仿射变换理论基础
### 2.1 仿射变换矩阵
#### 2.1.1 仿射变换矩阵的组成
仿射变换矩阵是一个 3x3 的矩阵,用于表示图像仿射变换的参数。矩阵中的元素定义如下:
| 元素 | 描述 |
|---|---|
| a | 水平缩放因子 |
| b | 水平剪切因子 |
| c | 垂直剪切因子 |
| d | 垂直缩放因子 |
| tx | 水平平移量 |
| ty | 垂直平移量 |
#### 2.1.2 仿射变换矩阵的求解
仿射变换矩阵可以通过以下方法求解:
- **两点映射:**给定图像中两对对应点,可以求解出仿射变换矩阵。
- **最小二乘法:**给定图像中多对对应点,可以使用最小二乘法拟合出仿射变换矩阵。
- **OpenCV 函数:**OpenCV 提供了 `cv2.getAffineTransform()` 函数,可以根据对应点自动计算仿射变换矩阵。
### 2.2 仿射变换的几何意义
仿射变换可以表示为一系列几何变换的组合,包括:
#### 2.2.1 平移、旋转和缩放
- **平移:**将图像沿水平或垂直方向移动。
- **旋转:**将图像绕其中心旋转一定角度。
- **缩放:**将图像沿水平或垂直方向缩放。
#### 2.2.2 剪切和透视变换
- **剪切:**将图像沿水平或垂直方向倾斜。
- **透视变换:**将图像投影到一个新的平面,从而产生透视效果。
**代码块:**
```python
import cv2
import numpy as np
# 图像平移
img = cv2.imread('image.jpg')
M = np.float32([[1, 0, 100], [0, 1, 50]]) # 平移矩阵
dst = cv2.warpAffine(img, M, (img.shape[1], img.shape[0]))
# 图像旋转
M = cv2.getRotationMatrix2D((img.shape[1]/2, img.shape[0]/2), 45, 1) # 旋转矩阵
dst = cv2.warpAffine(img, M, (img.shape[1], img.shape[0]))
# 图像缩放
M = np.float32([[2, 0, 0], [0, 2, 0]]) # 缩放矩阵
dst = cv2.warpAffine(img, M, (img.shape[1]*2, img.shape[0]*2))
# 图像剪切
M = np.float32([[1, 0.5, 0], [0, 1, 0]]) # 剪切矩阵
dst = cv2.warpAffine(img, M, (img.shape[1], img.shape[0]))
```
**逻辑分析:**
- `cv2.warpAffine()` 函数用于执行仿射变换。
- 平移矩阵 `M` 由 `np.float32([[1, 0, 100], [0, 1, 50]])` 定义,其中 `100` 和 `50` 分别表示水平和垂直平移量。
- 旋转矩阵 `M` 由 `cv2.getRotationMatrix2D()` 函数生成,其中 `45` 表示旋转角度,`1` 表示缩放因子。
- 缩放矩阵 `M` 由 `np.float32([[2, 0, 0], [0, 2, 0]])` 定义,其中 `2` 表示水平和垂直缩放因子。
- 剪切矩阵 `M` 由 `np.float32([[1, 0.5, 0], [0, 1, 0]])` 定义,其中 `0.5` 表示水平剪切因子。
# 3. OpenCV仿射变换实践应用
### 3.1 图像平移和旋转
#### 3.1.1 平移操作
平移是将图像沿水平或垂直方向移动一定距离的操作。在OpenCV中,可以使用`cv2.warpAffine()`函数进行平移操作。该函数需要一个仿射变换矩阵作为参数,该矩阵由以下公式生成:
```python
T = [[1, 0, tx],
[0, 1, ty],
[0, 0, 1]]
```
其中,`tx`和`ty`分别表示图像在水平和垂直方向上的平移距离。
**代码示例:**
```python
import cv2
# 读取图像
image = cv2.imread('image.jpg')
# 平移图像
tx = 100
ty = 50
T = np.array([[1, 0, tx],
[0, 1, ty],
[0, 0, 1]])
translated_image = cv2.warpAffine(image, T, (image.shape[1], image.shape[0]))
# 显示平移后的图像
cv2.imshow('Translated Image', translated_image)
cv2.waitKey(0)
cv2.destroyAllWindows()
```
**参数说明:**
* `image`: 输入图像
* `T`: 仿射变换矩阵
* `(image.shape[1], image.shape[0])`: 输出图像的大小
**代码逻辑:**
1. 读取图像并将其存储在`image`变量中。
2. 定义平移距离`tx`和`ty`。
3. 使用`np.array()`创建仿射变换矩阵`T`。
4. 使用`cv2.warpAffine()`函数将图像平移。
5. 显示平移后的图像。
#### 3.1.2 旋转操作
旋转是将图像绕中心点旋转一定角度的操作。在OpenCV中,可以使用`cv2.getRotationMatrix2D()`函数获取旋转矩阵,然后使用`cv2.warpAffine()`函数进行旋转操作。
**代码示例:**
```python
import cv2
# 读取图像
image = cv2.imread('image.jpg')
# 旋转图像
angle = 45
center = (image.shape[1] // 2, image.shape[0] // 2)
R = cv2.getRotationMatrix2D(center, angle, 1.0)
rotated_image = cv2.warpAffine(image, R, (image.shape[1], image.shape[0]))
# 显示旋转后的图像
cv2.imshow('Rotated Image', rotated_image)
cv2.waitKey(0)
cv2.destroyAllWindows()
```
**参数说明:**
* `image`: 输入图像
* `R`: 旋转矩阵
* `(image.shape[1], image.shape[0])`: 输出图像的大小
**代码逻辑:**
1. 读取图像并将其存储在`image`变量中。
2. 定义旋转角度`angle`和旋转中心`center`。
3. 使用`cv2.getRotationMatrix2D()`函数获取旋转矩阵`R`。
4. 使用`cv2.warpAffine()`函数将图像旋转。
5. 显示旋转后的图像。
### 3.2 图像缩放和剪切
#### 3.2.1 缩放操作
缩放是将图像按比例放大或缩小。在OpenCV中,可以使用`cv2.resize()`函数进行缩放操作。
**代码示例:**
```python
import cv2
# 读取图像
image = cv2.imread('image.jpg')
# 缩放图像
scale_factor = 0.5
scaled_image = cv2.resize(image, (0, 0), fx=scale_factor, fy=scale_factor)
# 显示缩放后的图像
cv2.imshow('Scaled Image', scaled_image)
cv2.waitKey(0)
cv2.destroyAllWindows()
```
**参数说明:**
* `image`: 输入图像
* `(0, 0)`: 输出图像的大小。如果指定为`(0, 0)`,则图像将根据`fx`和`fy`缩放。
* `fx`: 水平缩放因子
* `fy`: 垂直缩放因子
**代码逻辑:**
1. 读取图像并将其存储在`image`变量中。
2. 定义缩放因子`scale_factor`。
3. 使用`cv2.resize()`函数将图像缩放。
4. 显示缩放后的图像。
#### 3.2.2 剪切操作
剪切是将图像沿一条直线倾斜。在OpenCV中,可以使用`cv2.getAffineTransform()`函数获取剪切矩阵,然后使用`cv2.warpAffine()`函数进行剪切操作。
**代码示例:**
```python
import cv2
# 读取图像
image = cv2.imread('image.jpg')
# 剪切图像
shear_factor = 0.5
shear_matrix = np.array([[1, shear_factor, 0],
[0, 1, 0],
[0, 0, 1]])
sheared_image = cv2.warpAffine(image, shear_matrix, (image.shape[1], image.shape[0]))
# 显示剪切后的图像
cv2.imshow('Sheared Image', sheared_image)
cv2.waitKey(0)
cv2.destroyAllWindows()
```
**参数说明:**
* `image`: 输入图像
* `shear_matrix`: 剪切矩阵
* `(image.shape[1], image.shape[0])`: 输出图像的大小
**代码逻辑:**
1. 读取图像并将其存储在`image`变量中。
2. 定义剪切因子`shear_factor`。
3. 使用`np.array()`创建剪切矩阵`shear_matrix`。
4. 使用`cv2.warpAffine()`函数将图像剪切。
5. 显示剪切后的图像。
### 3.3 图像透视变换
透视变换是一种复杂的几何变换,它可以将图像从一个透视投影转换到另一个透视投影。在OpenCV中,可以使用`cv2.getPerspectiveTransform()`函数获取透视变换矩阵,然后使用`cv2.warpPerspective()`函数进行透视变换。
#### 3.3.1 透视变换矩阵的求解
透视变换矩阵是一个3x3矩阵,由以下公式生成:
```
H = [[a11, a12, a13],
[a21, a22, a23],
[a31, a32, a33]]
```
其中,`a11`、`a12`、`a13`、`a21`、`a22`、`a23`、`a31`、`a32`和`a33`是未知数。为了求解这些未知数,需要知道图像中四个点的原始坐标和目标坐标。
**代码示例:**
```python
import cv2
# 读取图像
image = cv2.imread('image.jpg')
# 定义原始坐标和目标坐标
src_points = np.array([[0, 0], [image.shape[1], 0], [0, image.shape[0]], [image.shape[1], image.shape[0]]])
dst_points = np.array([[100, 100], [image.shape[1] - 100, 100], [100, image.shape[0] - 100], [image.shape[1] - 100, image.shape[0] - 100]])
# 求解透视变换矩阵
H = cv2.getPerspectiveTransform(src_points, dst_points)
```
**参数说明:**
* `src_points`: 原始坐标
* `dst_points`: 目标坐标
**代码逻辑:**
1. 读取图像并将其存储在`image`变量中。
2. 定义原始坐标`src_points`和目标坐标`dst_points`。
3. 使用`cv2.getPerspectiveTransform()`函数求解透视变换矩阵`H`。
#### 3.3.2 透视变换操作
求解透视变换矩阵后,可以使用`cv2.warpPerspective()`函数进行透视变换。
**代码示例:**
```python
# 透视变换图像
transformed_image = cv2.warpPerspective(image, H, (image.shape[1], image.shape[0]))
# 显示透视变换后的图像
cv2.imshow('Transformed Image', transformed_image)
cv2.waitKey(0)
cv2.destroyAllWindows()
```
**参数说明:**
* `image`: 输入图像
* `H`: 透视变换矩阵
* `(image.shape[1], image.shape[0])`: 输出图像的大小
**代码逻辑:**
1. 使用
# 4. 图像畸变纠正实战
### 4.1 透视畸变纠正
#### 4.1.1 透视畸变的成因
透视畸变是一种常见的图像畸变,通常是由相机镜头与拍摄平面不平行造成的。当相机镜头与拍摄平面不平行时,图像中物体的边缘会发生弯曲或变形,导致图像看起来失真。
#### 4.1.2 透视畸变的纠正方法
透视畸变可以通过使用透视变换来纠正。透视变换是一种仿射变换,它可以将图像中的透视畸变移除。OpenCV 中提供了 `warpPerspective` 函数,可以实现透视变换。
```python
import cv2
import numpy as np
# 读取原始图像
image = cv2.imread('input.jpg')
# 定义透视变换矩阵
H = np.array([[1, 0, 0], [0, 1, 0], [0, 0, 1]])
# 应用透视变换
corrected_image = cv2.warpPerspective(image, H, (image.shape[1], image.shape[0]))
# 显示纠正后的图像
cv2.imshow('Corrected Image', corrected_image)
cv2.waitKey(0)
cv2.destroyAllWindows()
```
**代码逻辑分析:**
* `warpPerspective` 函数的第一个参数是输入图像。
* `warpPerspective` 函数的第二个参数是透视变换矩阵。
* `warpPerspective` 函数的第三个参数是输出图像的大小。
* `imshow` 函数显示纠正后的图像。
* `waitKey` 函数等待用户按下任意键。
* `destroyAllWindows` 函数关闭所有 OpenCV 窗口。
### 4.2 镜头畸变纠正
#### 4.2.1 镜头畸变的类型
镜头畸变是一种由相机镜头固有的缺陷造成的图像畸变。镜头畸变主要分为两种类型:
* **径向畸变:**径向畸变是指图像中物体的边缘向图像中心或远离图像中心弯曲。
* **切向畸变:**切向畸变是指图像中物体的边缘沿切线方向弯曲。
#### 4.2.2 镜头畸变的纠正方法
镜头畸变可以通过使用镜头畸变校正算法来纠正。OpenCV 中提供了 `initUndistortRectifyMap` 和 `remap` 函数,可以实现镜头畸变校正。
```python
import cv2
import numpy as np
# 读取原始图像
image = cv2.imread('input.jpg')
# 相机内参矩阵
camera_matrix = np.array([[1, 0, 0], [0, 1, 0], [0, 0, 1]])
# 畸变系数向量
dist_coeffs = np.array([0, 0, 0, 0, 0])
# 初始化镜头畸变校正映射
mapx, mapy = cv2.initUndistortRectifyMap(camera_matrix, dist_coeffs, None, camera_matrix, image.shape[:2], cv2.CV_32FC1)
# 应用镜头畸变校正
corrected_image = cv2.remap(image, mapx, mapy, cv2.INTER_LINEAR)
# 显示纠正后的图像
cv2.imshow('Corrected Image', corrected_image)
cv2.waitKey(0)
cv2.destroyAllWindows()
```
**代码逻辑分析:**
* `initUndistortRectifyMap` 函数初始化镜头畸变校正映射。
* `remap` 函数应用镜头畸变校正映射。
* `imshow` 函数显示纠正后的图像。
* `waitKey` 函数等待用户按下任意键。
* `destroyAllWindows` 函数关闭所有 OpenCV 窗口。
# 5.1 图像配准和拼接
### 5.1.1 图像配准算法
图像配准是指将两幅或多幅图像对齐到同一坐标系的过程,目的是将这些图像中的对应点匹配起来。在OpenCV中,图像配准通常使用特征匹配算法来实现。
#### 特征匹配算法
特征匹配算法通过提取图像中的特征点并计算它们的描述符来工作。描述符是特征点的特征向量,可以用来比较不同的特征点。OpenCV提供了多种特征匹配算法,包括:
- **SIFT (尺度不变特征变换):**对尺度和旋转变化具有鲁棒性。
- **SURF (加速稳健特征):**比SIFT更快,但对噪声和变形更敏感。
- **ORB (定向快速二进制模式):**比SIFT和SURF更快,但精度较低。
### 5.1.2 图像拼接技术
图像拼接是指将两幅或多幅图像拼接成一幅全景图像的过程。OpenCV提供了多种图像拼接技术,包括:
#### 全景拼接
全景拼接将多个图像拼接成一个360度的全景图像。OpenCV使用以下步骤进行全景拼接:
1. **图像配准:**使用特征匹配算法将图像对齐到同一坐标系。
2. **图像融合:**将对齐的图像融合在一起,创建无缝的全景图像。
#### 3D重建
3D重建是指从多个图像中创建3D模型的过程。OpenCV使用以下步骤进行3D重建:
1. **图像配准:**使用特征匹配算法将图像对齐到同一坐标系。
2. **深度估计:**估计图像中每个像素的深度。
3. **点云生成:**将深度信息转换为点云,表示3D场景。
```python
import cv2
# 图像配准
sift = cv2.SIFT_create()
keypoints1, descriptors1 = sift.detectAndCompute(img1, None)
keypoints2, descriptors2 = sift.detectAndCompute(img2, None)
bf = cv2.BFMatcher()
matches = bf.knnMatch(descriptors1, descriptors2, k=2)
# 图像拼接
stitcher = cv2.Stitcher_create()
status, pano = stitcher.stitch([img1, img2])
```
# 6.1 仿射变换算法优化
### 6.1.1 矩阵运算优化
仿射变换涉及大量的矩阵运算,优化矩阵运算可以显著提高算法性能。以下是一些常见的优化技术:
- **使用BLAS库:**BLAS(Basic Linear Algebra Subprograms)库提供了高效的矩阵运算函数,可以显著加速矩阵运算。
- **使用GPU加速:**对于大型矩阵运算,可以使用GPU加速来提高性能。
- **优化矩阵存储:**优化矩阵存储方式可以减少内存访问时间,提高运算效率。例如,可以使用行主序存储或列主序存储。
### 6.1.2 数据结构优化
仿射变换算法中使用的数据结构也会影响性能。以下是一些优化数据结构的技巧:
- **使用稀疏矩阵:**对于稀疏矩阵(非零元素较少的矩阵),使用稀疏矩阵数据结构可以节省内存和提高运算效率。
- **使用缓存:**使用缓存可以减少内存访问时间,提高算法性能。
- **优化数据布局:**优化数据布局可以减少内存访问冲突,提高运算效率。例如,可以使用内存对齐或SIMD(单指令多数据)技术。

 百万级
高质量VIP文章无限畅学
百万级
高质量VIP文章无限畅学
 千万级
优质资源任意下载
千万级
优质资源任意下载
 C知道
免费提问 ( 生成式Al产品 )
C知道
免费提问 ( 生成式Al产品 )
0
0
相关推荐

专栏简介
欢迎来到 OpenCV 仿射变换图像校正专栏,您的图像校正终极指南!本专栏深入探讨了 OpenCV 仿射变换技术,从基础原理到实战应用。通过一系列文章,您将掌握图像畸变纠正的秘诀,了解各种图像校正算法的优缺点,并深入了解图像校正背后的数学奥秘。此外,您还将学习如何编写 OpenCV 代码实现图像校正,解决常见问题,并优化性能。本专栏还涵盖了图像校正的应用场景、最新进展、行业案例和最佳实践。无论您是图像处理新手还是经验丰富的专业人士,本专栏都将为您提供全面且实用的指南,帮助您掌握图像校正的艺术。
专栏目录
最低0.47元/天 解锁专栏
买1年送3月
百万级
高质量VIP文章无限畅学
千万级
优质资源任意下载
C知道
免费提问 ( 生成式Al产品 )
最新推荐
PyroSiM中文版模拟效率革命:8个实用技巧助你提升精确度与效率
# 摘要
PyroSiM是一款强大的模拟软件,广泛应用于多个领域以解决复杂问题。本文从PyroSiM中文版的基础入门讲起,逐渐深入至模拟理论、技巧、实践应用以及高级技巧与进阶应用。通过对模拟理论与效率提升、模拟模型精确度分析以及实践案例的探讨,本文旨在为用户提供一套完整的PyroSiM使用指南。文章还关注了提高模拟效率的实践操作,包括优化技巧和模拟工作流的集成。高级
QT框架下的网络编程:从基础到高级,技术提升必读
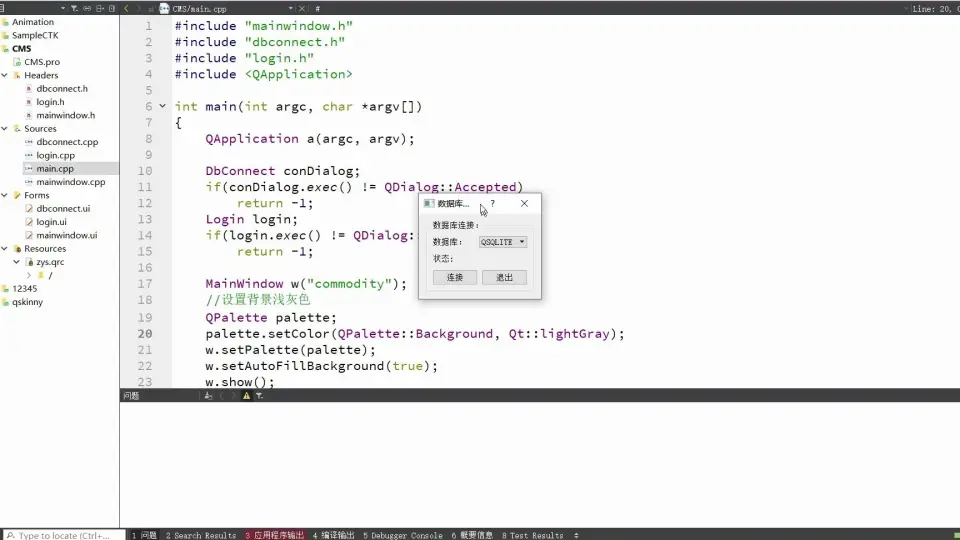
# 摘要
QT框架下的网络编程技术为开发者提供了强大的网络通信能力,使得在网络应用开发过程中,可以灵活地实现各种网络协议和数据交换功能。本文介绍了QT网络编程的基础知识,包括QTcpSocket和QUdpSocket类的基本使用,以及QNetworkAccessManager在不同场景下的网络访问管理。进一步地,本文探讨了QT网络编程中的信号与槽
优化信号处理流程:【高效傅里叶变换实现】的算法与代码实践

# 摘要
傅里叶变换是现代信号处理中的基础理论,其高效的实现——快速傅里叶变换(FFT)算法,极大地推动了数字信号处理技术的发展。本文首先介绍了傅里叶变换的基础理论和离散傅里叶变换(DFT)的基本概念及其计算复杂度。随后,详细阐述了FFT算法的发展历程,特别是Coo
MTK-ATA核心算法深度揭秘:全面解析ATA协议运作机制

# 摘要
本文深入探讨了MTK-ATA核心算法的理论基础、实践应用、高级特性以及问题诊断与解决方法。首先,本文介绍了ATA协议和MTK芯片架构之间的关系,并解析了ATA协议的核心概念,包括其命令集和数据传输机制。其次,文章阐述了MTK-ATA算法的工作原理、实现框架、调试与优化以及扩展与改进措施。此外,本文还分析了MTK-ATA算法在多
【MIPI摄像头与显示优化】:掌握CSI与DSI技术应用的关键
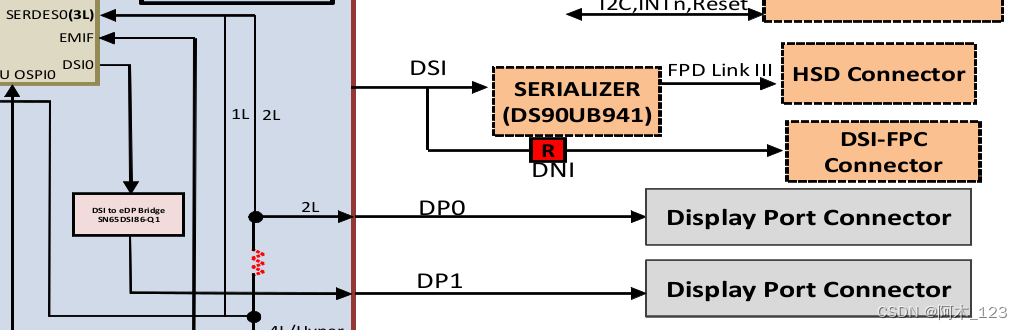
# 摘要
本文全面介绍了MIPI摄像头与显示技术,从基本概念到实际应用进行了详细阐述。首先,文章概览了MIPI摄像头与显示技术的基础知识,并对比分析了CSI与DSI标准的架构、技术要求及适用场景。接着,文章探讨了MIPI摄像头接口的配置、控制、图像处理与压缩技术,并提供了高级应用案例。对于MIPI显示接口部分,文章聚焦于配置、性能调优、视频输出与图形加速技术以及应用案例。第五章对性能测试工具与
揭秘PCtoLCD2002:如何利用其独特算法优化LCD显示性能

# 摘要
PCtoLCD2002作为一种高性能显示优化工具,在现代显示技术中占据重要地位。本文首先概述了PCtoLCD2002的基本概念及其显示性能的重要性,随后深入解析了其核心算法,包括理论基础、数据处理机制及性能分析。通过对算法的全面解析,探讨了算法如何在不同的显示设备上实现性能优化,并通过实验与案例研究展示了算法优化的实际效果。文章最后探讨了PCtoLCD2002算法的进阶应用和面临
DSP系统设计实战:TI 28X系列在嵌入式系统中的应用(系统优化全攻略)
# 摘要
TI 28X系列DSP系统作为一种高性能数字信号处理平台,广泛应用于音频、图像和通信等领域。本文旨在提供TI 28X系列DSP的系统概述、核心架构和性能分析,探讨软件开发基础、优化技术和实战应用案例。通过深入解析DSP系统的设计特点、性能指标、软件开发环境以及优化策略,本文旨在指导工程师有效地利用DSP系统的
资源上传下载、课程学习等过程中有任何疑问或建议,欢迎提出宝贵意见哦~我们会及时处理!
点击此处反馈


专栏目录
最低0.47元/天 解锁专栏
买1年送3月
百万级
高质量VIP文章无限畅学
千万级
优质资源任意下载
C知道
免费提问 ( 生成式Al产品 )