【Basic】Basic Image Plotting in MATLAB: Plotting 2D Function Images
发布时间: 2024-09-15 02:12:28 阅读量: 25 订阅数: 60 
# 2.1 Fundamental Principles of Function Graph Plotting
### 2.1.1 Coordinate Systems and Pixel Coordinates
Graph plotting in MATLAB is based on the Cartesian coordinate system, with the x-axis horizontal and the y-axis vertical. Each pixel in an image is uniquely determined by its position in the coordinate system. Pixel coordinates are represented by integers, with the top-left pixel coordinate being (1, 1), and the bottom-right pixel coordinate being (width, height), where width and height are the width and height of the image, respectively.
### 2.1.2 The Process of Graph Plotting
The process of graph plotting involves the following steps:
1. **Data Preparation:** Convert function data into MATLAB variables.
2. **Coordinate Transformation:** Convert data points from Cartesian coordinates to pixel coordinates.
3. **Pixel Coloring:** Set the color of each pixel based on the value of the data points.
4. **Image Generation:** Combine the colored pixels to form a complete image.
# 2. Theory and Practice of 2D Function Graph Plotting
### 2.1 Fundamental Principles of Function Graph Plotting
#### 2.1.1 Coordinate Systems and Pixel Coordinates
In MATLAB, graph plotting is based on the Cartesian coordinate system. The origin of the coordinate system is located at the bottom-left of the image, with the x-axis extending to the right and the y-axis extending upwards.
An image is composed of pixels, each with its own coordinate value. Pixel coordinates are relative to the top-left corner of the image, with the top-left pixel's coordinates being (1, 1).
#### 2.1.2 The Process of Graph Plotting
The process of plotting a function graph can be divided into the following steps:
1. **Define the Function:** Use MATLAB syntax to define the function to be plotted.
2. **Create the Canvas:** Use the `figure` command to create a canvas, specifying the size and position of the image.
3. **Draw the Image:** Use the `plot` function to draw the function data onto the canvas.
4. **Set Attributes:** Use the attributes of the `plot` function (such as `xlabel`, `ylabel`) to customize the appearance of the image.
5. **Display the Image:** Use the `imshow` command to display the image on the canvas.
### 2.2 MATLAB Syntax for Function Graph Plotting
#### 2.2.1 Basic Usage of the `plot()` Function
The `plot` function is the basic function in MATLAB for plotting function graphs. Its syntax is as follows:
```
plot(x, y)
```
Where:
* `x`: Data for the x-axis.
* `y`: Data for the y-axis.
For example, to plot the graph of the function `y = x^2`:
```
x = linspace(-5, 5, 100);
y = x.^2;
plot(x, y)
```
#### 2.2.2 Attribute Settings for the `plot()` Function
The `plot` ***mon attribute setting functions include:
* `xlabel`: Sets the x-axis label.
* `ylabel`: Sets the y-axis label.
* `title`: Sets the title of the image.
* `LineWidth`: Sets the line width.
* `Color`: Sets the line color.
For example, setting the image title to "Quadratic Function Graph":
```
plot(x, y)
title('Quadratic Function Graph')
```
# 3.1 Image Scaling and Translation
#### 3.1.1 Scaling of Coordinate Axes
MATLAB provides various methods for scaling coordinate axes, including:
- `xlim()` and `ylim()` functions: Set the range of the x-axis and y-axis.
- `axis()` function: Set the range and scale of the coordinate axes.
- `zoom()` function: Interactively scale the coordinate axes.
**Code Block:**
```
% Set the range of the x-axis to [0, 10]
xlim([0, 10]);
% Set the range of the y-axis to [-5, 5]
ylim([-5, 5]);
% Set the scale of the x-axis to 1
set(gca, 'XTick', 0:1:10);
% Set the scale of the y-axis to 2
set(gca, 'YTick', -5:2:5);
% Interactive scaling
zoom on;
```
**Logical Analysis:**
* The `xlim()` and `ylim()` functions set the range of the coordinate axes, specifying the minimum and maximum values.
* The `axis()` function sets the range and scale of the coordinate axes, allowing for the specification of scale intervals and scale labels.
* The `set(gca, 'XTick')` and `set(gca, 'YTick')` functions set the scale of the coordinate axes, specifying the scale values.
* The `zoom on` command enables interactive scaling, allowing users to zoom in on the coordinate axes using a mouse.
#### 3.1.2 Image Translation
MATLAB provides the `pan()` function for translating images.
**Code Block:**
```
% Translate the image 2 units to the right
pan x 2;
% Translate the image 1 unit upwards
pan y 1;
% Interactive translation
pan on;
```
**Logical Analysis:**
* The `pan x` and `pan y` functions translate the image, specifying the distance to translate along the x-axis or y-axis.
* The `pan on` command enables interactive translation, allowing users to translate the image using a mouse.
# 4. Practical Applications of Function Graph Plotting
### 4.1 Image Plotting in Scientific Computing
#### 4.1.1 Time Domain and Frequency Domain Images of Signals
In scientific computing, image plotting is often used to visualize the time domain and frequency domain characteristics of signals.
**Time Domain Image** represents the changes in a signal over time. In MATLAB, the `plot()` function can be used to draw time domain images. For example, to draw the time domain image of a sine signal:
```matlab
t = 0:0.01:10;
y = sin(2*pi*1*t);
plot(t, y);
xlabel('Time (s)');
ylabel('Amplitude');
title('Time Domain Image of a Sine Signal');
```
**Frequency Domain Image** represents the distribution of a signal in the frequency domain. In MATLAB, the `fft()` function can be used to compute the signal's spectrum, and then the `plot()` function can be used to draw the frequency domain image. For example, to draw the frequency domain image of a sine signal:
```matlab
Y = fft(y);
f = (0:length(Y)-1)*(1/t(end));
plot(f, abs(Y));
xlabel('Frequency (Hz)');
ylabel('Amplitude');
title('Frequency Domain Image of a Sine Signal');
```
#### 4.1.2 Distribution Images of Statistical Data
Image plotting can also be used to visualize the distribution of statistical data. For example, to draw the probability density function (PDF) image of a normal distribution:
```matlab
mu = 0;
sigma = 1;
x = -3:0.01:3;
y = normpdf(x, mu, sigma);
plot(x, y);
xlabel('x');
ylabel('Probability Density');
title('Probability Density Function Image of a Normal Distribution');
```
### 4.2 Image Plotting in Image Processing
#### 4.2.1 Image Grayscale Level Histogram
The image grayscale level histogram shows the number of pixels for each grayscale level in an image. In MATLAB, the `imhist()` function can be used to plot the grayscale level histogram. For example, to plot the grayscale level histogram of an image:
```matlab
I = imread('image.jpg');
imhist(I);
xlabel('Grayscale Level');
ylabel('Number of Pixels');
title('Grayscale Level Histogram of an Image');
```
#### 4.2.2 Image Edge Detection and Contour Extraction
Image edge detection and contour extraction are important techniques in image processing. In MATLAB, the `edge()` function can be used for edge detection, and then the `bwboundaries()` function can be used to extract contours. For example, to detect the edges of an image and extract contours:
```matlab
I = imread('image.jpg');
edges = edge(I, 'canny');
[B, L] = bwboundaries(edges);
figure;
imshow(I);
hold on;
for i = 1:length(B)
boundary = B{i};
plot(boundary(:,2), boundary(:,1), 'r', 'LineWidth', 2);
end
title('Image Edge Detection and Contour Extraction');
```
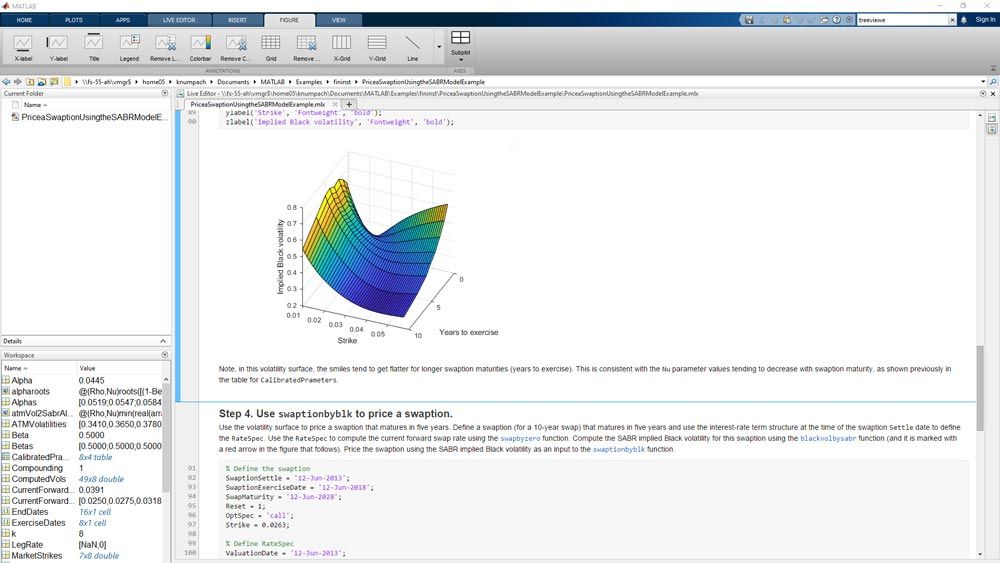
# 5.1 3D Function Graph Plotting
### 5.1.1 `surf()` Function and `mesh()` Function
In MATLAB, the `surf()` and `mesh()` functions can be used to plot 3D function graphs. The `surf()` function generates a colored surface, while the `mesh()` function generates a mesh surface.
```
% Define a 3D function
[X, Y] = meshgrid(-2:0.1:2);
Z = X.^2 + Y.^2;
% Use `surf()` to plot a 3D surface
figure;
surf(X, Y, Z);
title('3D Surface Plotted with `surf()`');
xlabel('X');
ylabel('Y');
zlabel('Z');
% Use `mesh()` to plot a 3D mesh
figure;
mesh(X, Y, Z);
title('3D Mesh Plotted with `mesh()`');
xlabel('X');
ylabel('Y');
zlabel('Z');
```
### 5.1.2 Rotation and Scaling of 3D Images
The plotted 3D images can be rotated using the `view()` function and scaled using the `campos()` function.
```
% Rotate a 3D image
figure;
surf(X, Y, Z);
view(3); % Rotate the image to show it from a 3D perspective
title('Rotated 3D Surface');
% Scale a 3D image
figure;
surf(X, Y, Z);
campos([10, 10, 10]); % Scale the image to be displayed from the perspective of [10, 10, 10]
title('Scaled 3D Surface');
```
### 5.1.3 Illumination of 3D Images
MATLAB provides the `light` and `lighting` functions to control the illumination effects of 3D images.
```
% Add a light source
figure;
surf(X, Y, Z);
light('Position', [10, 10, 10]); % Add a light source at position [10, 10, 10]
title('3D Surface with Added Light Source');
% Set the lighting model
figure;
surf(X, Y, Z);
lighting phong; % Set the lighting model to Phong
title('3D Surface with Set Lighting Model');
```
# 6. Performance Optimization of MATLAB Image Plotting
### 6.1 Optimization of Image Plotting Algorithms
#### 6.1.1 Sparse Matrix Plotting
For sparse matrices (i.e., matrices with most elements being zero), specialized sparse matrix plotting algorithms can be used to improve performance. MATLAB provides the `spy()` function, which can quickly plot the distribution of non-zero elements in a sparse matrix.
```
% Create a sparse matrix
A = sparse(1000, 1000, 0.01);
% Use `spy()` to plot the sparse matrix
spy(A);
```
#### 6.1.2 Block Plotting
For large images, they can be divided into multiple smaller blocks and then plotted individually. This method of block plotting can reduce the memory overhead of plotting all pixels at once, thereby improving performance.
```
% Create a large image
image = randn(10000, 10000);
% Divide the image into 100 blocks
blocks = mat2cell(image, 100 * ones(1, 100), 100 * ones(1, 100));
% Plot the image block by block
for i = 1:100
for j = 1:100
subplot(10, 10, i + (j - 1) * 10);
imshow(blocks{i, j});
end
end
```
### 6.2 Selection of Image File Formats
#### 6.2.1 Pros and Cons of Different Image Formats
Different image file formats have different pros and cons, and the choice depends on the intended use of the image and performance requirements.
| Format | Pros | Cons |
|---|---|---|
| PNG | Lossless compression, supports transparency | Larger file size |
| JPEG | Lossy compression, smaller file size | Introduces distortion |
| GIF | Lossless compression, supports animation | Limited color range |
| TIFF | Lossless compression, supports multiple layers | Larger file size |
#### 6.2.2 Image File Compression and Optimization
By compressing and optimizing image files, the file size can be reduced, thereby speeding up loading and transmission. MATLAB provides various image compression and optimization functions, such as `imwrite()` and `imresize()`.
```
% Compress the image into PNG format
imwrite(image, 'image.png', 'Quality', 90);
% Resize the image
image_resized = imresize(image, 0.5);
```

 百万级
高质量VIP文章无限畅学
百万级
高质量VIP文章无限畅学
 千万级
优质资源任意下载
千万级
优质资源任意下载
 C知道
免费提问 ( 生成式Al产品 )
C知道
免费提问 ( 生成式Al产品 )
0
0
相关推荐

专栏目录
最低0.47元/天 解锁专栏
买1年送3月
百万级
高质量VIP文章无限畅学
千万级
优质资源任意下载
C知道
免费提问 ( 生成式Al产品 )
最新推荐
专家指南:Origin图表高级坐标轴编辑技巧及实战应用
# 摘要
Origin是一款强大的科学绘图和数据分析软件,广泛应用于科学研究和工程领域。本文首先回顾了Origin图表的基础知识,然后深入探讨了高级坐标轴编辑技巧,包括坐标轴类型选择、刻度与标签调整、标题与单位设置以及复杂数据处理。接着,通过实战应用案例,展
【MATLAB 3D绘图专家教程】:meshc与meshz深度剖析与应用案例
# 摘要
本文系统介绍了MATLAB中用于3D数据可视化的meshc与meshz函数。首先,本文概述了这两
【必看】域控制器重命名前的系统检查清单及之后的测试验证
# 摘要
本文详细阐述了域控制器重命名的操作流程及其在维护网络系统稳定性中的重要性。在开始重命名前,本文强调了进行域控制器状态评估、制定备份策略和准备用户及应用程序的必要性。接着,介绍了具体的重命名步骤,包括系统检查、执行重命名操作以及监控整个过程。在重命名完成后,文章着重于如何通过功能性测试
HiLink SDK高级特性详解:提升设备兼容性的秘籍

# 摘要
本文对HiLink SDK进行全面介绍,阐述其架构、组件、功能以及设备接入流程和认证机制。深入探讨了HiLink SDK的网络协议与数据通信机制,以及如何提升设备的兼容性和优化性能。通过兼容性问题诊断和改进策略,提出具体的设备适配与性能优化技术。文章还通过具体案例分析了HiL
【ABAQUS与ANSYS终极对决】:如何根据项目需求选择最合适的仿真工具
# 摘要
本文系统地分析了仿真工具在现代工程分析中的重要性,并对比了两大主流仿真软件ABAQUS与ANSYS的基础理论框架及其在不同工程领域的应用。通过深入探讨各自的优势与特点,本文旨在为工程技术人员提供关于软件功能、操作体验、仿真精度和结果验证的全面视角。文章还对软件的成本效益、技术支持与培训资源进行了综合评估,并分享了用户成功案例。最后,展望了仿真技术的未来发展
【备份策略】:构建高效备份体系的关键步骤
# 摘要
备份策略是确保数据安全和业务连续性的核心组成部分。本文从理论基础出发,详细讨论了备份策略的设计、规划与执行,并对备份工具的选择和备份环境的搭建进行了分析。文章探讨了不同
【脚本自动化教程】:Xshell批量管理Vmware虚拟机的终极武器

# 摘要
本文全面概述了Xshell与Vmware脚本自动化技术,从基础知识到高级技巧再到实践应用,详细介绍了如何使用Xshell脚本与Vmware命令行工具实现高效的虚拟机管理。章节涵盖Xshell脚本基础语法、Vmware命令行工具的使用、自动化脚本的高级技巧、以及脚本在实际环境中的应用案例分析。通过深入探讨条件控制、函数模块化编程、错误处理与日
【增量式PID控制算法的高级应用】:在温度控制与伺服电机中的实践

# 摘要
增量式PID控制算法作为一种改进型的PID控制方法,在控制系统中具有广泛应用前景。本文首先概述了增量式PID控制算法的基本概念、理论基础以及与传统PID控制的比较,进而深入探讨了其在温度控制系统和伺服电机控制系统的具体应用和性能评估。随后,文章介绍了增量式PID控制算法的高级优化技术
【高级应用】MATLAB在雷达测角技术中的创新策略

# 摘要
MATLAB作为一种强大的工程计算软件,其在雷达测角技术领域具有广泛的应用。本文系统地探讨了MATLAB在雷达信号处理、测角方法、系统仿真以及创新应用中的具体实现和相关技术。通过分析雷达信号的采集、预处理、频谱分析以及目标检测算法,揭示了MATLAB在提升信号处理效率和准确性方面的关键作用。进一步,本文探讨了MATLAB在雷达测角建模、算法实现与性能评估中的应用,并提供了基于机器
资源上传下载、课程学习等过程中有任何疑问或建议,欢迎提出宝贵意见哦~我们会及时处理!
点击此处反馈


专栏目录
最低0.47元/天 解锁专栏
买1年送3月
百万级
高质量VIP文章无限畅学
千万级
优质资源任意下载
C知道
免费提问 ( 生成式Al产品 )